How-to: Make a false factory radio faceplate
 AintGotNoSol
Wagonist
AintGotNoSol
Wagonist
I'm sure this has been done several times before, but I haven't seen a write-up. Maybe none of you will think this is very useful, but it was fun, no less.
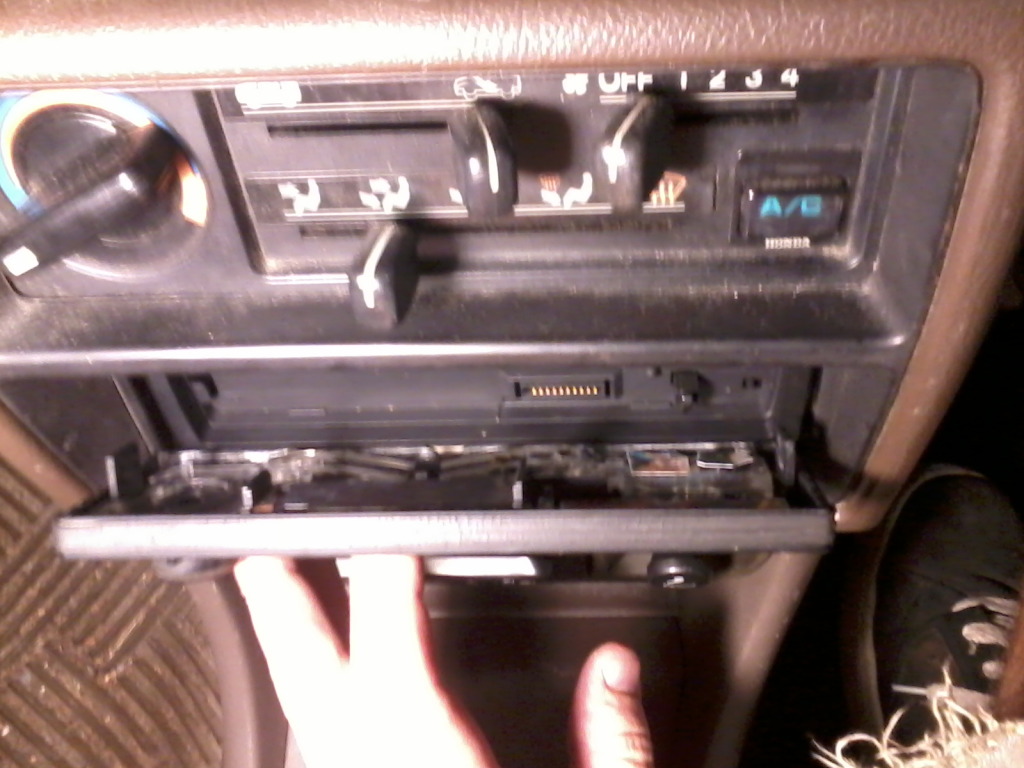
This was performed on my 89 Civic Sedan equipped with a Pioneer HD4400 unit, but it should work just the same on any hatchback or wagon, and most cd players have nearly identical dimensions in the front trim with the face removed. It's really trial-and-error as far as finding a way to mount it up. I just got really lucky.
Problem: You bought a sweet new HD Radio / CD Player but you're worried someone will be tempted to steal it from you.
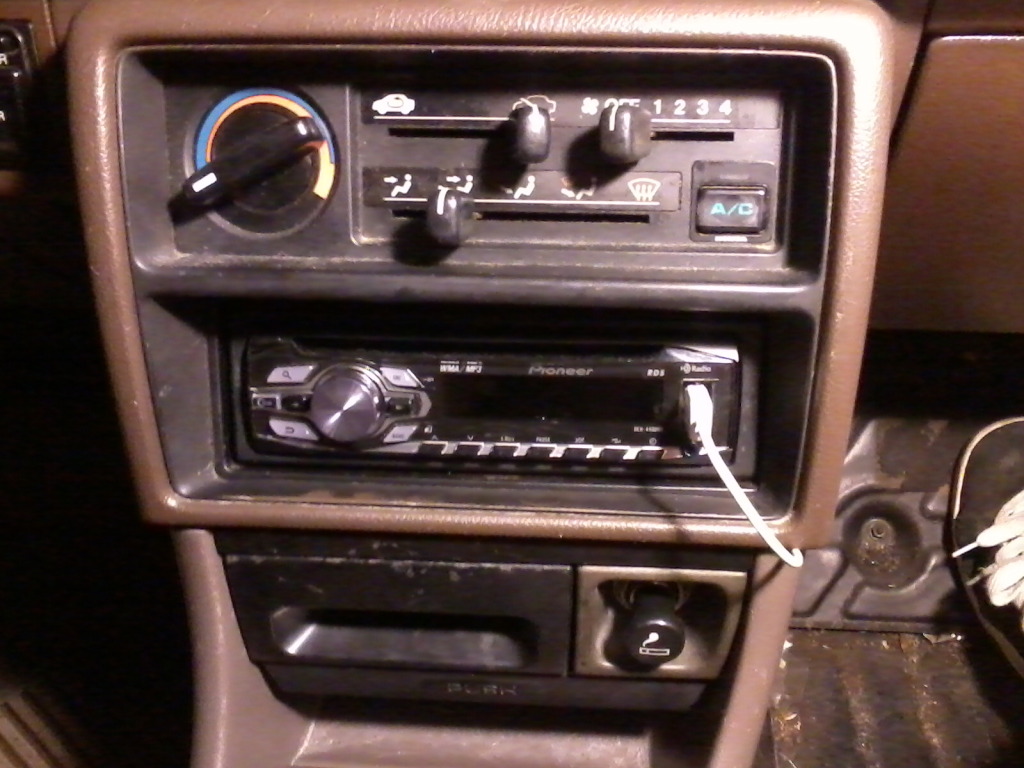
Sure, it's got a removable faceplate...
but that just says "Hey look, my radio is expensive enough to take the faceplate with me, and I've prob got expensive speakers / amp / subs etc...."
Solution: Give the false impression that your shit is old and busted.
What you need:
-Small phillips head screwdriver
-Super glue
-Nail polish remover (for when you super glue your hands to your pants)
-Old magazines or junk mail, anything printed on thick paper with lots of solid black.
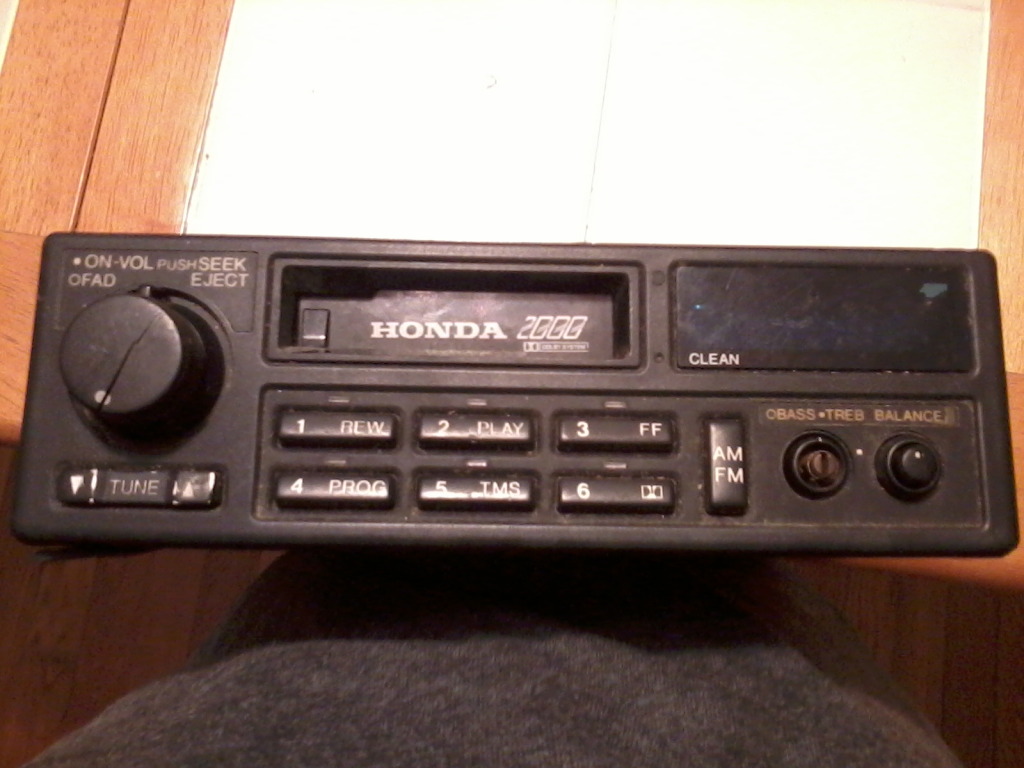
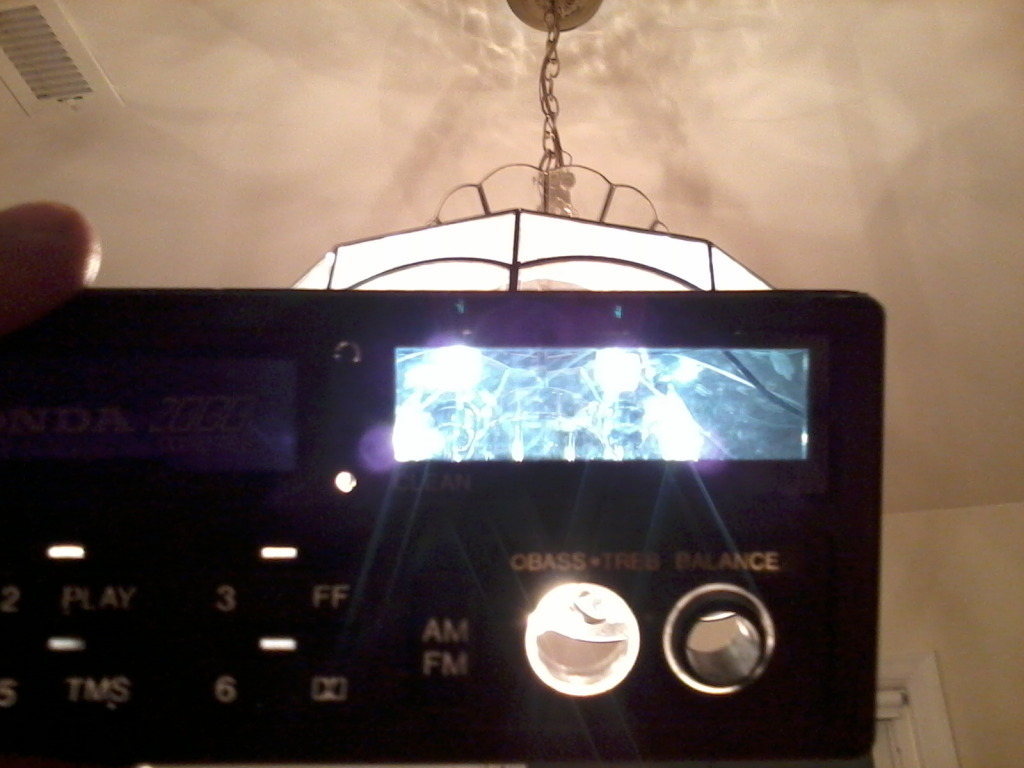
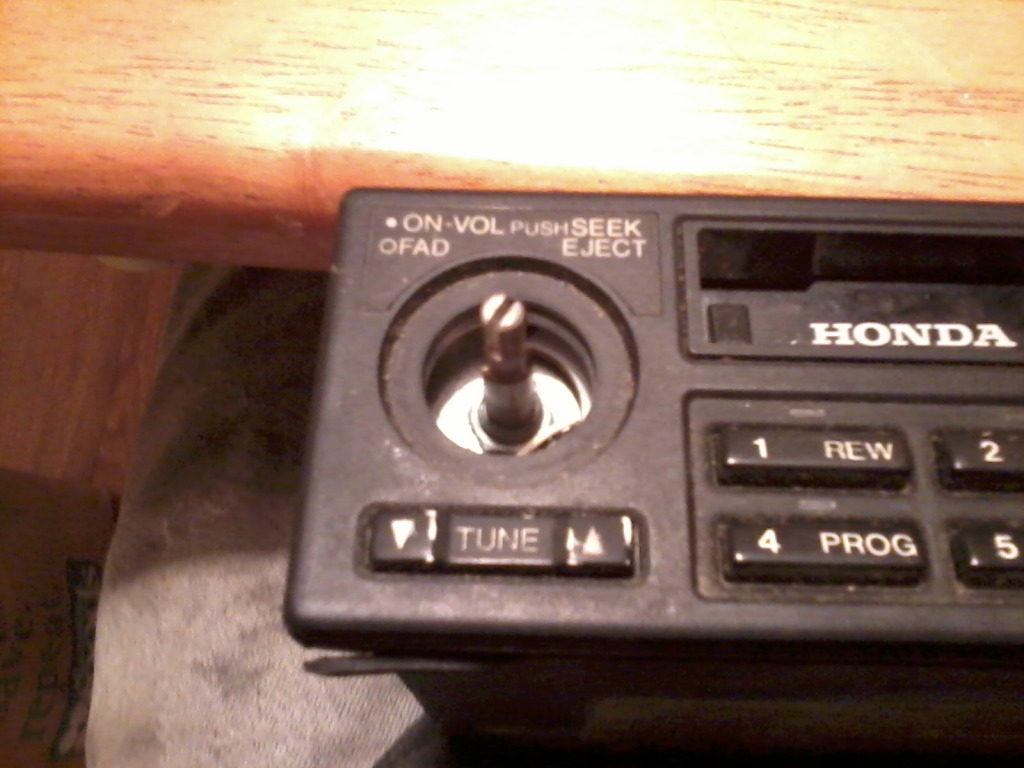
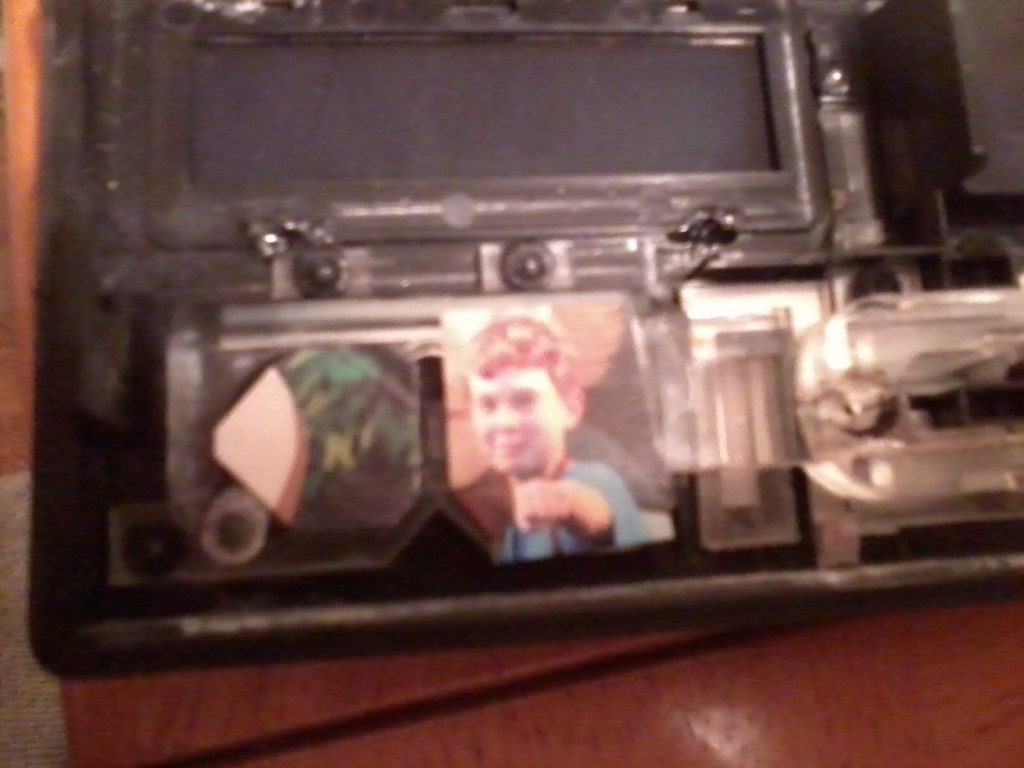
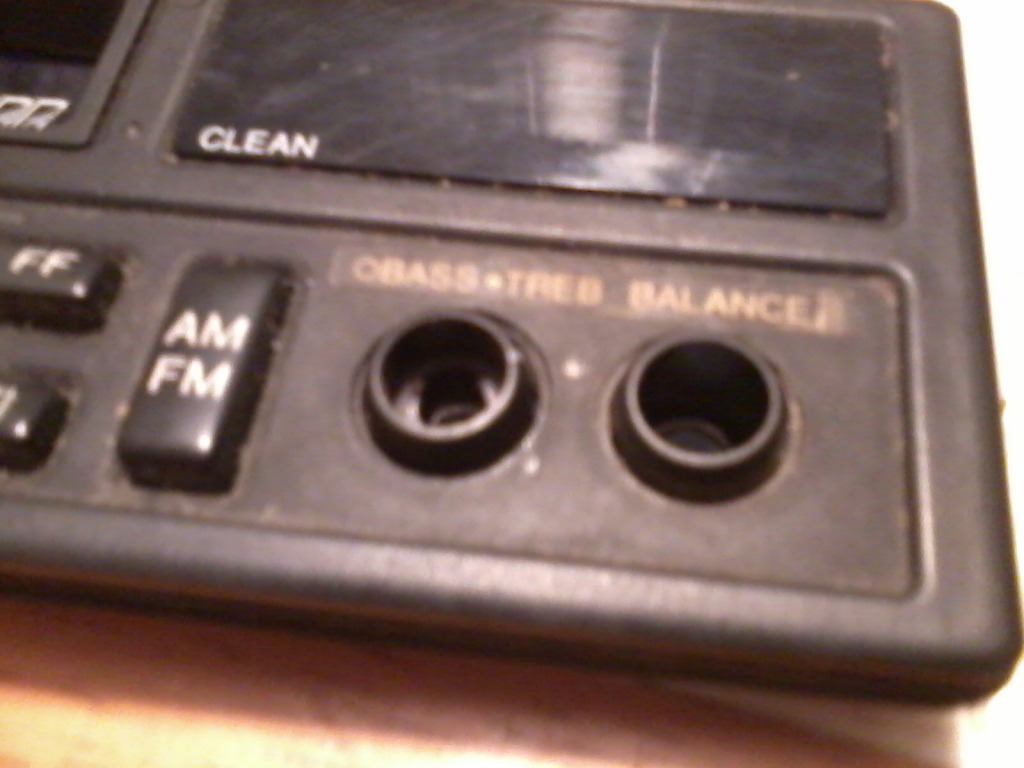
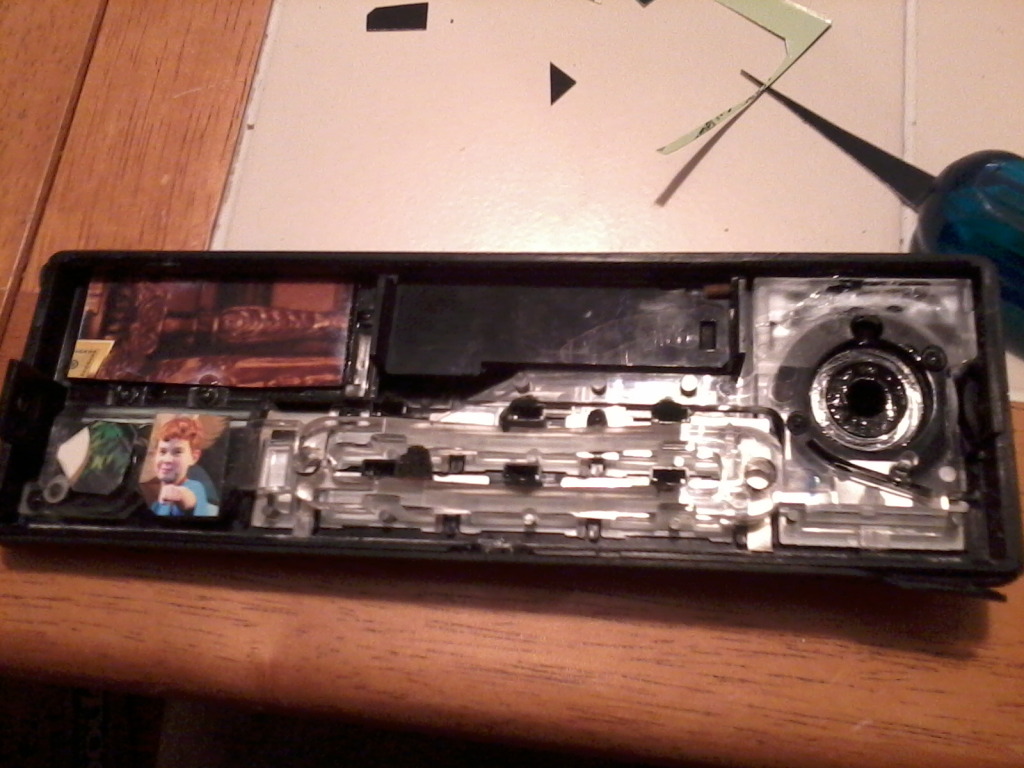
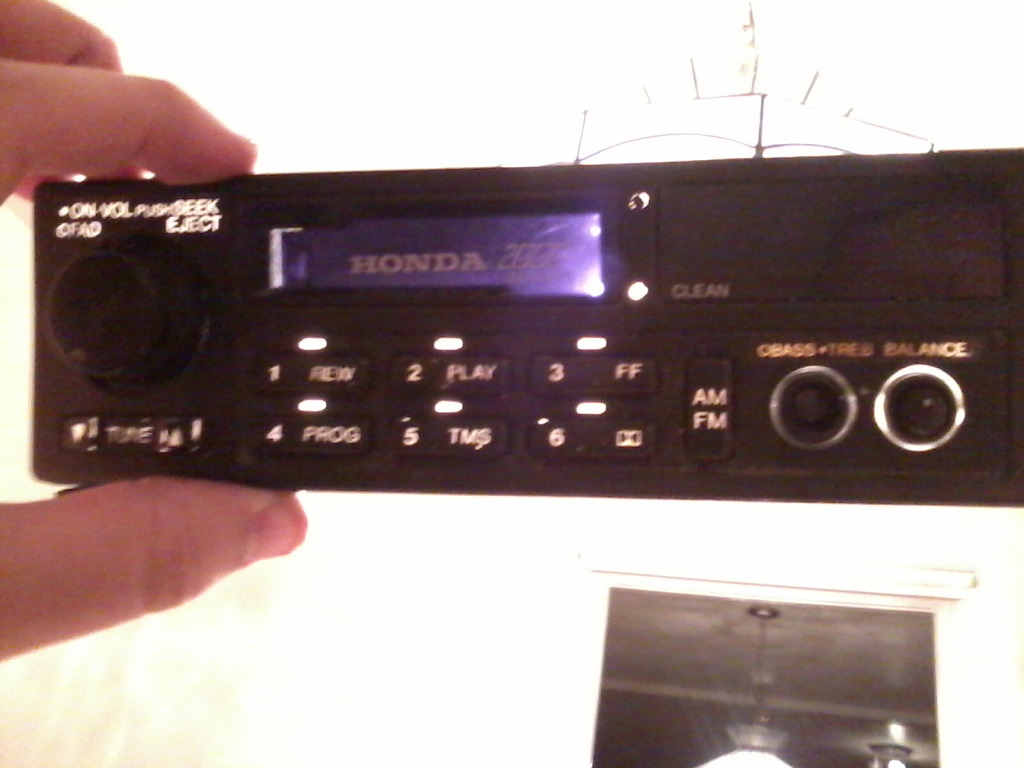
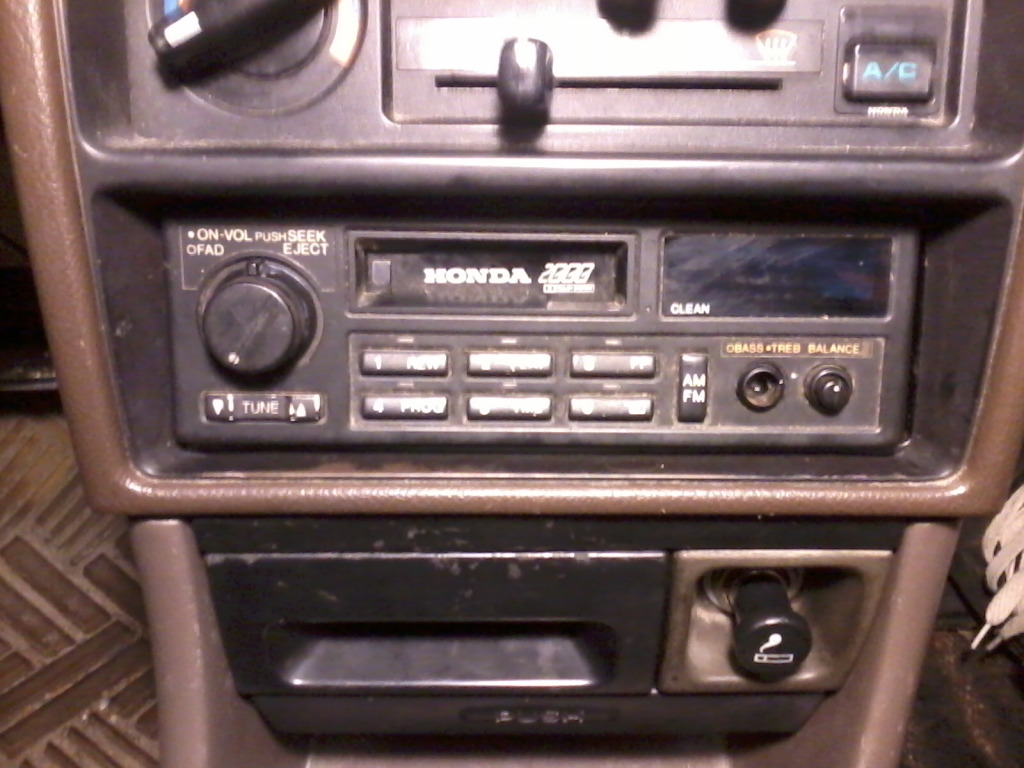
-Old busted factory Honda radio. Preferably one that doesn't work. The jankier the better. This is what I used. It was a birthday present from my broke-ass brother. This is how it looked when he gave it to me, and it doesn't work for shit. I guess it was his idea of a joke. I'm not sure what car it actually came out of, but by the looks of the radio, and the printing on the top label, I'd guess its probably EF civic era...?
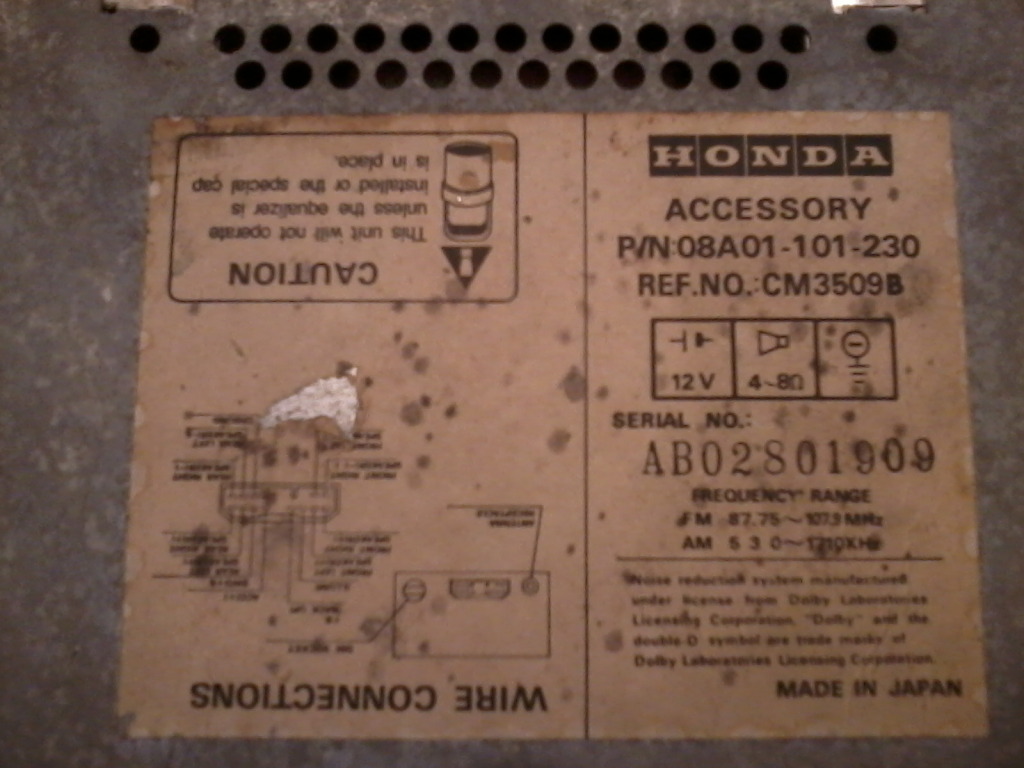
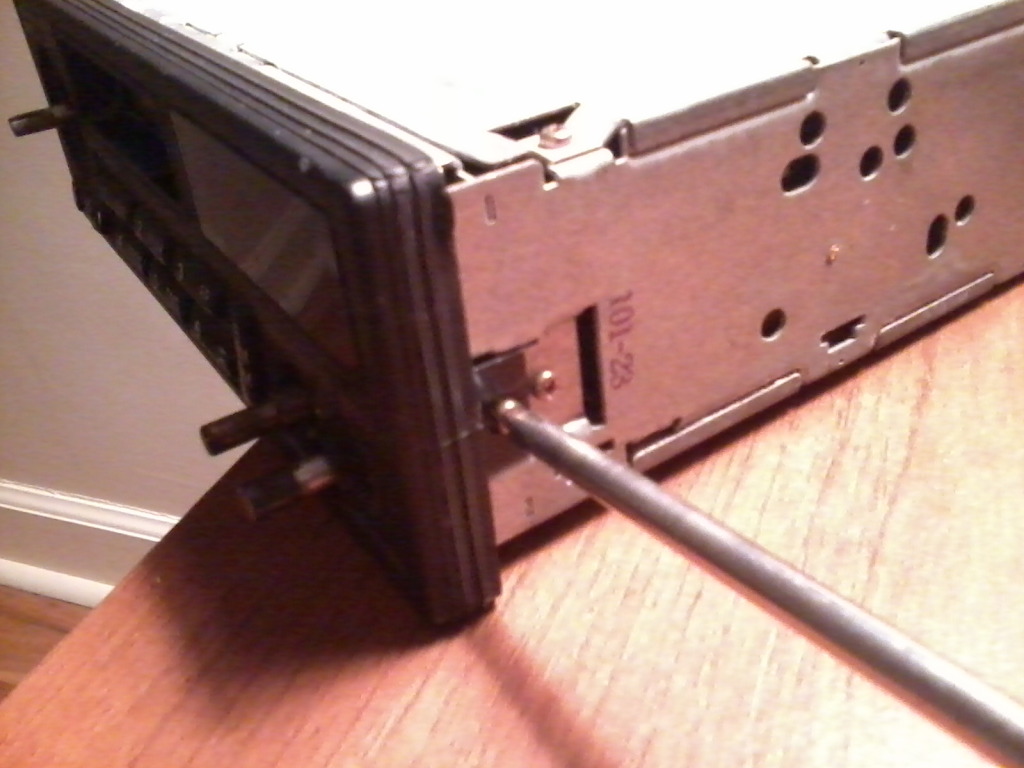
Top view, part number
Step one, remove one screw from each side that holds the face onto the radio.
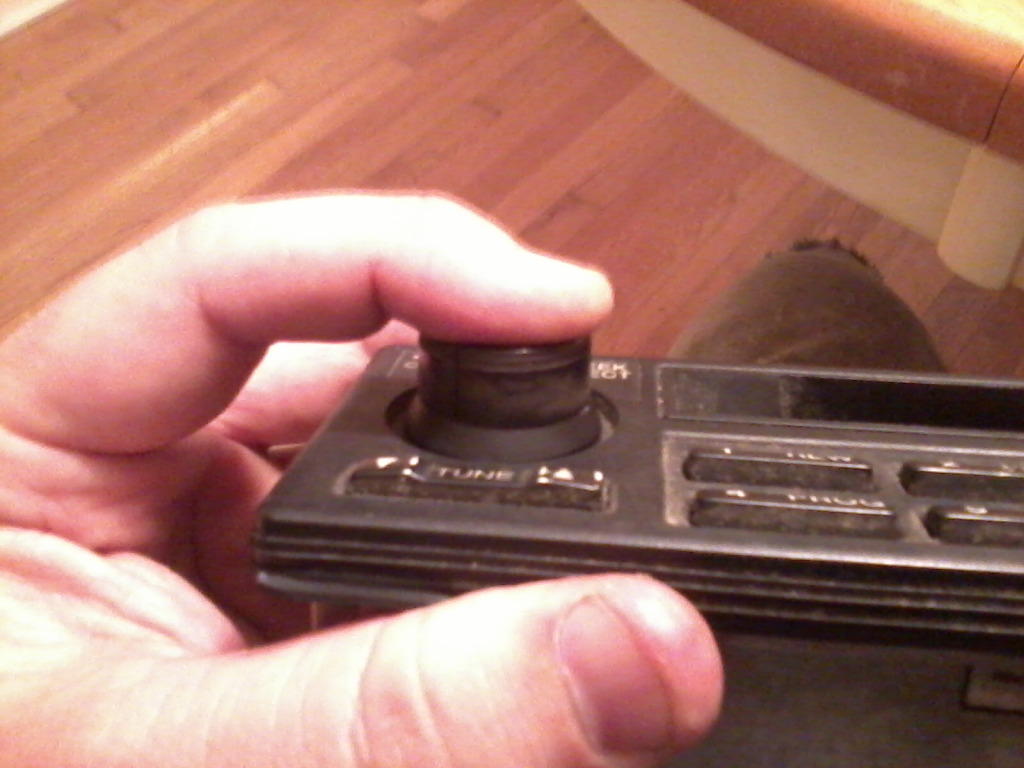
Remove knobs. On this particular radio, the volume knob was easy to pull off, but the fader was hard to get a grip on. I just gently wiggled the whole faceplate off and the fader came with it.
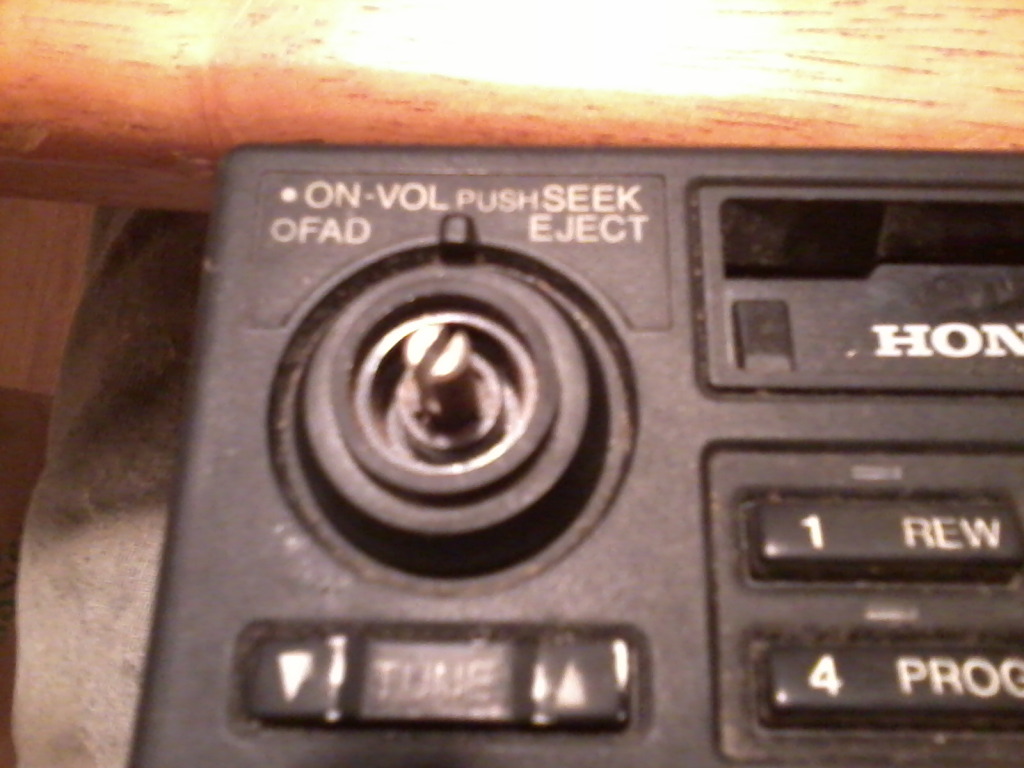
Once the plate is off, slide your volume and fader knobs on and off a few times, to loosen them up a bit. This will help a little later.
Now your faceplate is off, and you can pretend the faceless radio is some kind of Back To The Future, Time-Circuit crap.
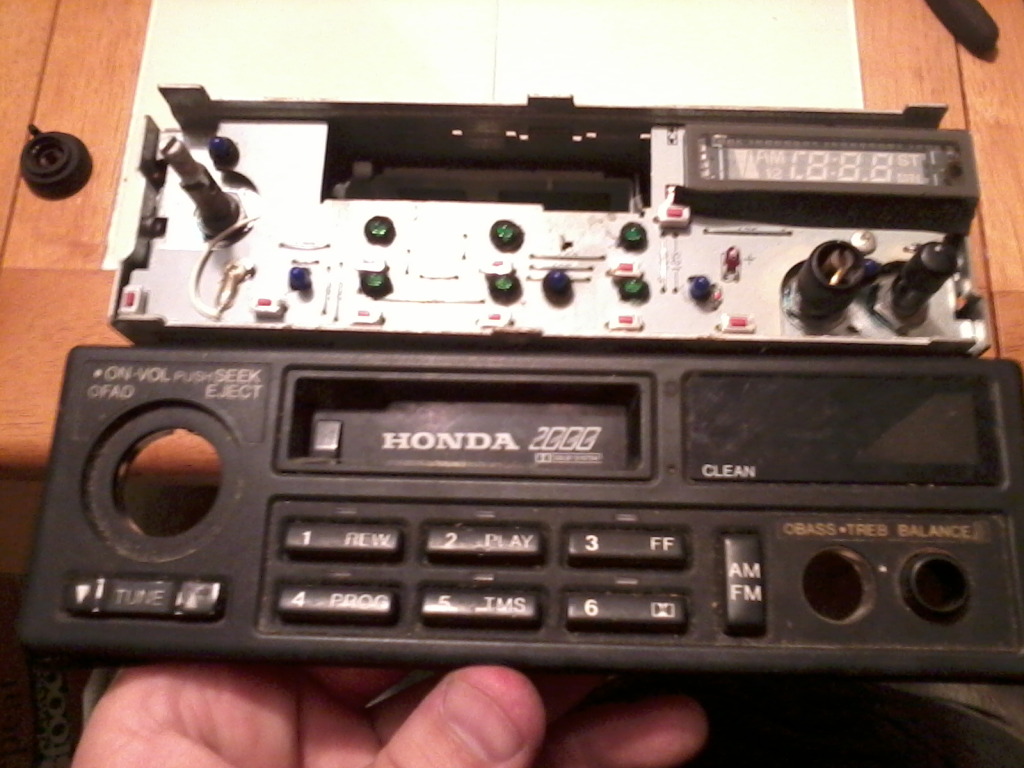
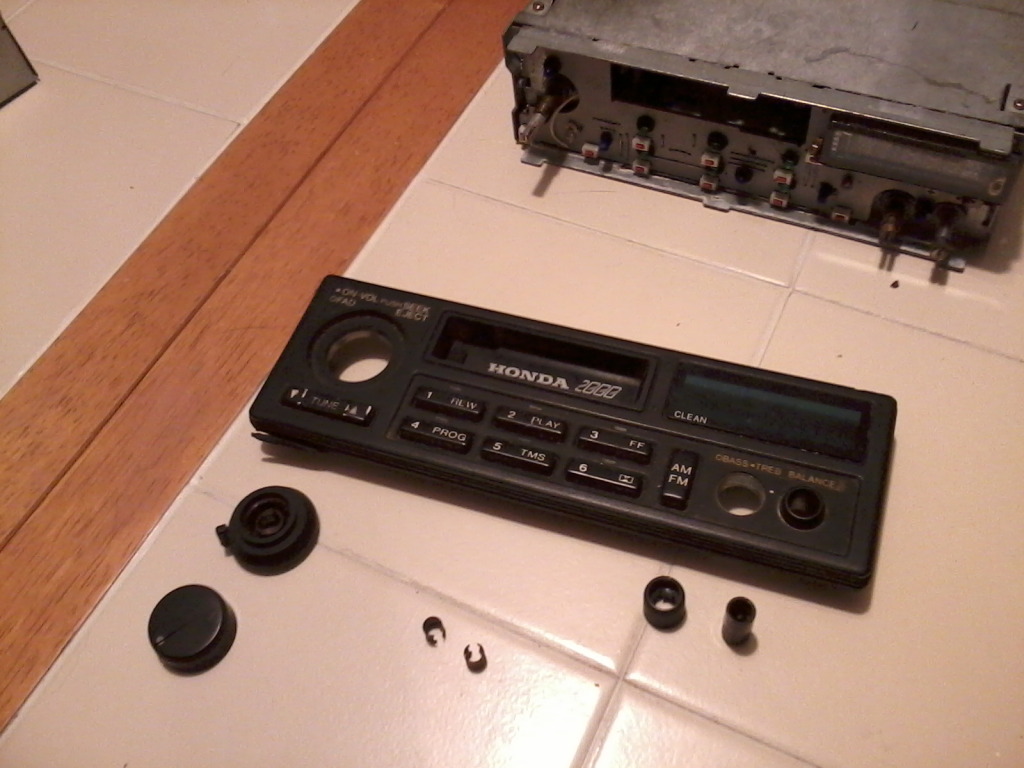
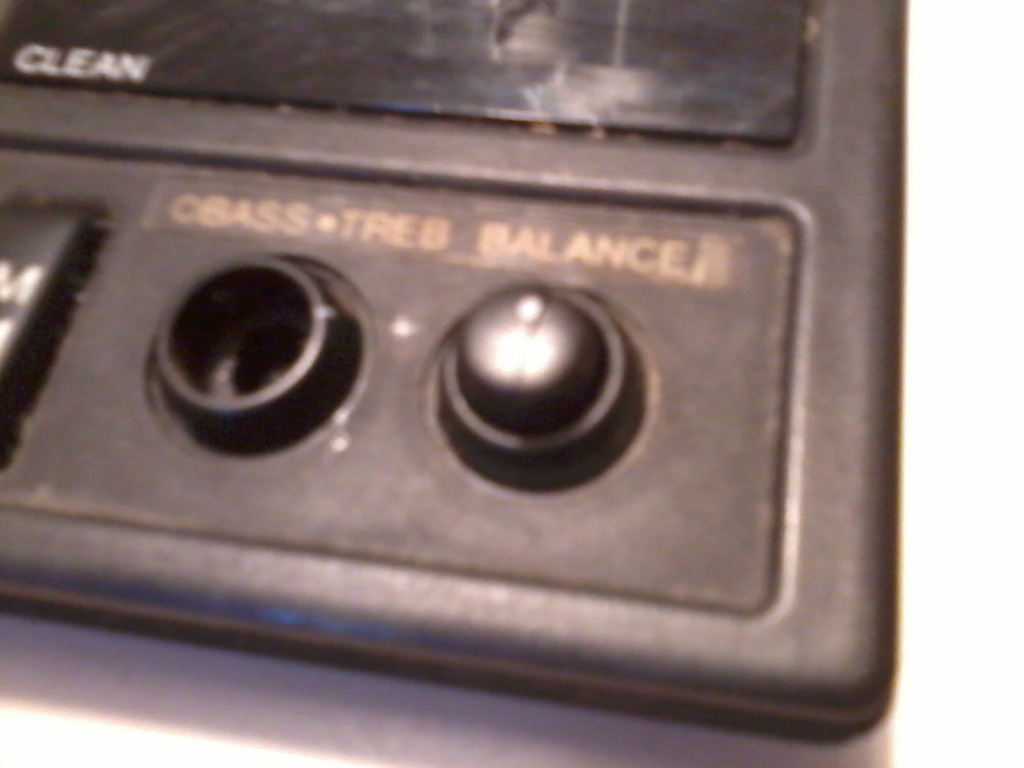
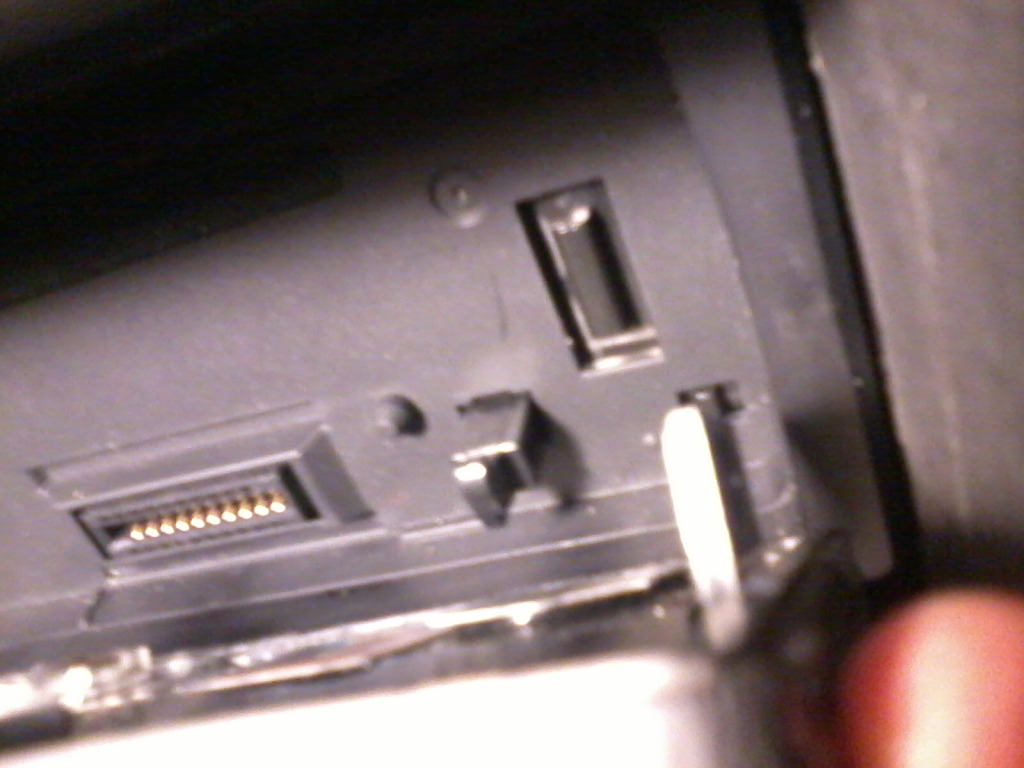
Anyway here are the parts you have removed so far, face and knobs. You will notice two things: First, the outer ring of the knob on the right stays in the faceplate. It's already a false knob and doesn't do anything but look cool. Second, I'm missing the center knob that goes right next to it. It's all good. Like I said, the jankier, the better! The small metal clips may fall out from inside the knobs. Make sure you still have one in the volume knob, it will come in handy when you put it back on the stalk later. Set the radio aside for now, we'll use that again later too.
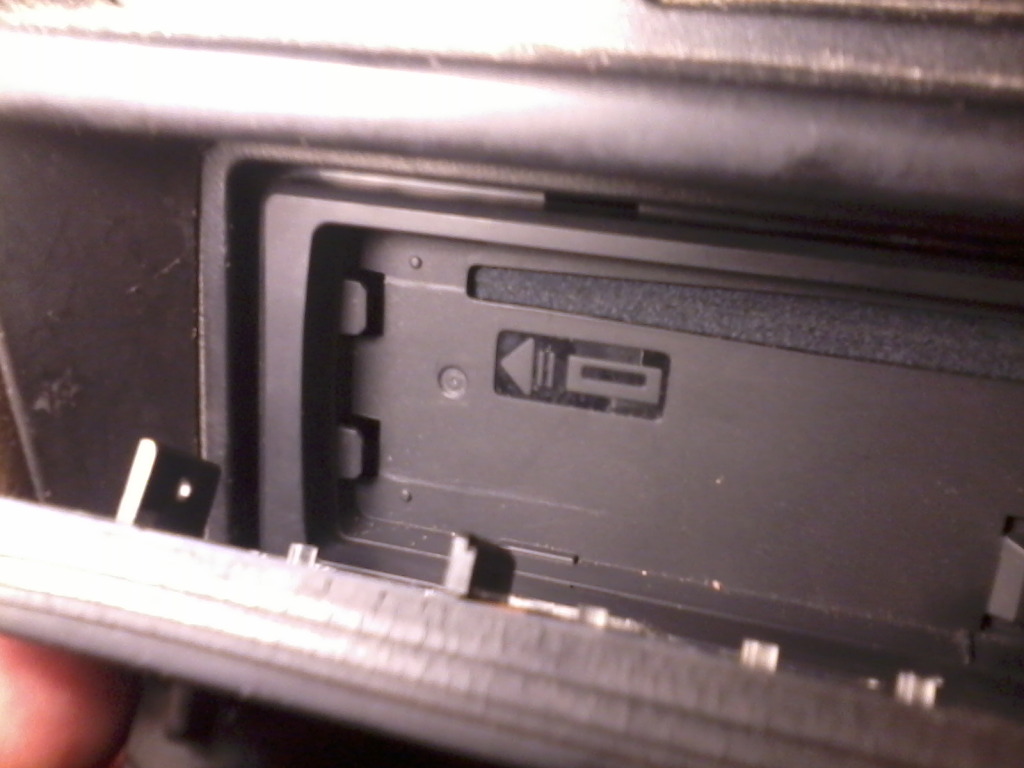
Now, you'll notice the window for the display is dark, but on a bright sunny day, someone might be able to see through it and spot your sweet HD radio!
Grab a magazine, junk mail, whatever. I used the back cover off an issue of Rolling Stone. Cut out a nice section of solid black. Doesn't matter what's on the back, but if its something cool, you get bonus points.
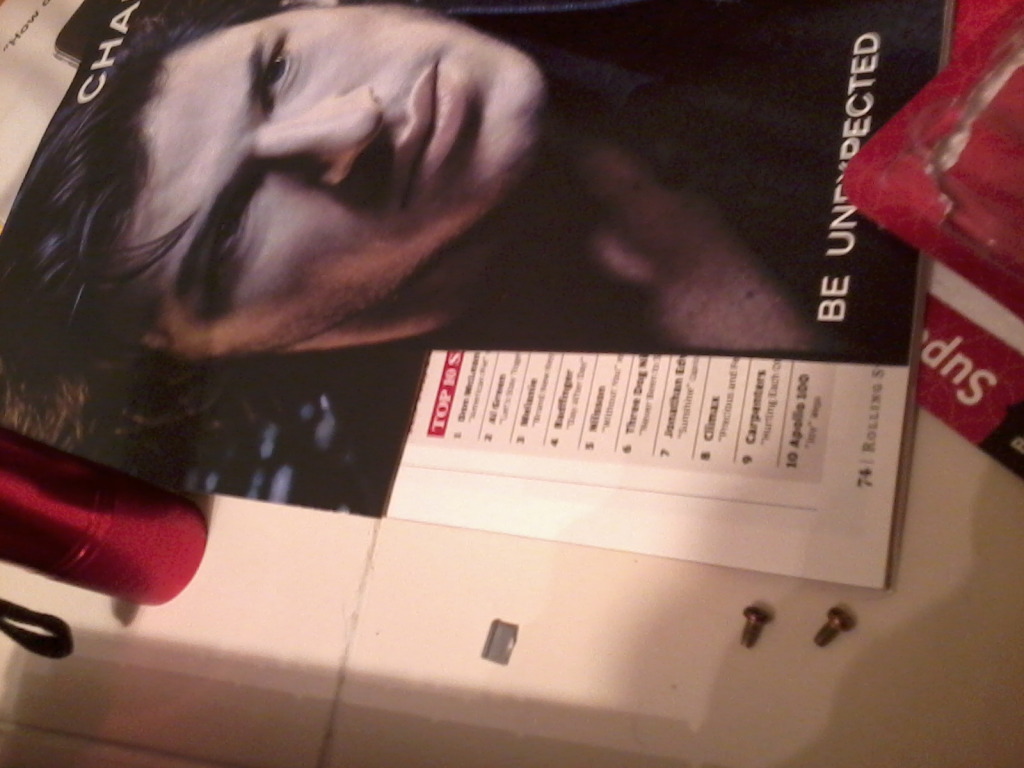
Cut a rectangle slightly larger than the window.
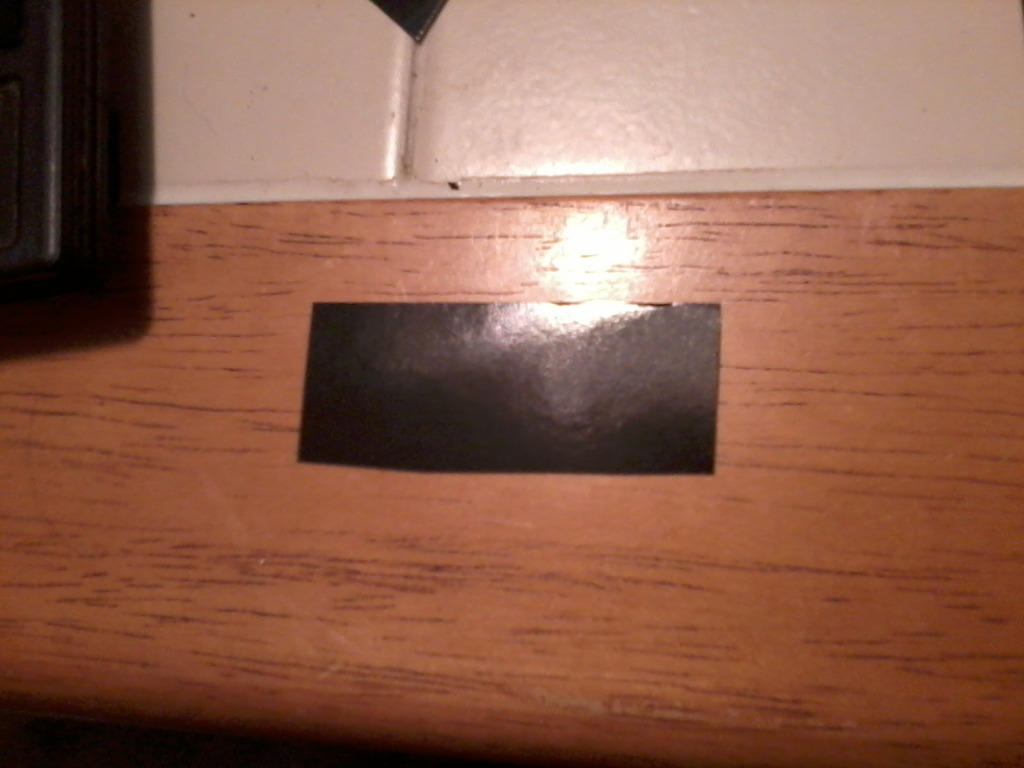
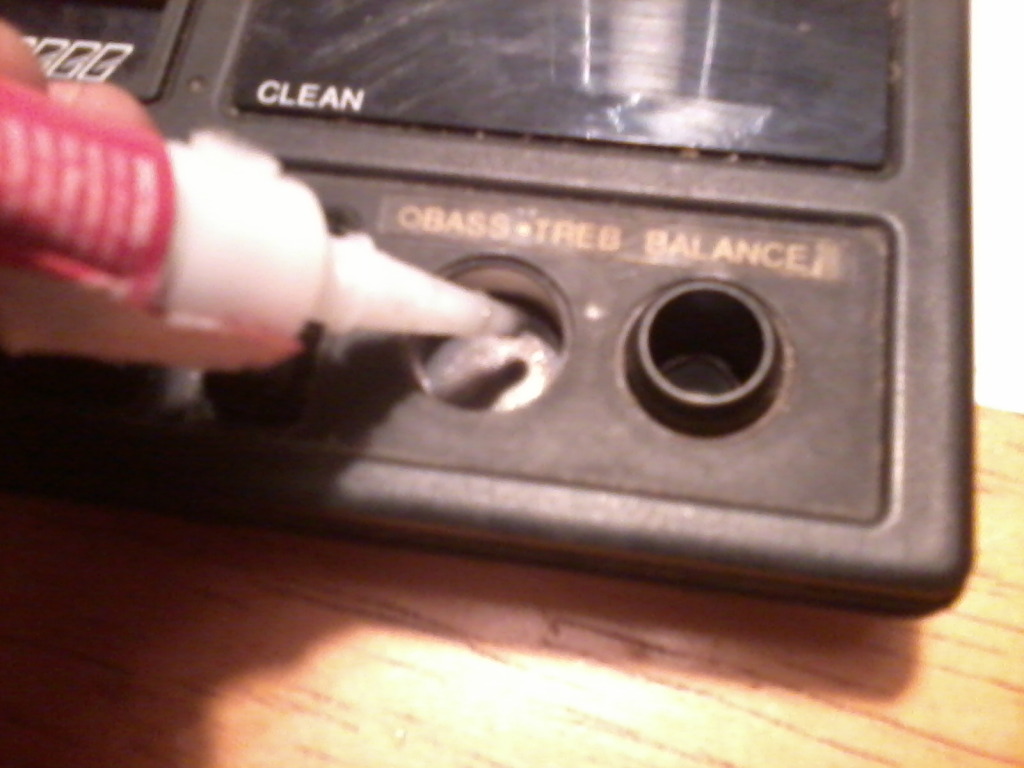
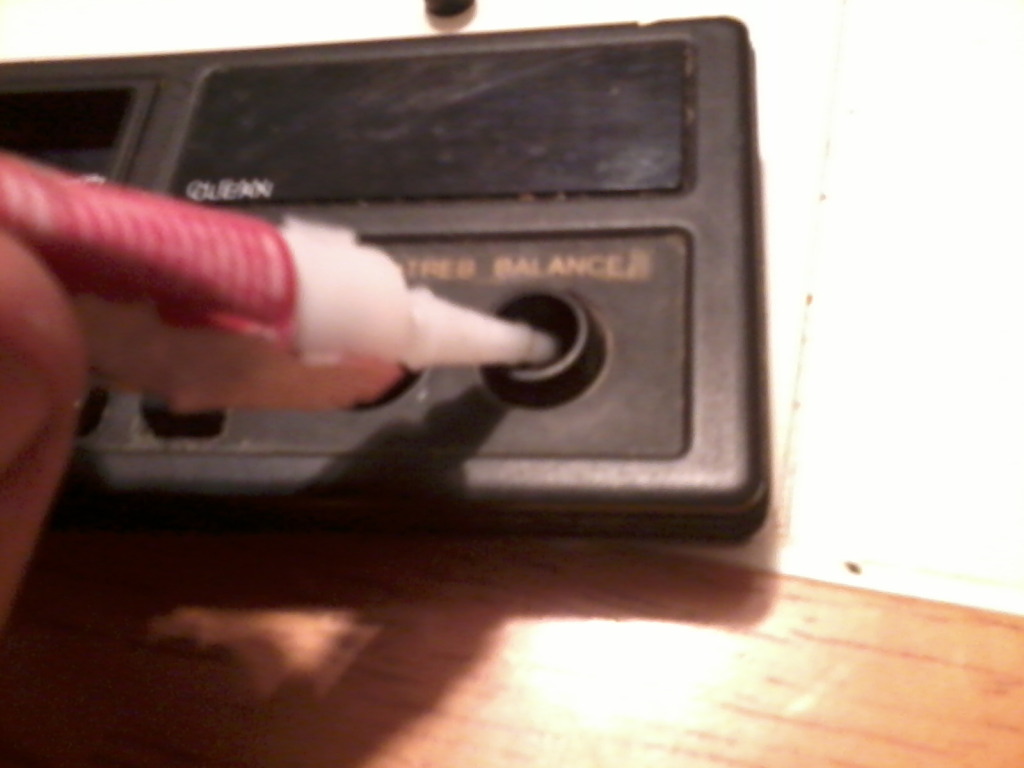
Test fit, trim as needed so it fits flush. When you are satisfied, dab a little super glue AROUND the window and set the page down over the window, black side down. DON'T glue it right on the clear part, it will fog and you will see it from the other side.
(Can't believe I didn't get a pic of this!)
Let that sit a few minutes til its dry, then we'll begin working on the Volume / Fader knobs. Set the scraps of black paper aside, we'll use them again later.
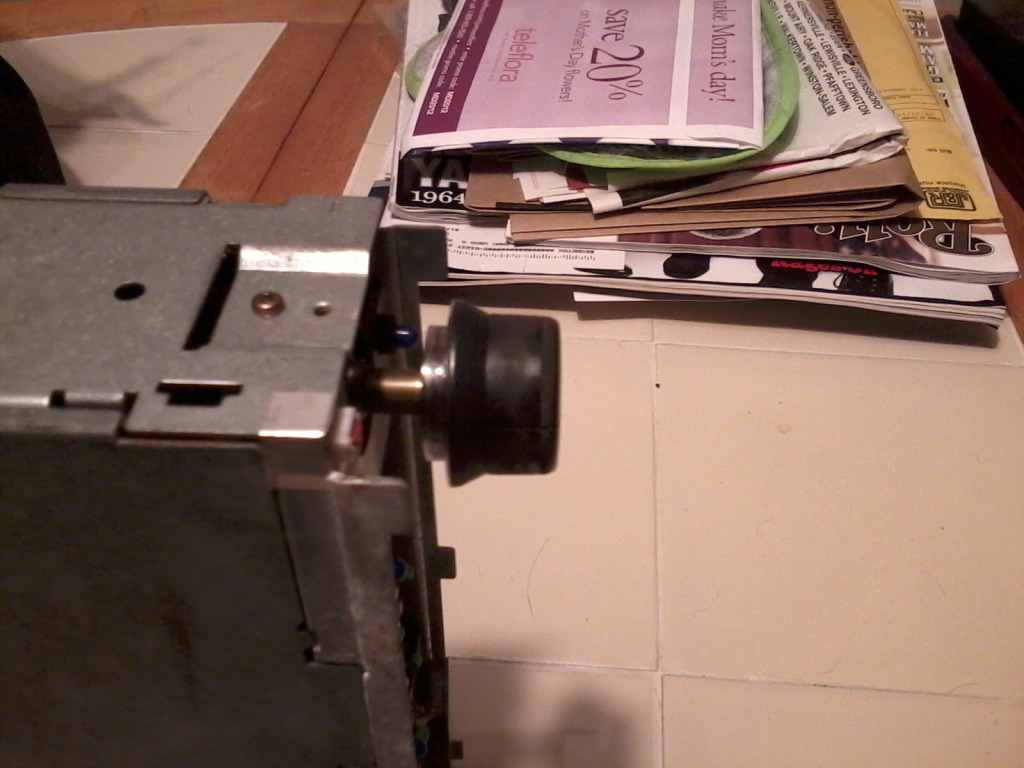
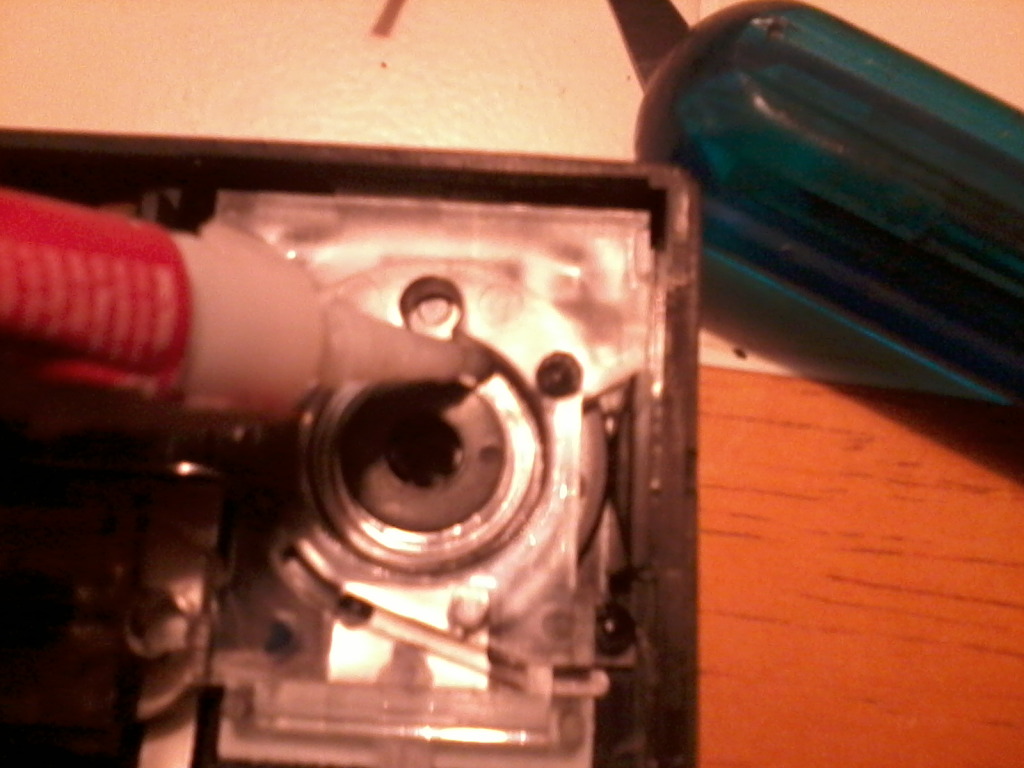
We're going to use the radio unit again, to align the knobs together, so this looks realistic enough. Here, I have mounted them both on the stalk, without the face installed, to show you this gap. Notice that when the knobs are installed, there is a slight gap between the two. This is so you can "click" the volume button.
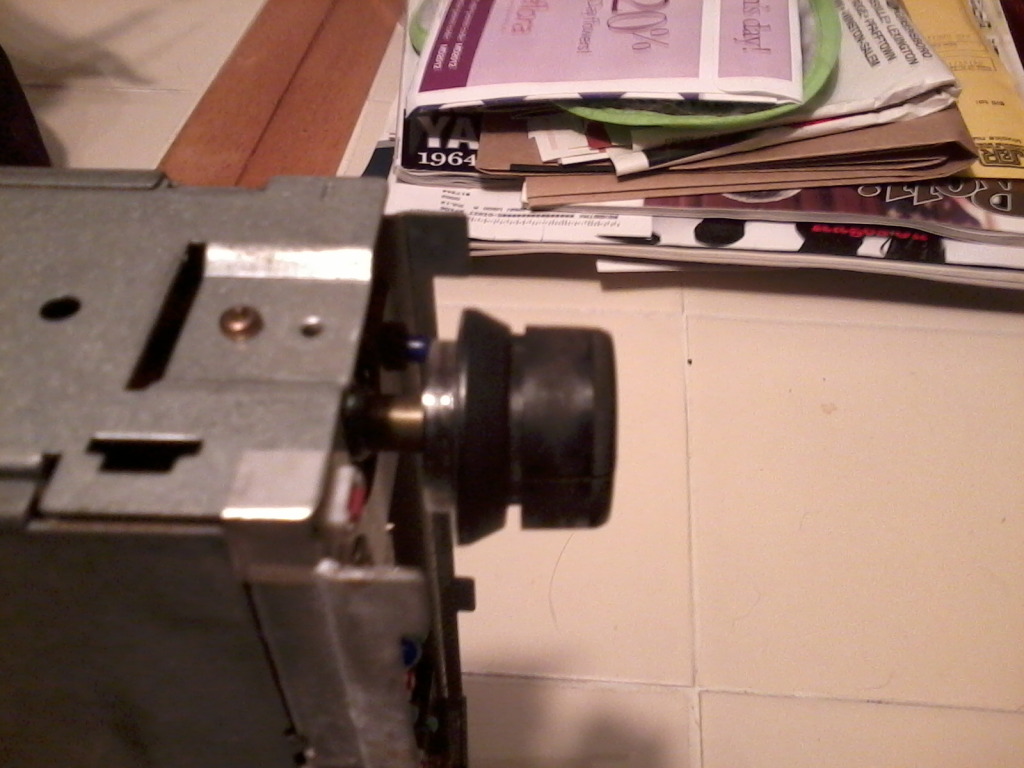
Once we get around to fusing these together, there will be no gap. There is a subtle difference in the way it looks, but I doubt anyone will notice.
OK so hopefully by now your glue is dry on the window. If so, slap the faceplate on the radio and take a look at the volume stalk area.
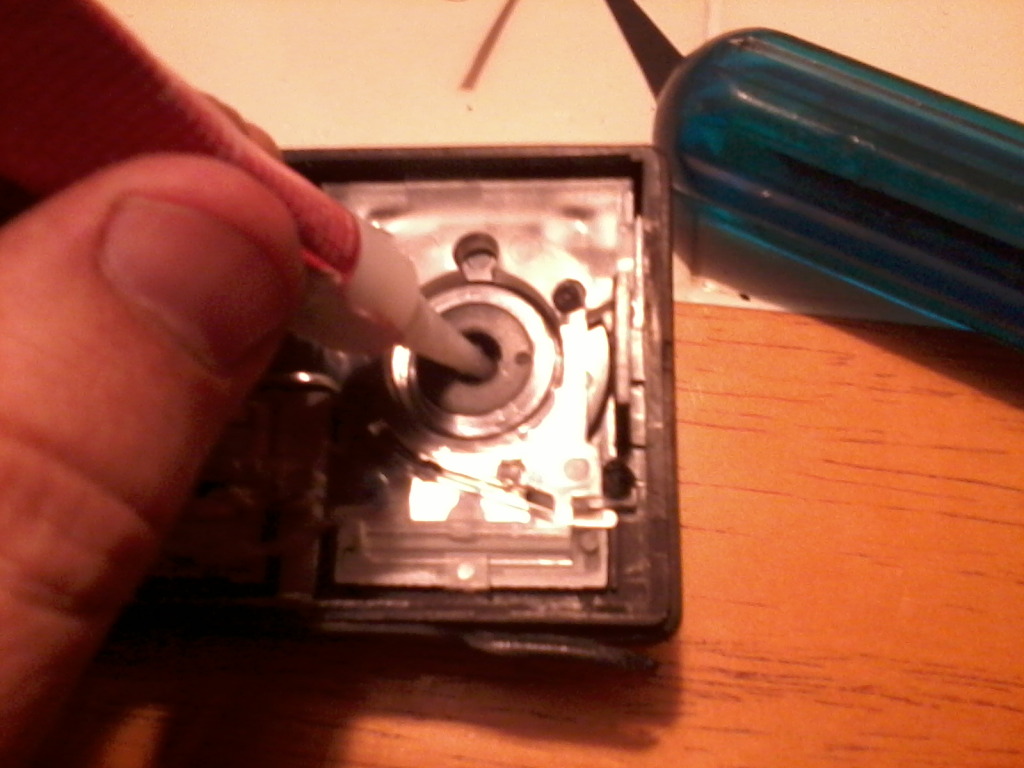
Make sure you take note of the orientation of the knobs and stalk. I kept the fader set at center and the volume turned all the way down and clicked off. Made it pretty easy to keep things lined up. Put a VERY small amount of glue around the edge of the hole (if you use too much glue, it will squeeze out around the knob and look suspicious), slide the fader knob on, and press it against the faceplate. The stalk will keep the knob centered.
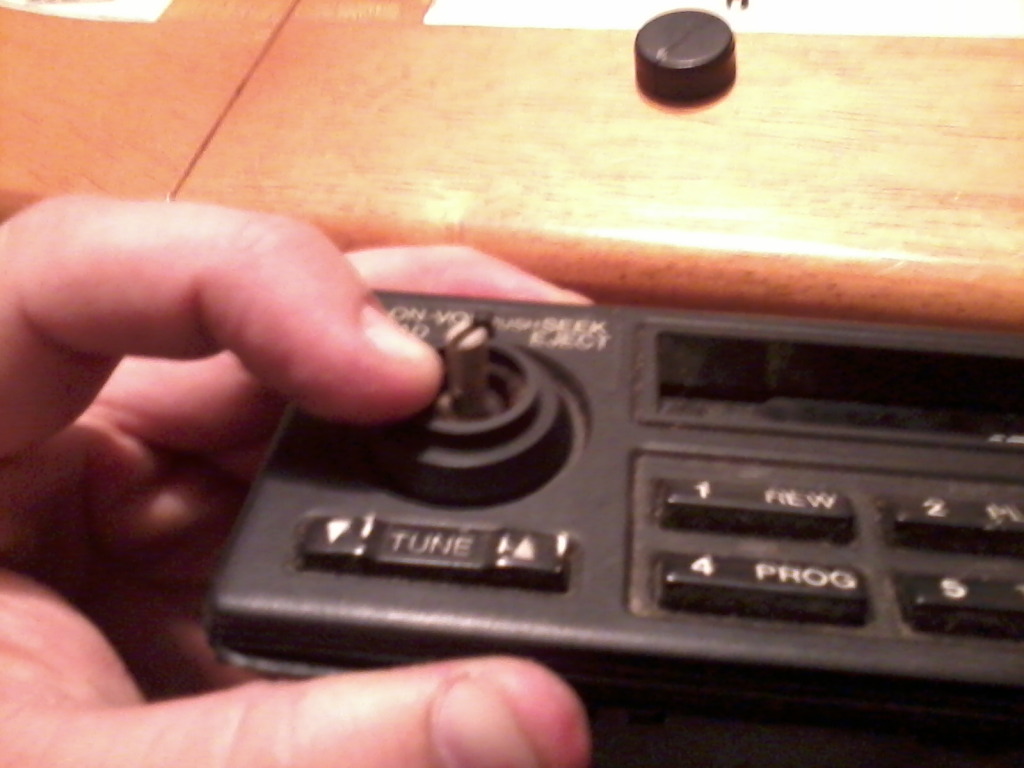
Pull the face outward slightly while pushing the fader against it, and hold it that way until the glue has set. You can see that's what I'm doing in the picture.
Repeat this process for the Volume knob.
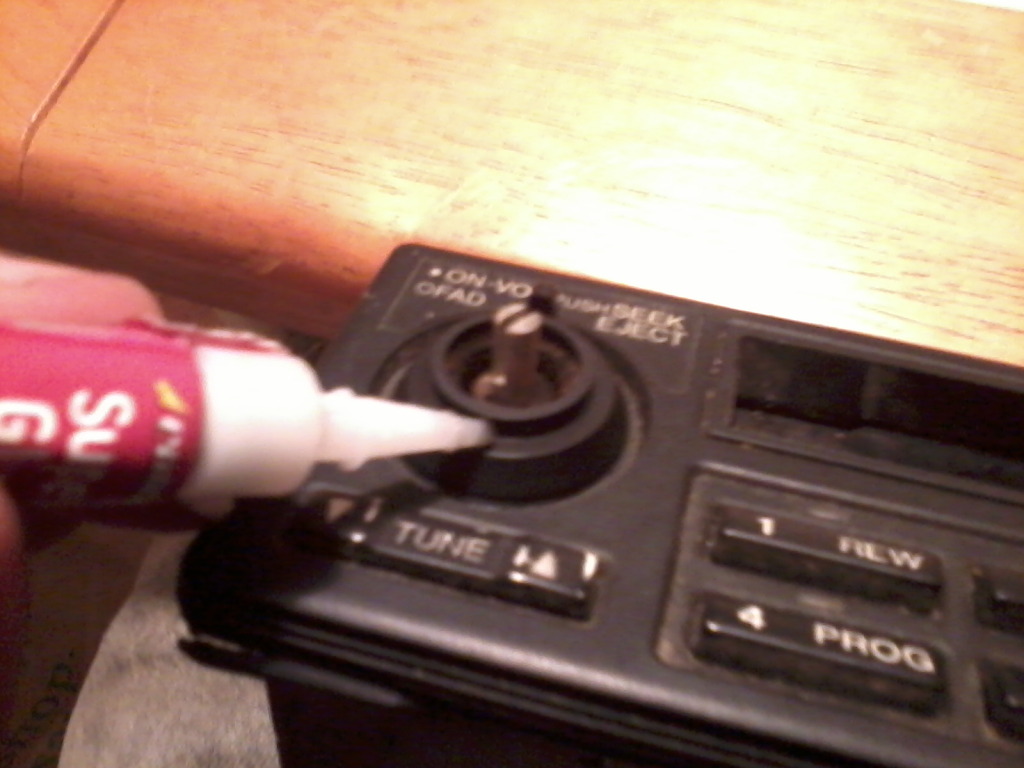
Glue here (its REALLY tough to get this right, because if you get too much glue, it has only one way to go. My glue ended up squeezing out a little bit once I got the volume knob on, but luckily i was able to clean it up real fast before it dried.)
Slide on and press. You WILL have to pull the faceplate out when you do this one, because of that gap I showed you earlier.
Hold it together for a few minutes til its pretty firm, then gently wiggle the whole face / knob assembly off of the radio.
Now you can flip the face over, and add some glue to the back to strengthen it a little.
Here for the fader
and here for the volume knob (I forgot my volume knob was cracked, and super glue leaked out through the crack and i nearly glued this thing to my kitchen table. Don't do that.)
Now, there is quite a bit of glue on this thing. Set it aside, and go make a sandwich or something so it can dry. We need the glue to be solid so we don't accidentally knock the knobs out of whack, or drip it onto the kitchen table.
Once it's good and solid, it's time to work on these two holes from the smaller knobs.
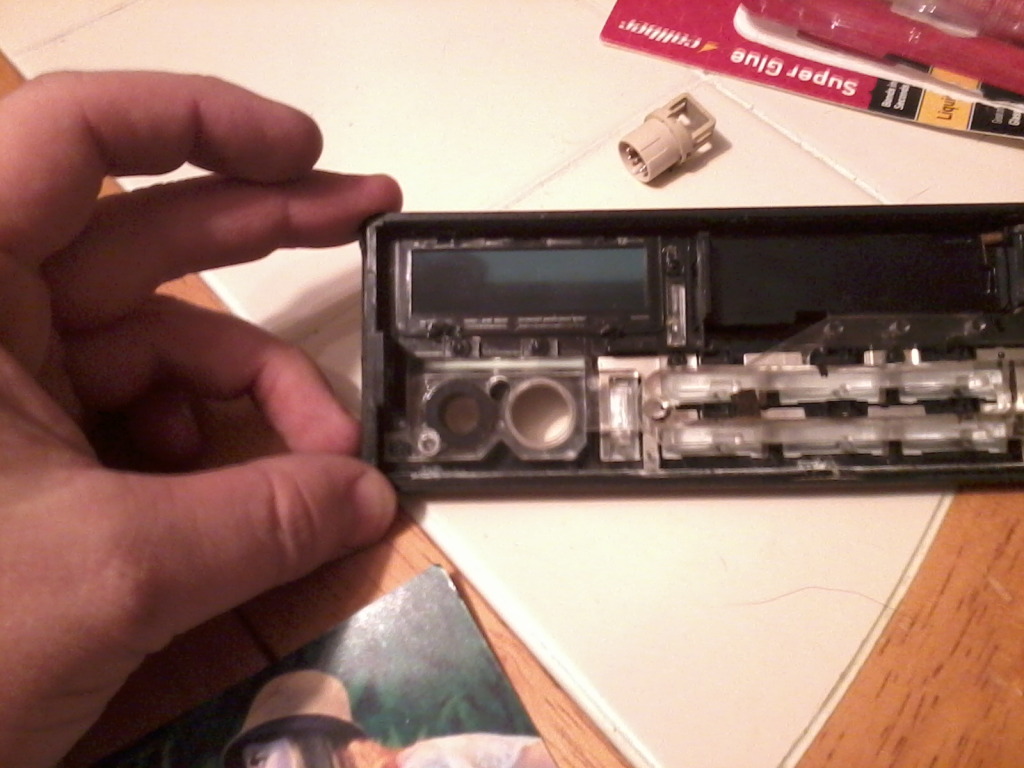
Grab the scraps of thick black magazine paper and cut a few small pieces to cover the holes.
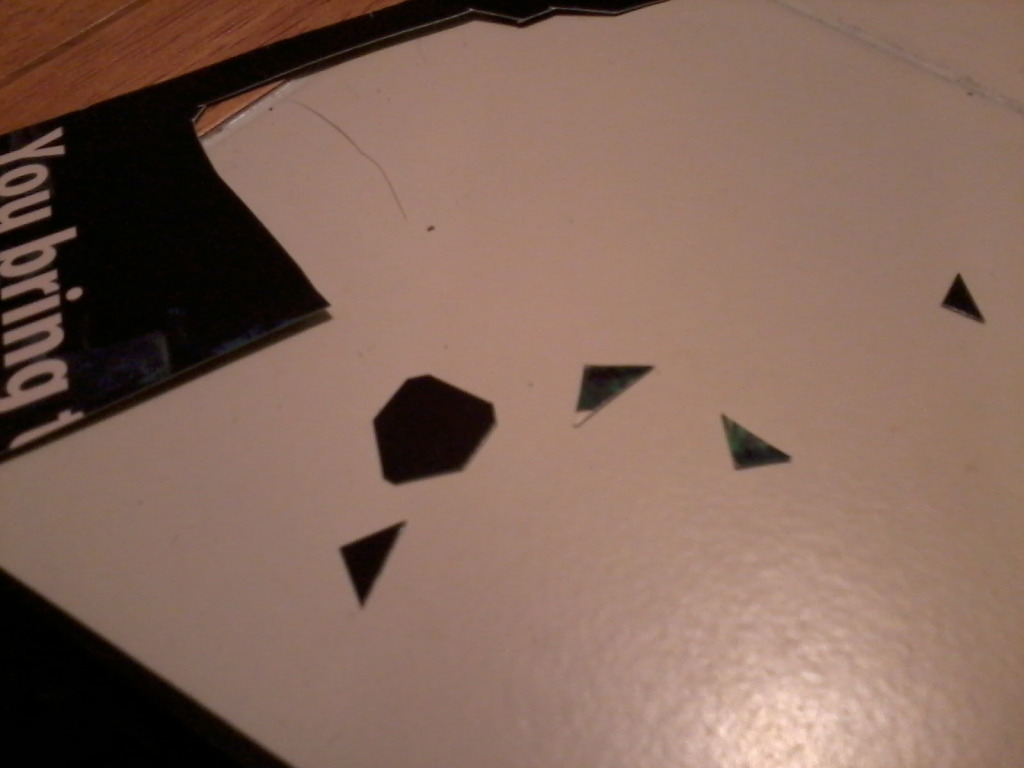
Glue those in place over the holes. Remember how I said it doesn't matter what's on the back side? Just by pure chance, one of mine somehow ended up with this red-headed fist-bump kid on it. That's what I mean by bonus points.
Let dry, flip over, glue knobs in place. These knobs are small enough that even if they aren't perfectly aligned, you can't tell.
Now let it all dry completely. This is how it should look. Unless you have all your knobs... Then it should look more... knobbier.

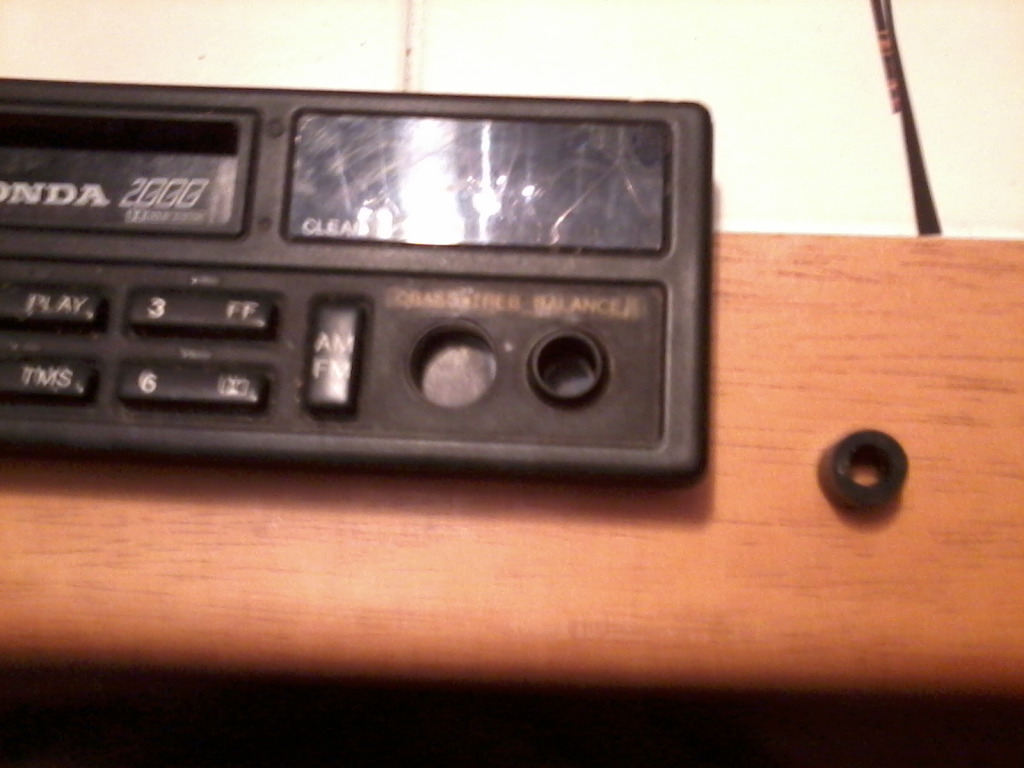
This is how it looks held up to the light. There are no significant gaps, so you can't see the radio unit behind it when installed. For some reason, my cell phone camera picked up a lot of light through the tape door. To the naked eye, the door actually had a very dark red color to it, and very little light actually makes it through.
OK now here's where luck came into play for me. The face i used has one tab at either side of the rear, where it mounts to the radio itself. I simply left those intact, and it just so happens that those tabs almost lined up with my Pioneer radio.... kinda. I'll try to explain with pics.
Here you can see that my home made faceplate is shifted slightly to the left.
The right side tab sets against the the trim ring of my radio...
...and the left side tab slides between the trim ring of the radio and the actual console trim.
Press it in firmly, and it should just set right in there. I wouldn't suggest driving on bumpy roads with it, but it shouldn't fall out just sitting in the parking lot.
Yours may or may not happen to line up the same. I suggest you test it out beforehand. If it doesn't work, get creative with the super glue and make your own tabs or something.
BY THE WAY! Make sure you let this sit at least overnight before you leave it in the car. I did not, and I left it on the radio all night. got in the car this afternoon and the left half of my radio and the trim and a little of the center dash had a layer of Super Glue fog. I'm hoping this will come off easily with some nail polish remover. Updates to come....
So there ya go. Hope you enjoyed it. Maybe someone else wants to give this a try, or maybe not. I'm sure someone will find this interesting though.
This was performed on my 89 Civic Sedan equipped with a Pioneer HD4400 unit, but it should work just the same on any hatchback or wagon, and most cd players have nearly identical dimensions in the front trim with the face removed. It's really trial-and-error as far as finding a way to mount it up. I just got really lucky.
Problem: You bought a sweet new HD Radio / CD Player but you're worried someone will be tempted to steal it from you.
Sure, it's got a removable faceplate...
but that just says "Hey look, my radio is expensive enough to take the faceplate with me, and I've prob got expensive speakers / amp / subs etc...."
Solution: Give the false impression that your shit is old and busted.
What you need:
-Small phillips head screwdriver
-Super glue
-Nail polish remover (for when you super glue your hands to your pants)
-Old magazines or junk mail, anything printed on thick paper with lots of solid black.
-Old busted factory Honda radio. Preferably one that doesn't work. The jankier the better. This is what I used. It was a birthday present from my broke-ass brother. This is how it looked when he gave it to me, and it doesn't work for shit. I guess it was his idea of a joke. I'm not sure what car it actually came out of, but by the looks of the radio, and the printing on the top label, I'd guess its probably EF civic era...?
Top view, part number
Step one, remove one screw from each side that holds the face onto the radio.
Remove knobs. On this particular radio, the volume knob was easy to pull off, but the fader was hard to get a grip on. I just gently wiggled the whole faceplate off and the fader came with it.
Once the plate is off, slide your volume and fader knobs on and off a few times, to loosen them up a bit. This will help a little later.
Now your faceplate is off, and you can pretend the faceless radio is some kind of Back To The Future, Time-Circuit crap.
Anyway here are the parts you have removed so far, face and knobs. You will notice two things: First, the outer ring of the knob on the right stays in the faceplate. It's already a false knob and doesn't do anything but look cool. Second, I'm missing the center knob that goes right next to it. It's all good. Like I said, the jankier, the better! The small metal clips may fall out from inside the knobs. Make sure you still have one in the volume knob, it will come in handy when you put it back on the stalk later. Set the radio aside for now, we'll use that again later too.
Now, you'll notice the window for the display is dark, but on a bright sunny day, someone might be able to see through it and spot your sweet HD radio!
Grab a magazine, junk mail, whatever. I used the back cover off an issue of Rolling Stone. Cut out a nice section of solid black. Doesn't matter what's on the back, but if its something cool, you get bonus points.
Cut a rectangle slightly larger than the window.
Test fit, trim as needed so it fits flush. When you are satisfied, dab a little super glue AROUND the window and set the page down over the window, black side down. DON'T glue it right on the clear part, it will fog and you will see it from the other side.
(Can't believe I didn't get a pic of this!)
Let that sit a few minutes til its dry, then we'll begin working on the Volume / Fader knobs. Set the scraps of black paper aside, we'll use them again later.
We're going to use the radio unit again, to align the knobs together, so this looks realistic enough. Here, I have mounted them both on the stalk, without the face installed, to show you this gap. Notice that when the knobs are installed, there is a slight gap between the two. This is so you can "click" the volume button.
Once we get around to fusing these together, there will be no gap. There is a subtle difference in the way it looks, but I doubt anyone will notice.
OK so hopefully by now your glue is dry on the window. If so, slap the faceplate on the radio and take a look at the volume stalk area.
Make sure you take note of the orientation of the knobs and stalk. I kept the fader set at center and the volume turned all the way down and clicked off. Made it pretty easy to keep things lined up. Put a VERY small amount of glue around the edge of the hole (if you use too much glue, it will squeeze out around the knob and look suspicious), slide the fader knob on, and press it against the faceplate. The stalk will keep the knob centered.
Pull the face outward slightly while pushing the fader against it, and hold it that way until the glue has set. You can see that's what I'm doing in the picture.
Repeat this process for the Volume knob.
Glue here (its REALLY tough to get this right, because if you get too much glue, it has only one way to go. My glue ended up squeezing out a little bit once I got the volume knob on, but luckily i was able to clean it up real fast before it dried.)
Slide on and press. You WILL have to pull the faceplate out when you do this one, because of that gap I showed you earlier.
Hold it together for a few minutes til its pretty firm, then gently wiggle the whole face / knob assembly off of the radio.
Now you can flip the face over, and add some glue to the back to strengthen it a little.
Here for the fader
and here for the volume knob (I forgot my volume knob was cracked, and super glue leaked out through the crack and i nearly glued this thing to my kitchen table. Don't do that.)
Now, there is quite a bit of glue on this thing. Set it aside, and go make a sandwich or something so it can dry. We need the glue to be solid so we don't accidentally knock the knobs out of whack, or drip it onto the kitchen table.
Once it's good and solid, it's time to work on these two holes from the smaller knobs.
Grab the scraps of thick black magazine paper and cut a few small pieces to cover the holes.
Glue those in place over the holes. Remember how I said it doesn't matter what's on the back side? Just by pure chance, one of mine somehow ended up with this red-headed fist-bump kid on it. That's what I mean by bonus points.
Let dry, flip over, glue knobs in place. These knobs are small enough that even if they aren't perfectly aligned, you can't tell.
Now let it all dry completely. This is how it should look. Unless you have all your knobs... Then it should look more... knobbier.
This is how it looks held up to the light. There are no significant gaps, so you can't see the radio unit behind it when installed. For some reason, my cell phone camera picked up a lot of light through the tape door. To the naked eye, the door actually had a very dark red color to it, and very little light actually makes it through.
OK now here's where luck came into play for me. The face i used has one tab at either side of the rear, where it mounts to the radio itself. I simply left those intact, and it just so happens that those tabs almost lined up with my Pioneer radio.... kinda. I'll try to explain with pics.
Here you can see that my home made faceplate is shifted slightly to the left.
The right side tab sets against the the trim ring of my radio...
...and the left side tab slides between the trim ring of the radio and the actual console trim.
Press it in firmly, and it should just set right in there. I wouldn't suggest driving on bumpy roads with it, but it shouldn't fall out just sitting in the parking lot.
Yours may or may not happen to line up the same. I suggest you test it out beforehand. If it doesn't work, get creative with the super glue and make your own tabs or something.
BY THE WAY! Make sure you let this sit at least overnight before you leave it in the car. I did not, and I left it on the radio all night. got in the car this afternoon and the left half of my radio and the trim and a little of the center dash had a layer of Super Glue fog. I'm hoping this will come off easily with some nail polish remover. Updates to come....
So there ya go. Hope you enjoyed it. Maybe someone else wants to give this a try, or maybe not. I'm sure someone will find this interesting though.
Comments
I have seen the Honda 2000 radios go for over $100 in good working condition... Lol
But now I'm going to have to make one.
I feel you. My radio is the only thing of value in my daily driver. Radio was $125, and I only paid $200 for the whole car. needless to say, it's not the kind of car thieves are likely to target. Regardless, I will probably try to make another one of these for my wagon, as soon as i get it running again. And the del Sol... well it has a radio door so no need!
The 2000 series radio is a honda accessories radio and is the second hardest radio to find :miserable:
The hardest one to find is the 3000 series radios.
I collect these and have a few and only have two that are in good working order,
lmk if still have the extra pieces?