Ek4/ek9 foglight retrofit

Ek 4door,ek4/ek9 foglight retrofit
I’ve seen a lot of these done on ppls builds but haven’t seen a write up on how they made it possible, so let me do some of the hard work for y’all today. This how to use ek4/ek9, ek 4door fog light kits and fit them to work on a 90-91 wagon usdm bumper (I believe this will work for the 88-89 bumper but can’t promise you that).
These fog lights are by no means a plug and play system and ⚠️does require you to cut away two small 3x4in sections out of the front metal fascia/rad support. If your not willing to cut a little of your support out these light will not fit and arent the set up for you. The problem is they are about 2 inch to deep and hit behind the bumper so you need to make the clearance for it to work. You will also need to remake the top brackets so some metal work is needed but not overly complicated.
Please remember by no means am I a professional car builder or manufacturer and any idiot with time and patience can do this, also by no means am I saying this is the only way or THE way it has to be done but this is the way I’ve achieve my out come and hopefully this helps you have a positive one too or at least give you some inspiration to do something similar. That being said let get started here what tools you’ll end up needing.
Tools
- Saw all or metal cut off wheel
- razor blade
- screw drivers
- 10mm socket
- file or sandpaper
- paint & primer
- sheet metal
Here what I installed

So I ordered this “aftermarket” stock light recreate of ek foglight kit in the thoughts of I’d mess around with them if they fit really nice and easy I’d keep them if not they could be returned in 30day, thanks you Jeff bezos lol. I also was expecting very poor quality and was very mistaken when they arrived. The lens feel almost like glass and feel very solid my only complaint is the ones I got have a h1 light that looks to be wired to a universal two prong harness plug so replacing this bulb down the line may be a little hassle but not the worse thing. I’m sure if you find a real official Honda set of these fog lights they come with just a normal bulb clip. The plus side of this kit is it comes with brackets (top&bottom) and a full pre-made wiring harness with relays and clips all solder, I ended up cutting my harness up a little to extend the harness to fit my wire tuck route and ocd needs lol. You will need to take the top brackets and use them as a template to make your new top brackets and you can repurpose the bottom brackets.
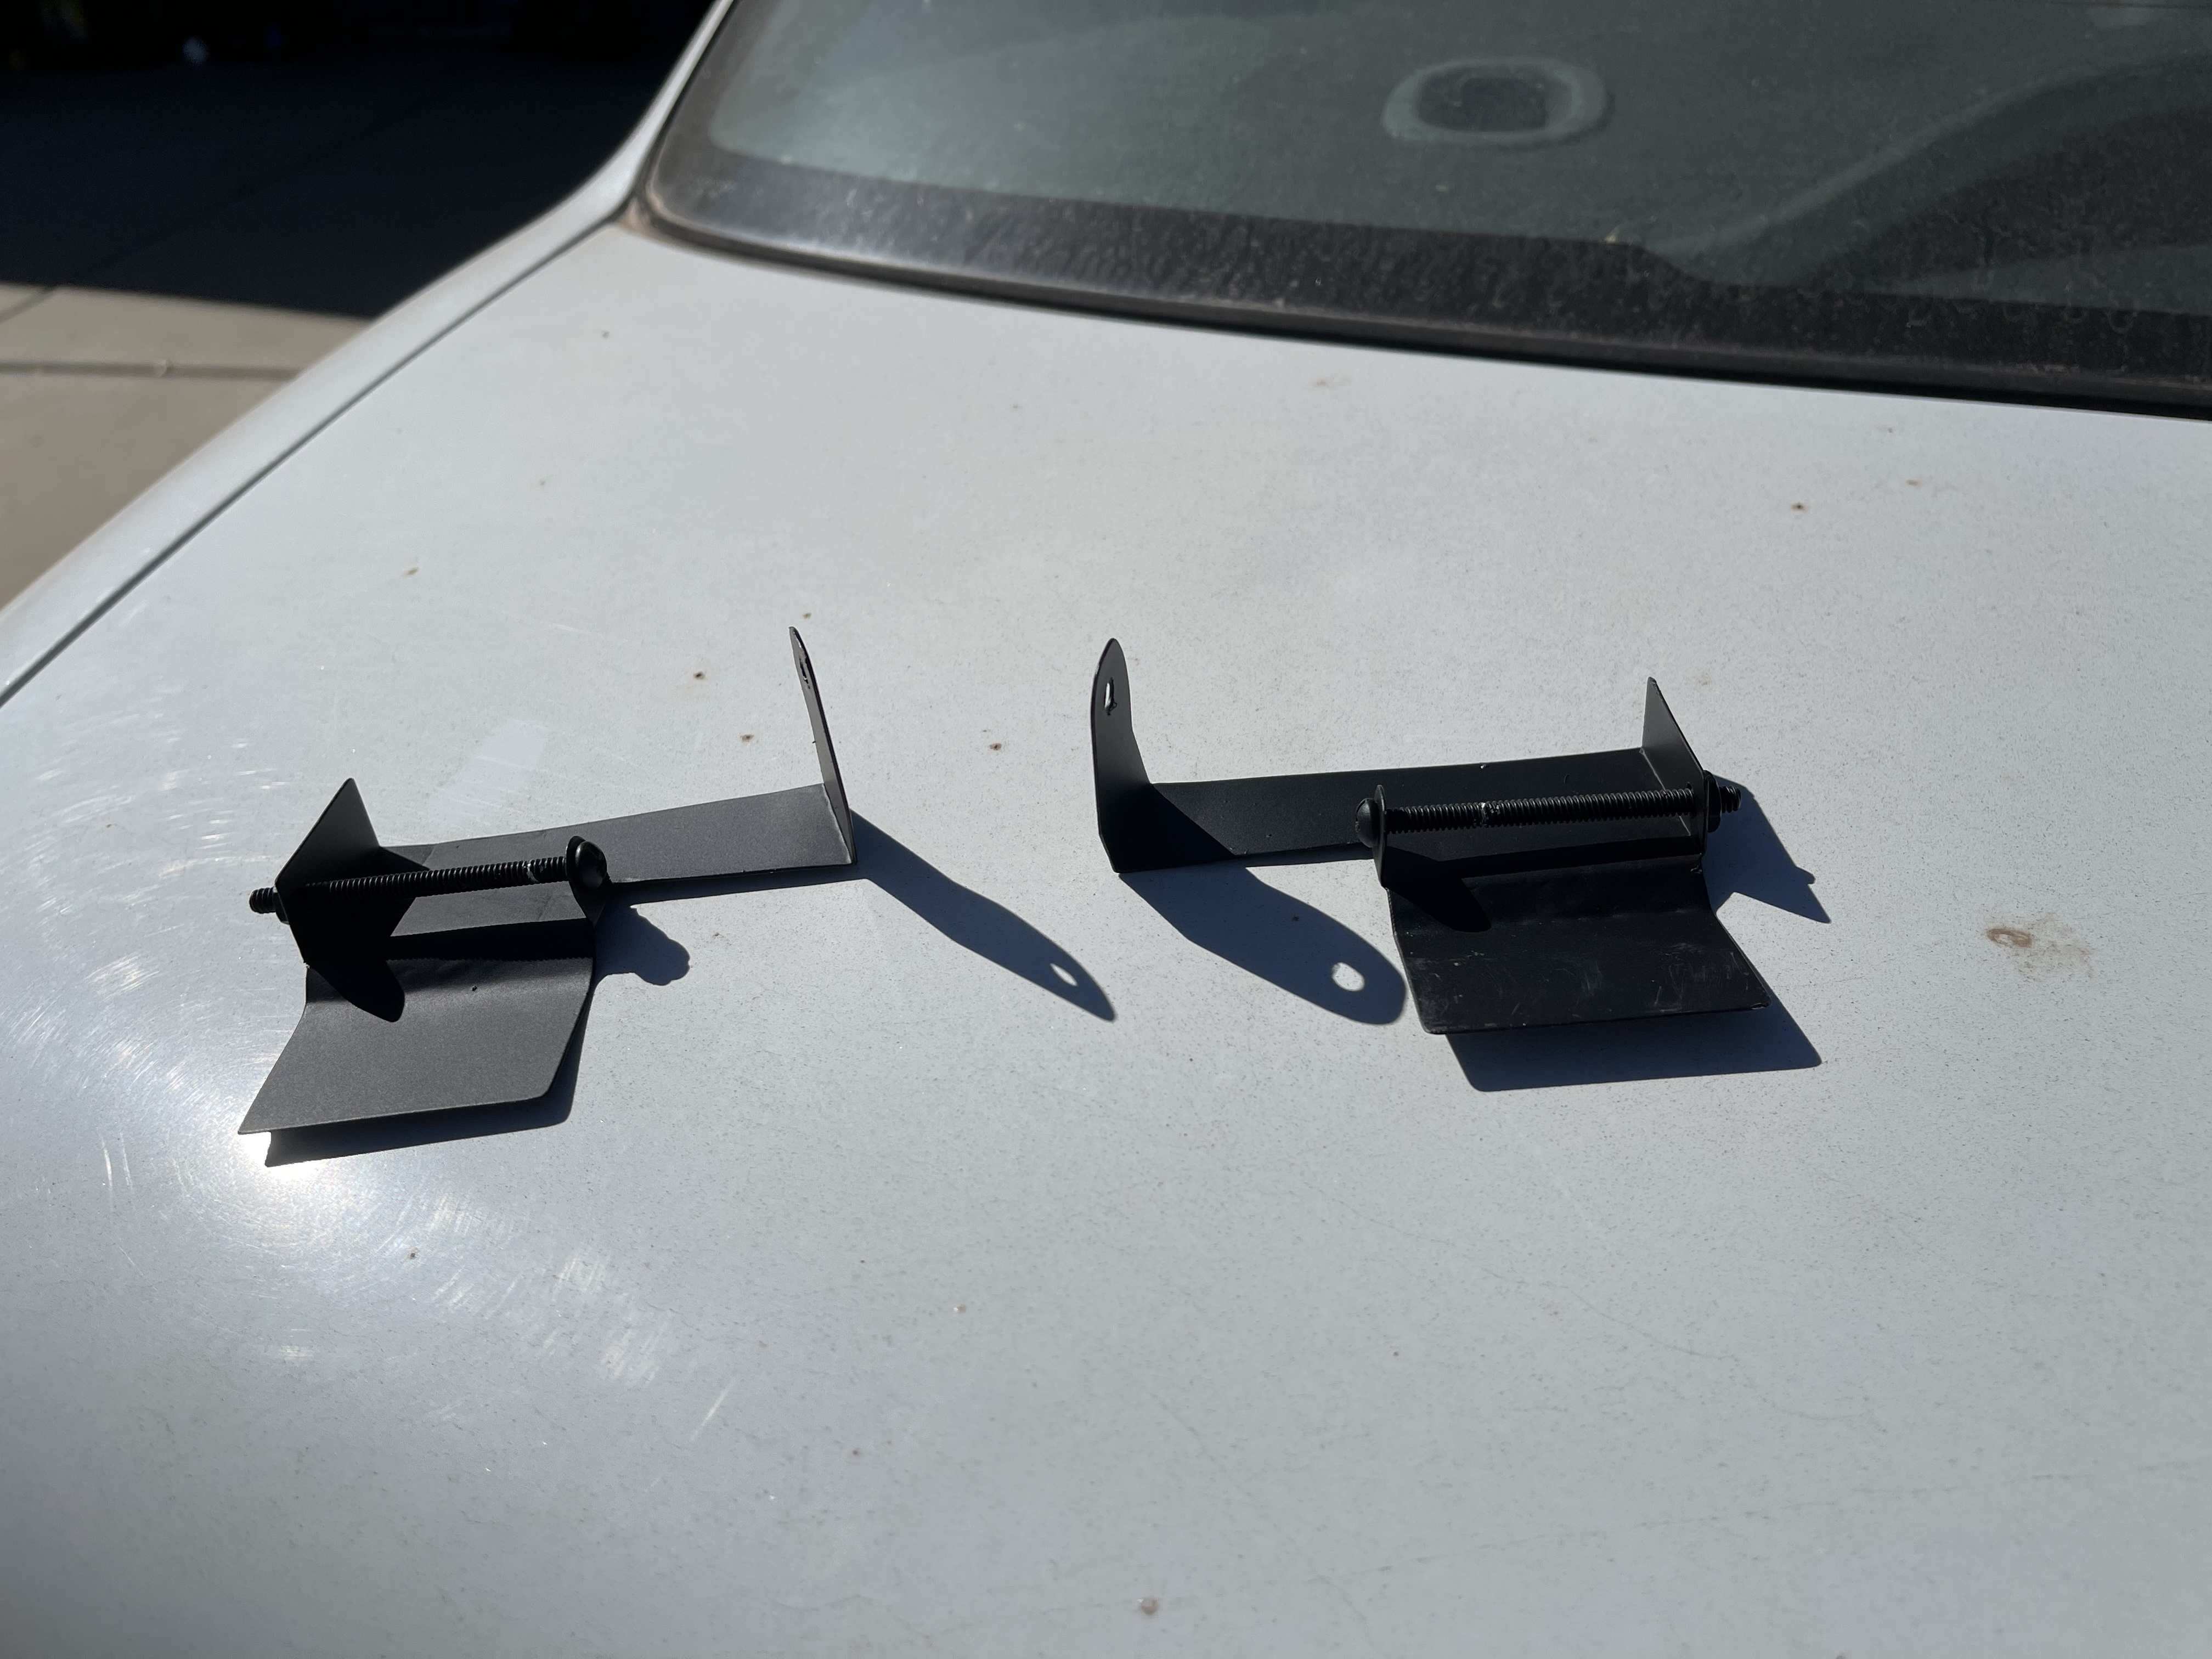
I used the original top ek brackets (black brackets pictured) to make a paper template of where the bolt/hook point and the side set screw mount too, then ended up extending the front of it about 2.5inches (20g raw steel bracket pictured).


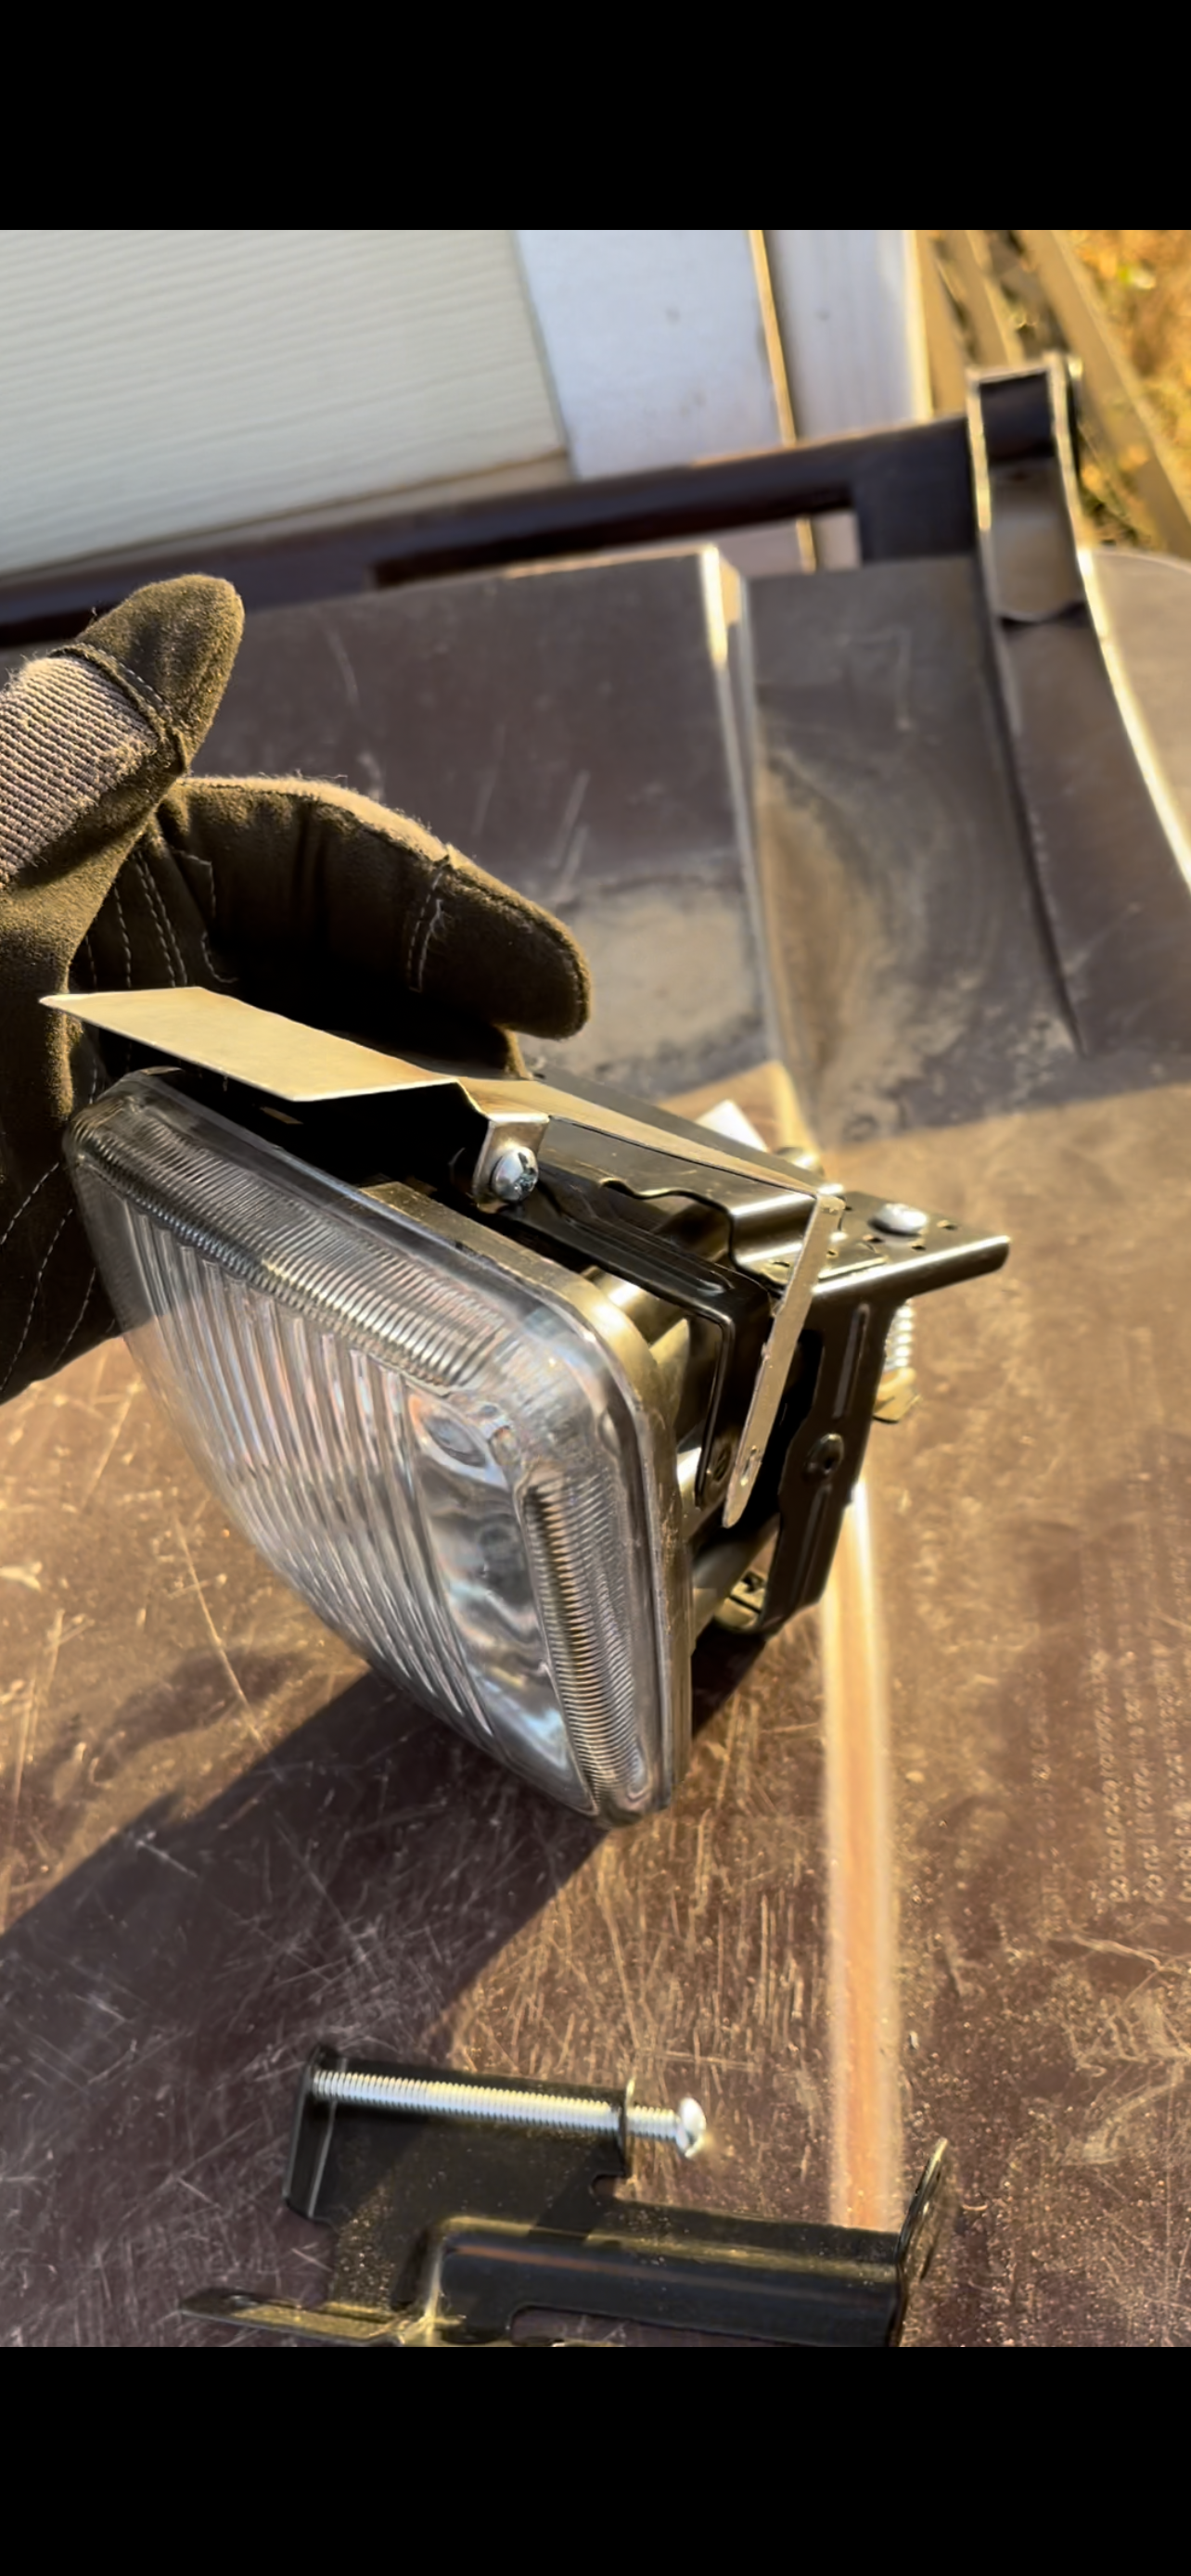


You can see the originally ek bracket mounts to the back where I’ve made mine come forward for it to slide in between the bumper and foam pad. I added that small kink in the front arm to make the bracket sit more flush and bring that bolt/hook point even with the bumper. You can slide the brackets in between the foam keep semi in placed while you try to mock up your final the angle and fitment. Once I was happy with the placement and fitment you gotta repeat again for the other side. Of course prime and paint your raw brackets once your pleased with them so they don’t rust (or make them from aluminum).

I ended up riveting all the brackets straight to the bumper so the lights ends up hooking into the top and hooking to the bottom lip in the grill. The side set screw is what fully secures the light to the top bracket. I ended up repurposing the bottom bracket by grinding away the bottom so that in could fit into the space of the bottom lip of the bumper in order to help add support to the grill hook point. Note: By no means do you have to use the bottom bracket since the bumper grill lip is used as the bottom hook point this is just my ocd, overkill mentality engineering. Not using the lower bracket will delete the two front exposed rivet or screw mounts.


The rivets can be easily painted over and hidden. My front lip covers the bottom bracket rivets in the front so I’m worried about them being in the front and opt for the support.
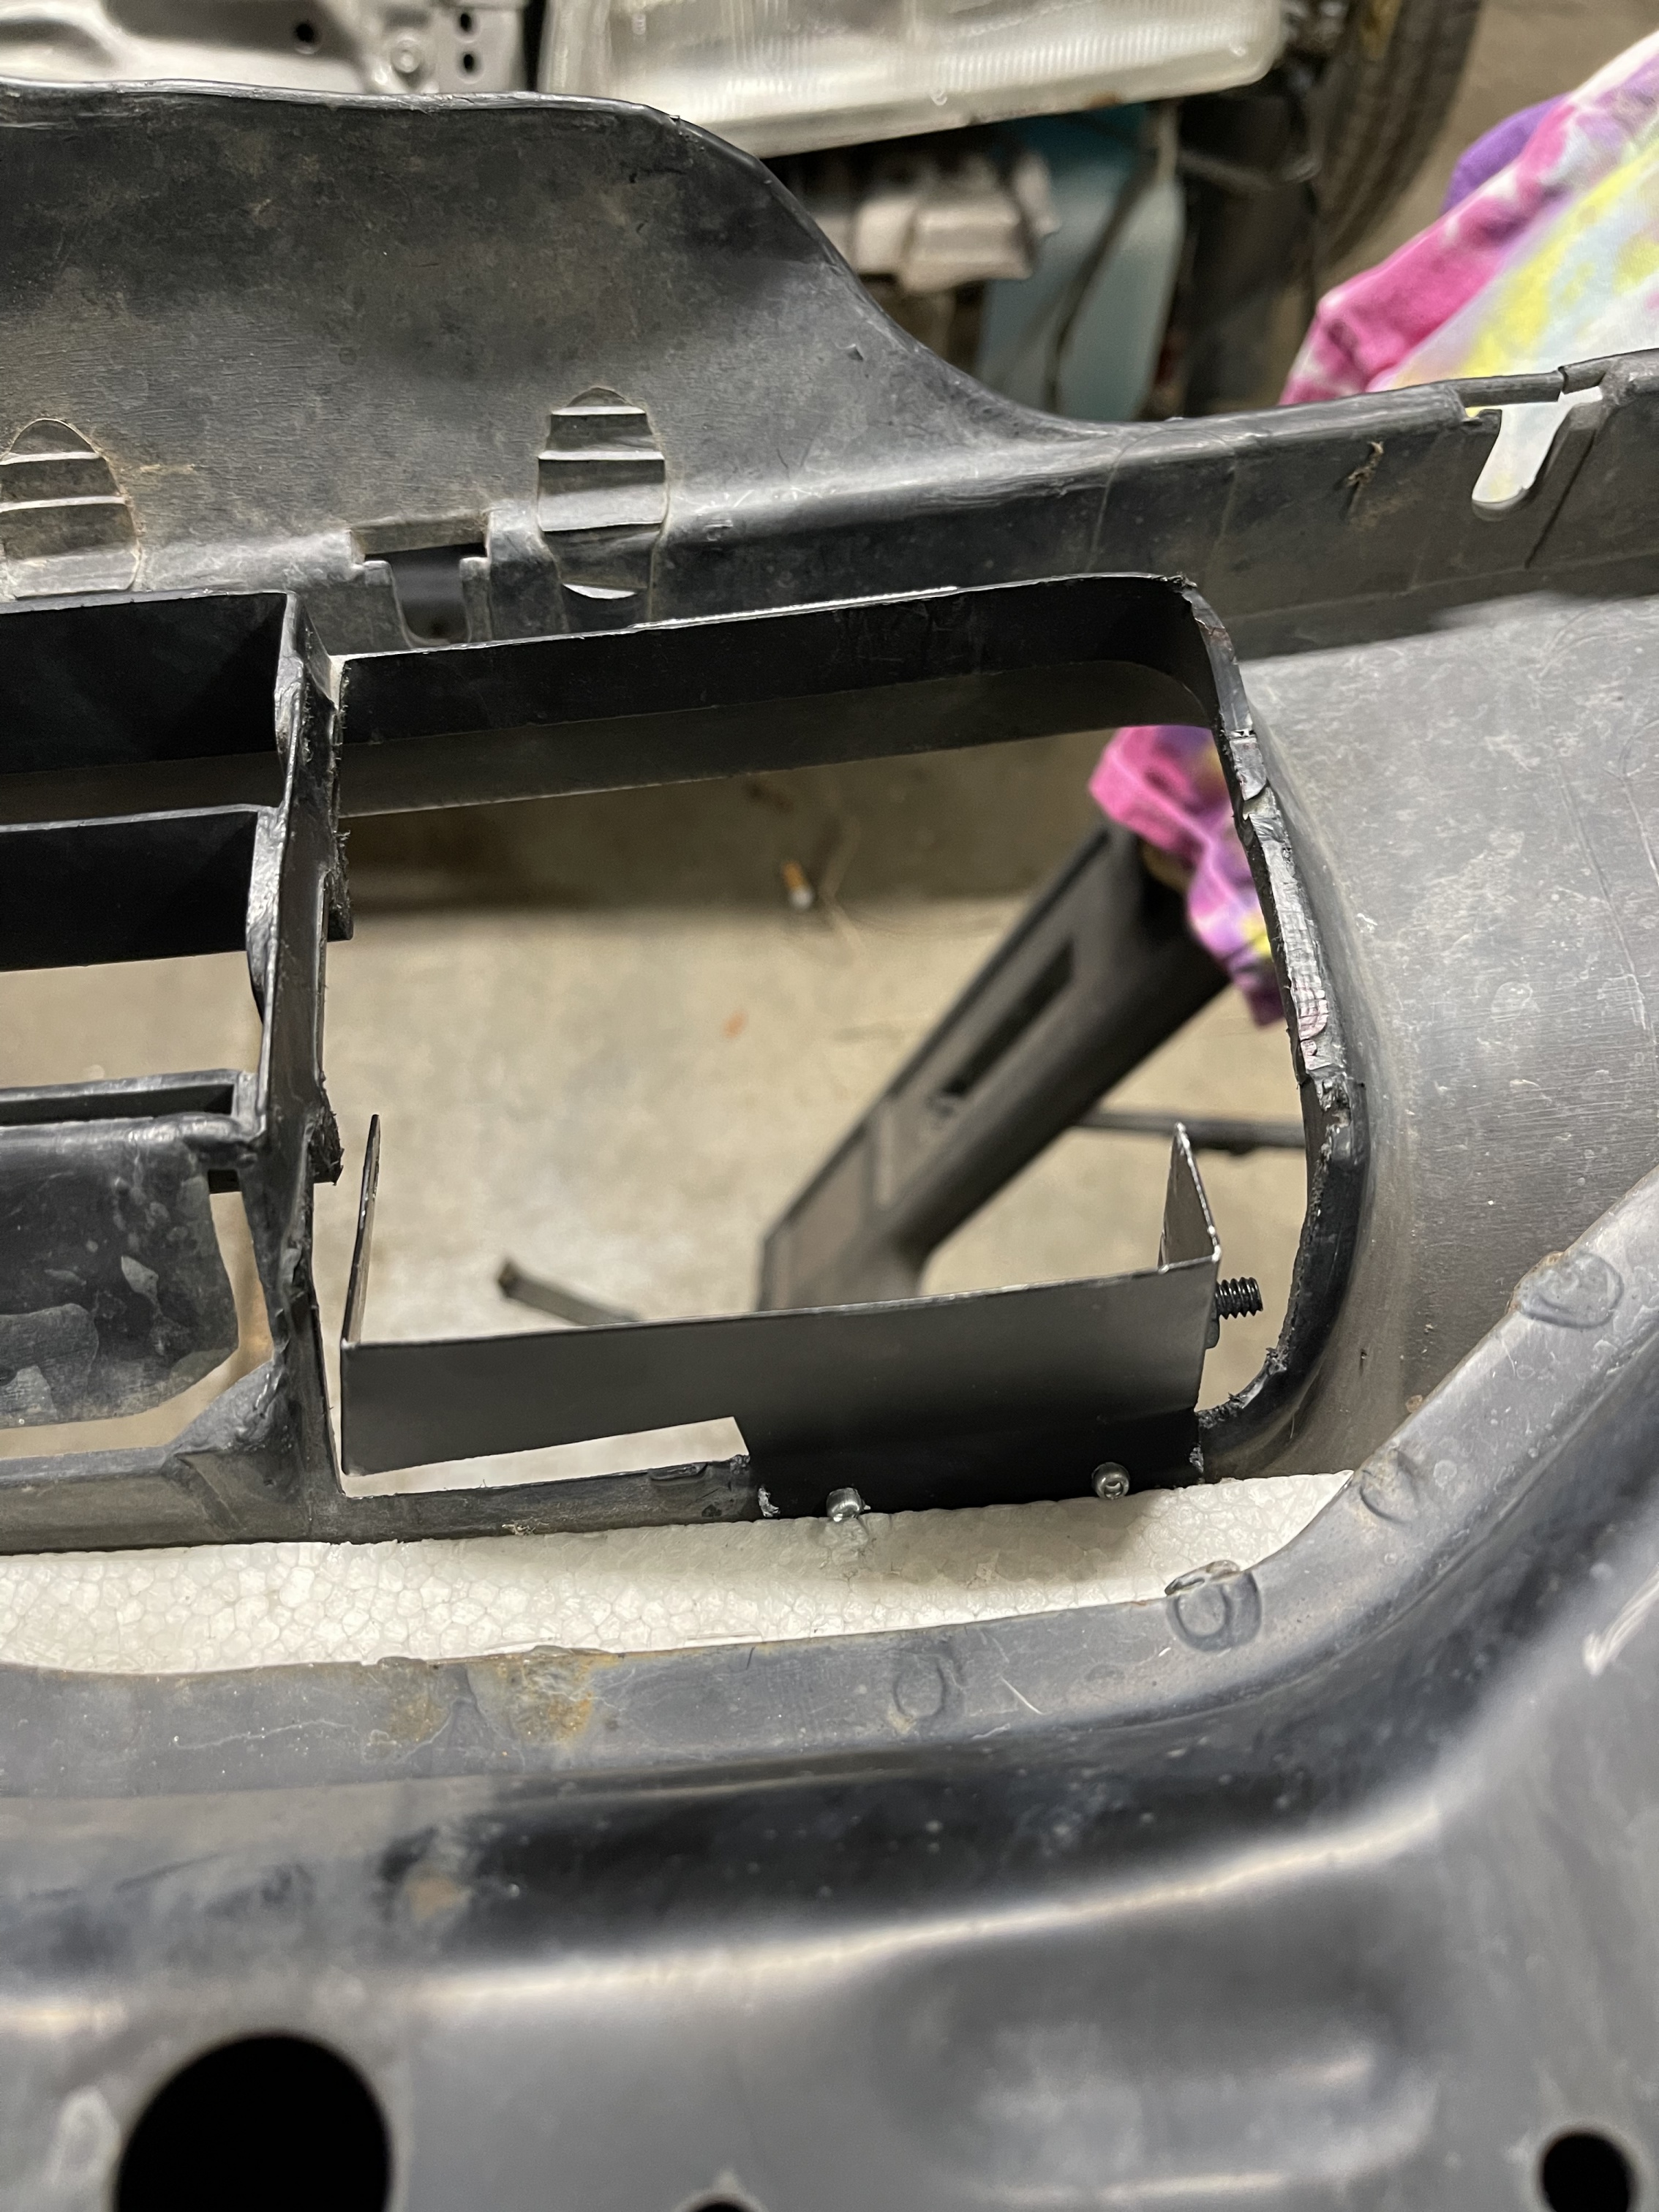
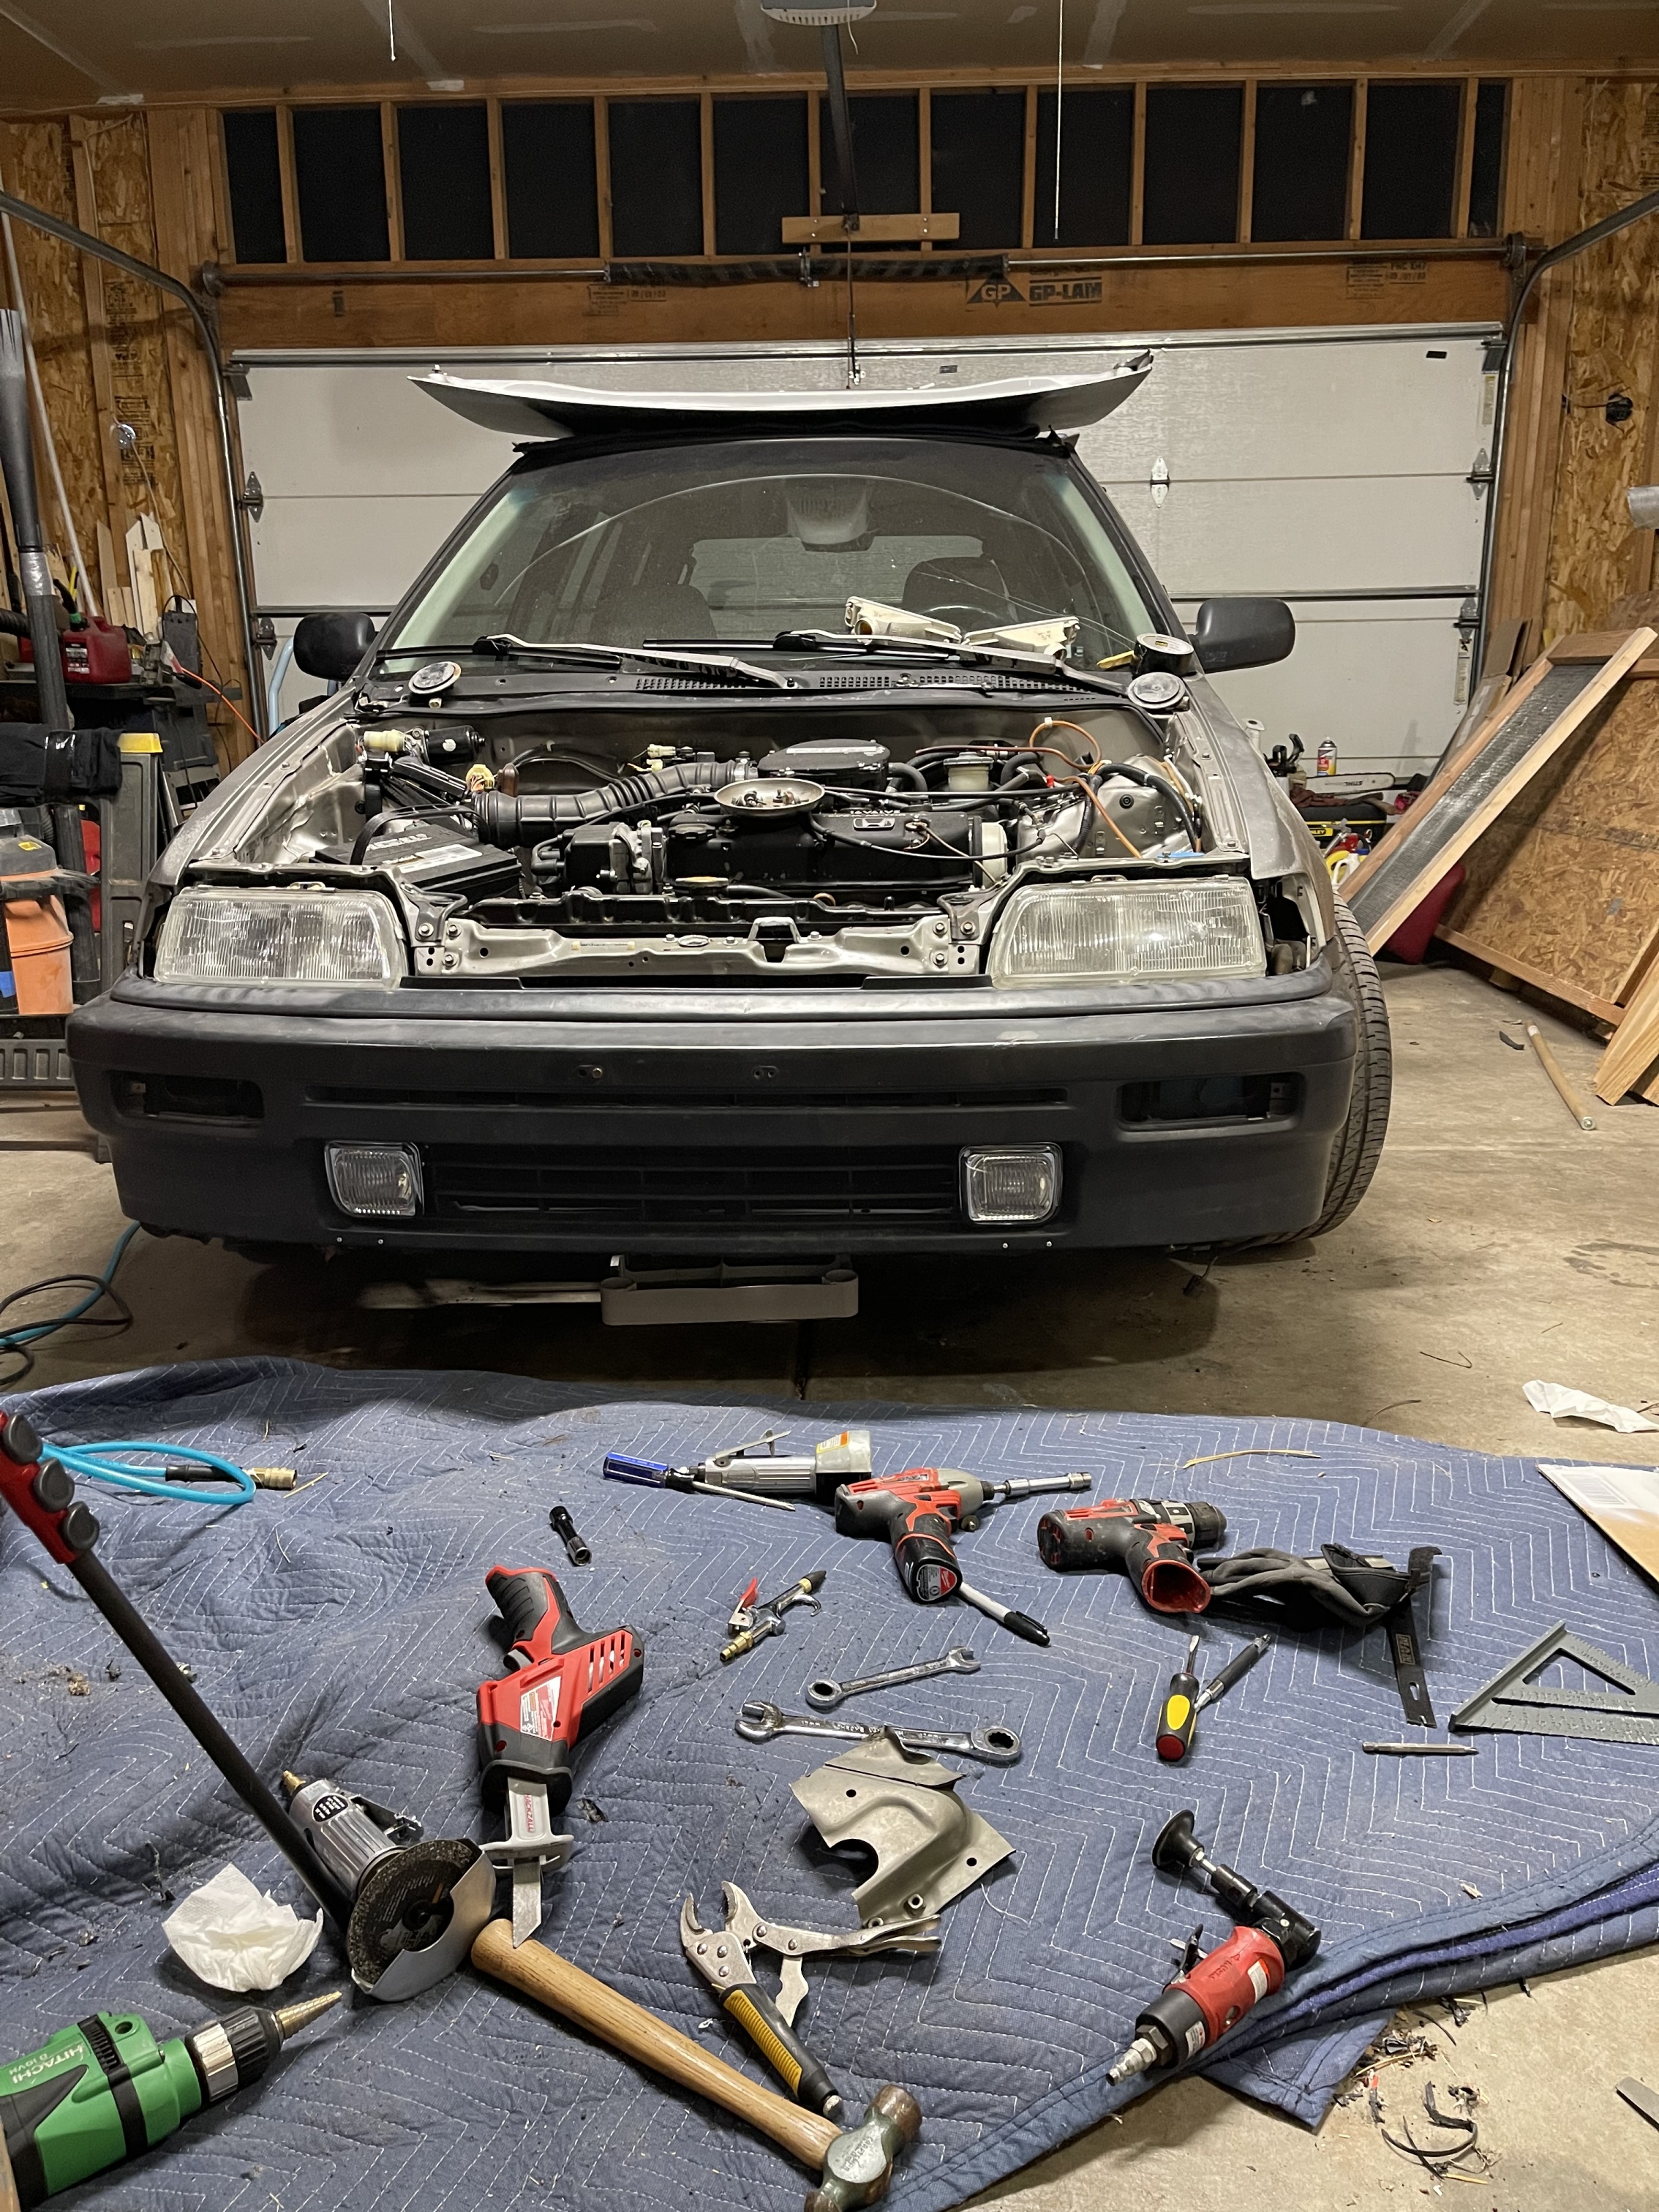
Now the hardest/scary part of this build……. Cutting the front fascia/rad support. You’ll have to remove and later relocated you horns. ⚠️Warning if you are clumsy, have no saws all control or cutting experience, or just don’t trust yourself! Nows the time to take out your radiator so you don’t run the risk of cutting into it!
Once you have everything clear out from behind and in front of where your going to cut you can place the bumper back on to mark where you’re hole line up in the front. You can technically split the upper support but to me it was easier just to cut the bottom straight out. The holes are roughly 3x4in (marked in yellow lines on photo). Please note too that the bottom corner section that you’ll cut is double layered so you will have to cut through both sections. Also be aware to not cut too deep and end up cutting into the 3 bolts that mount the tow hooks to the frame (just speaking from experience 🤦🏻♂️)


Make sure to prime and paint any cute areas of the front fascia so there is not exposed metal or rust points. Now the hard parts done you can slide the bumper on with the lights mounted now and see how well you did. You then use the provided wiring harness that comes with the kit to wire up and slide the button into a free slot. You will also have to extend you horn harness depending on where you relocated your horns and if they still can be connected as is.

Hope this was helpful or helped inspired an idea you had cooking. If anyone has any questions I’ll definitely try to answer what I can when I see them come in. Maybe one day soon I’ll get around to making a YouTube channel and show off a video version of this process but for now hope you enjoyed this write up and maybe it’s good enough to get pinned. Good luck and happy building!
Please post and show off your ek foglight or any light builds that this post may have helped inspire and push you to try!
Comments
nice write up, good job. Here’s mine as you can see the driver side is a little flimsy but they still look good though haha (old wagon)
Aye still looks killer And if it works it works 🙌🏽😂👌🏽