Works Bell, the bell works? Aka tips and tricks for a works bell rapfix install.
 greenteagod
Moderator
greenteagod
Moderator
If you're familiar with Works Bell, you know they make some fun car parts. I picked myself up a Rapfix II quick release for my car.
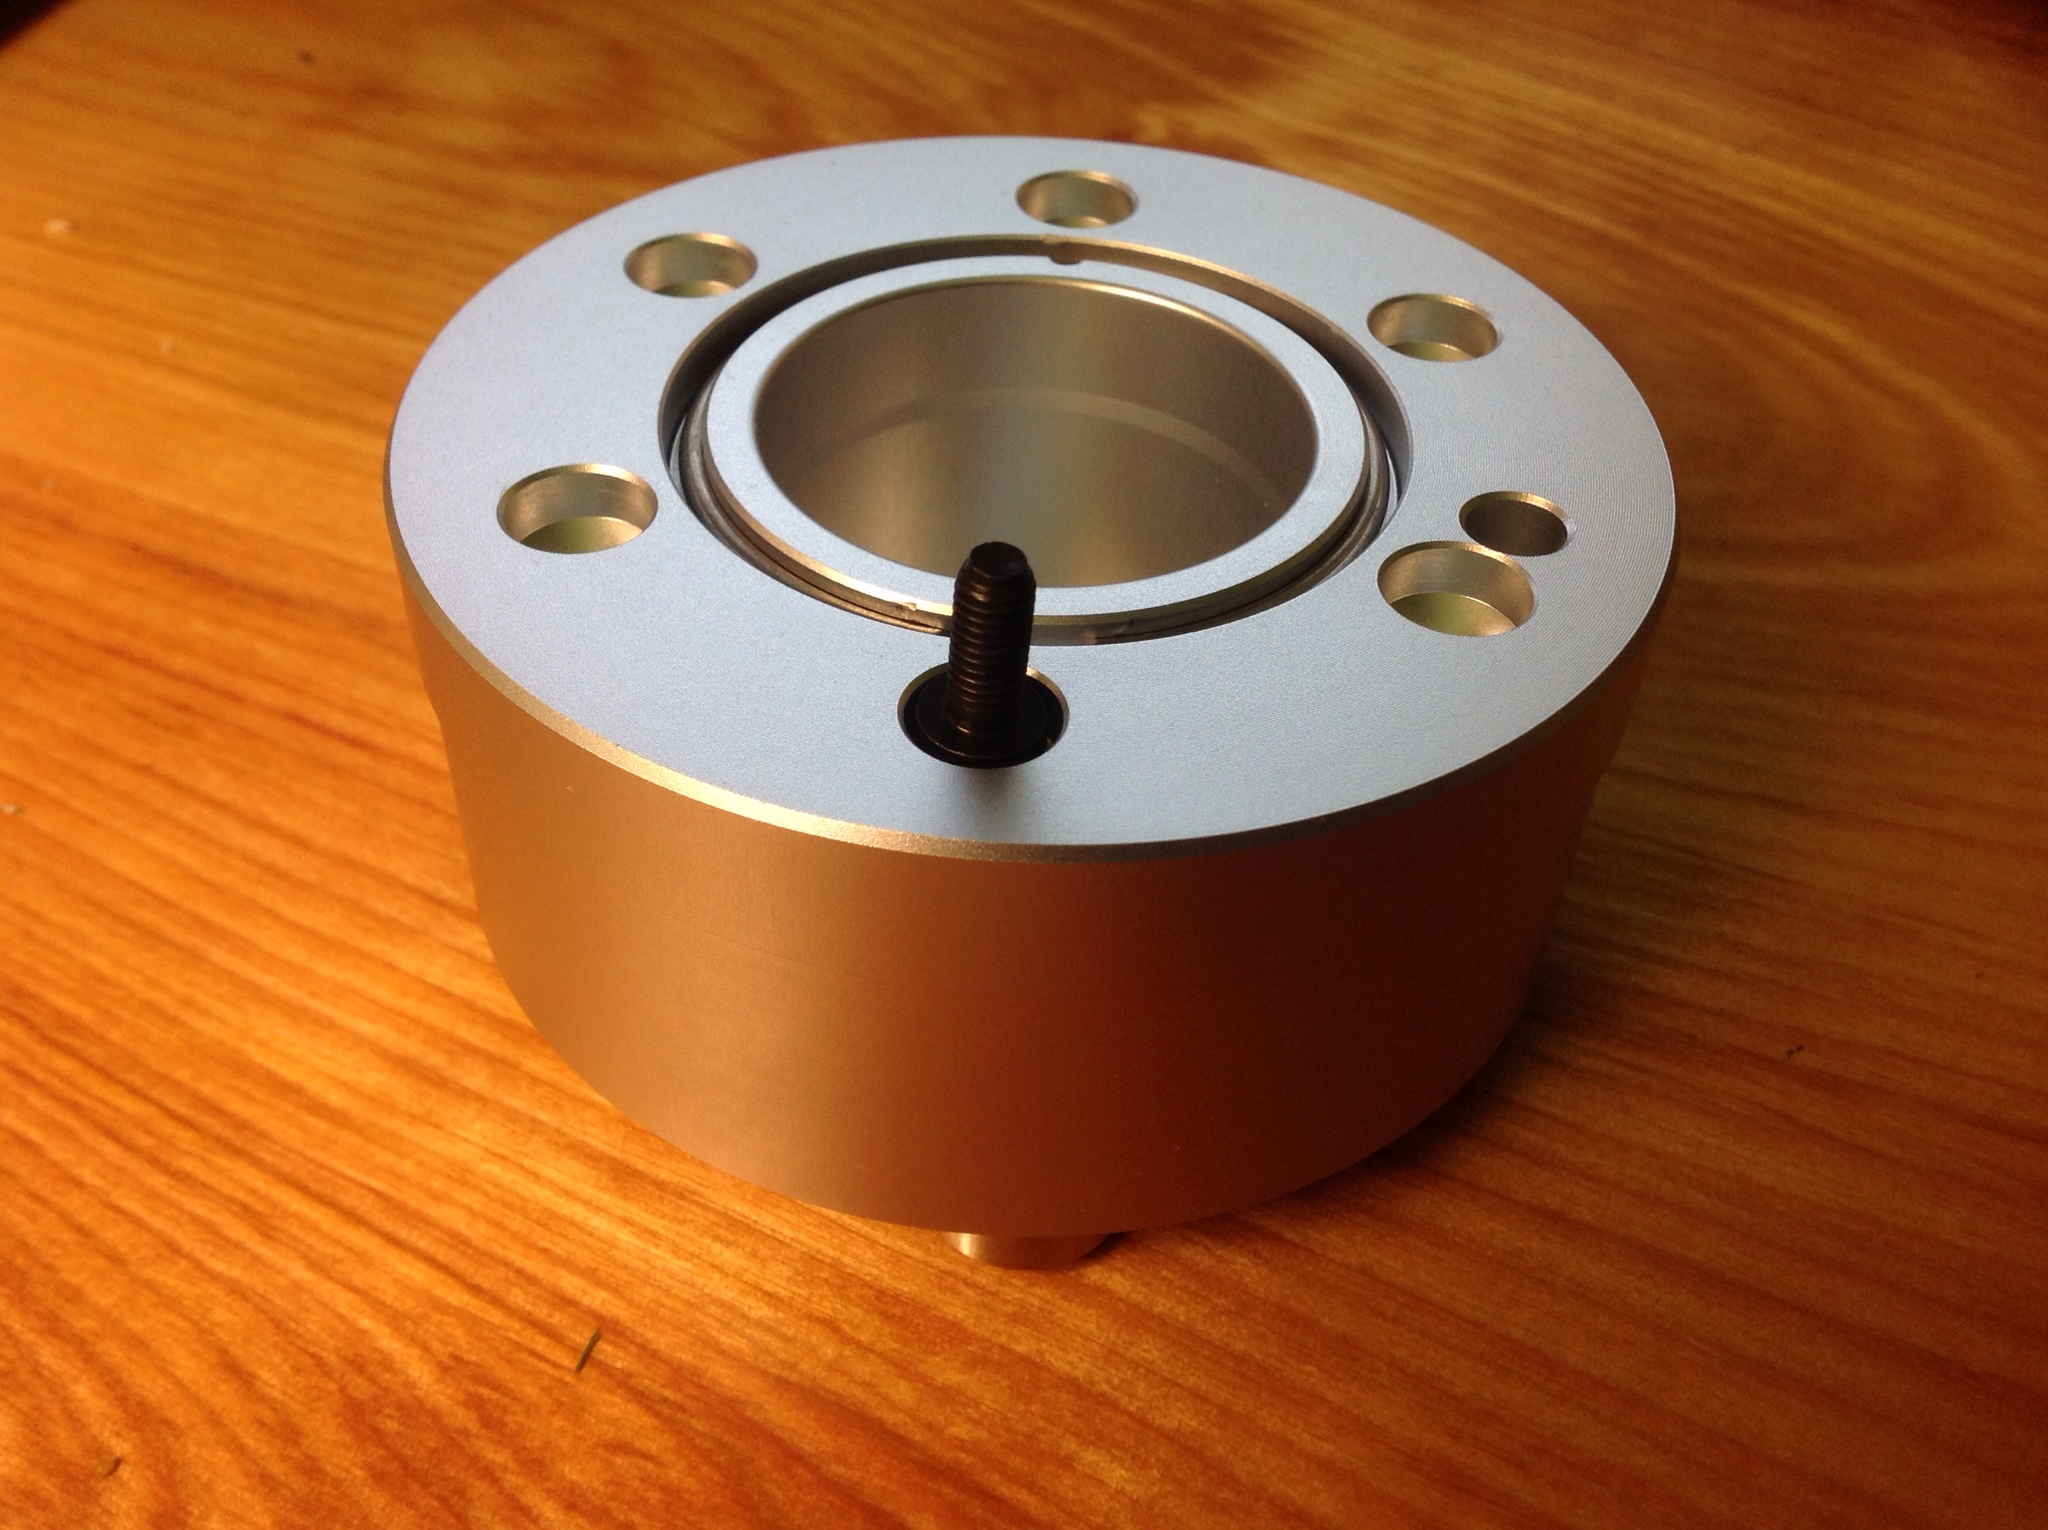
Right off the bat, a couple things to note. They sell a vehicle specific hub for the 88-91 civic but it's a long hub. Which means if you are planning on using the disconnect as well, you're going to be eating your steering wheel. I picked up the 210s hub adapter which is for the 92-95 civics.
They stated the turn signals might not work, but they do still for me. All of the triggering apparatus appears to be further down the steering shaft. One problem you'll run in to right away though is the gap.
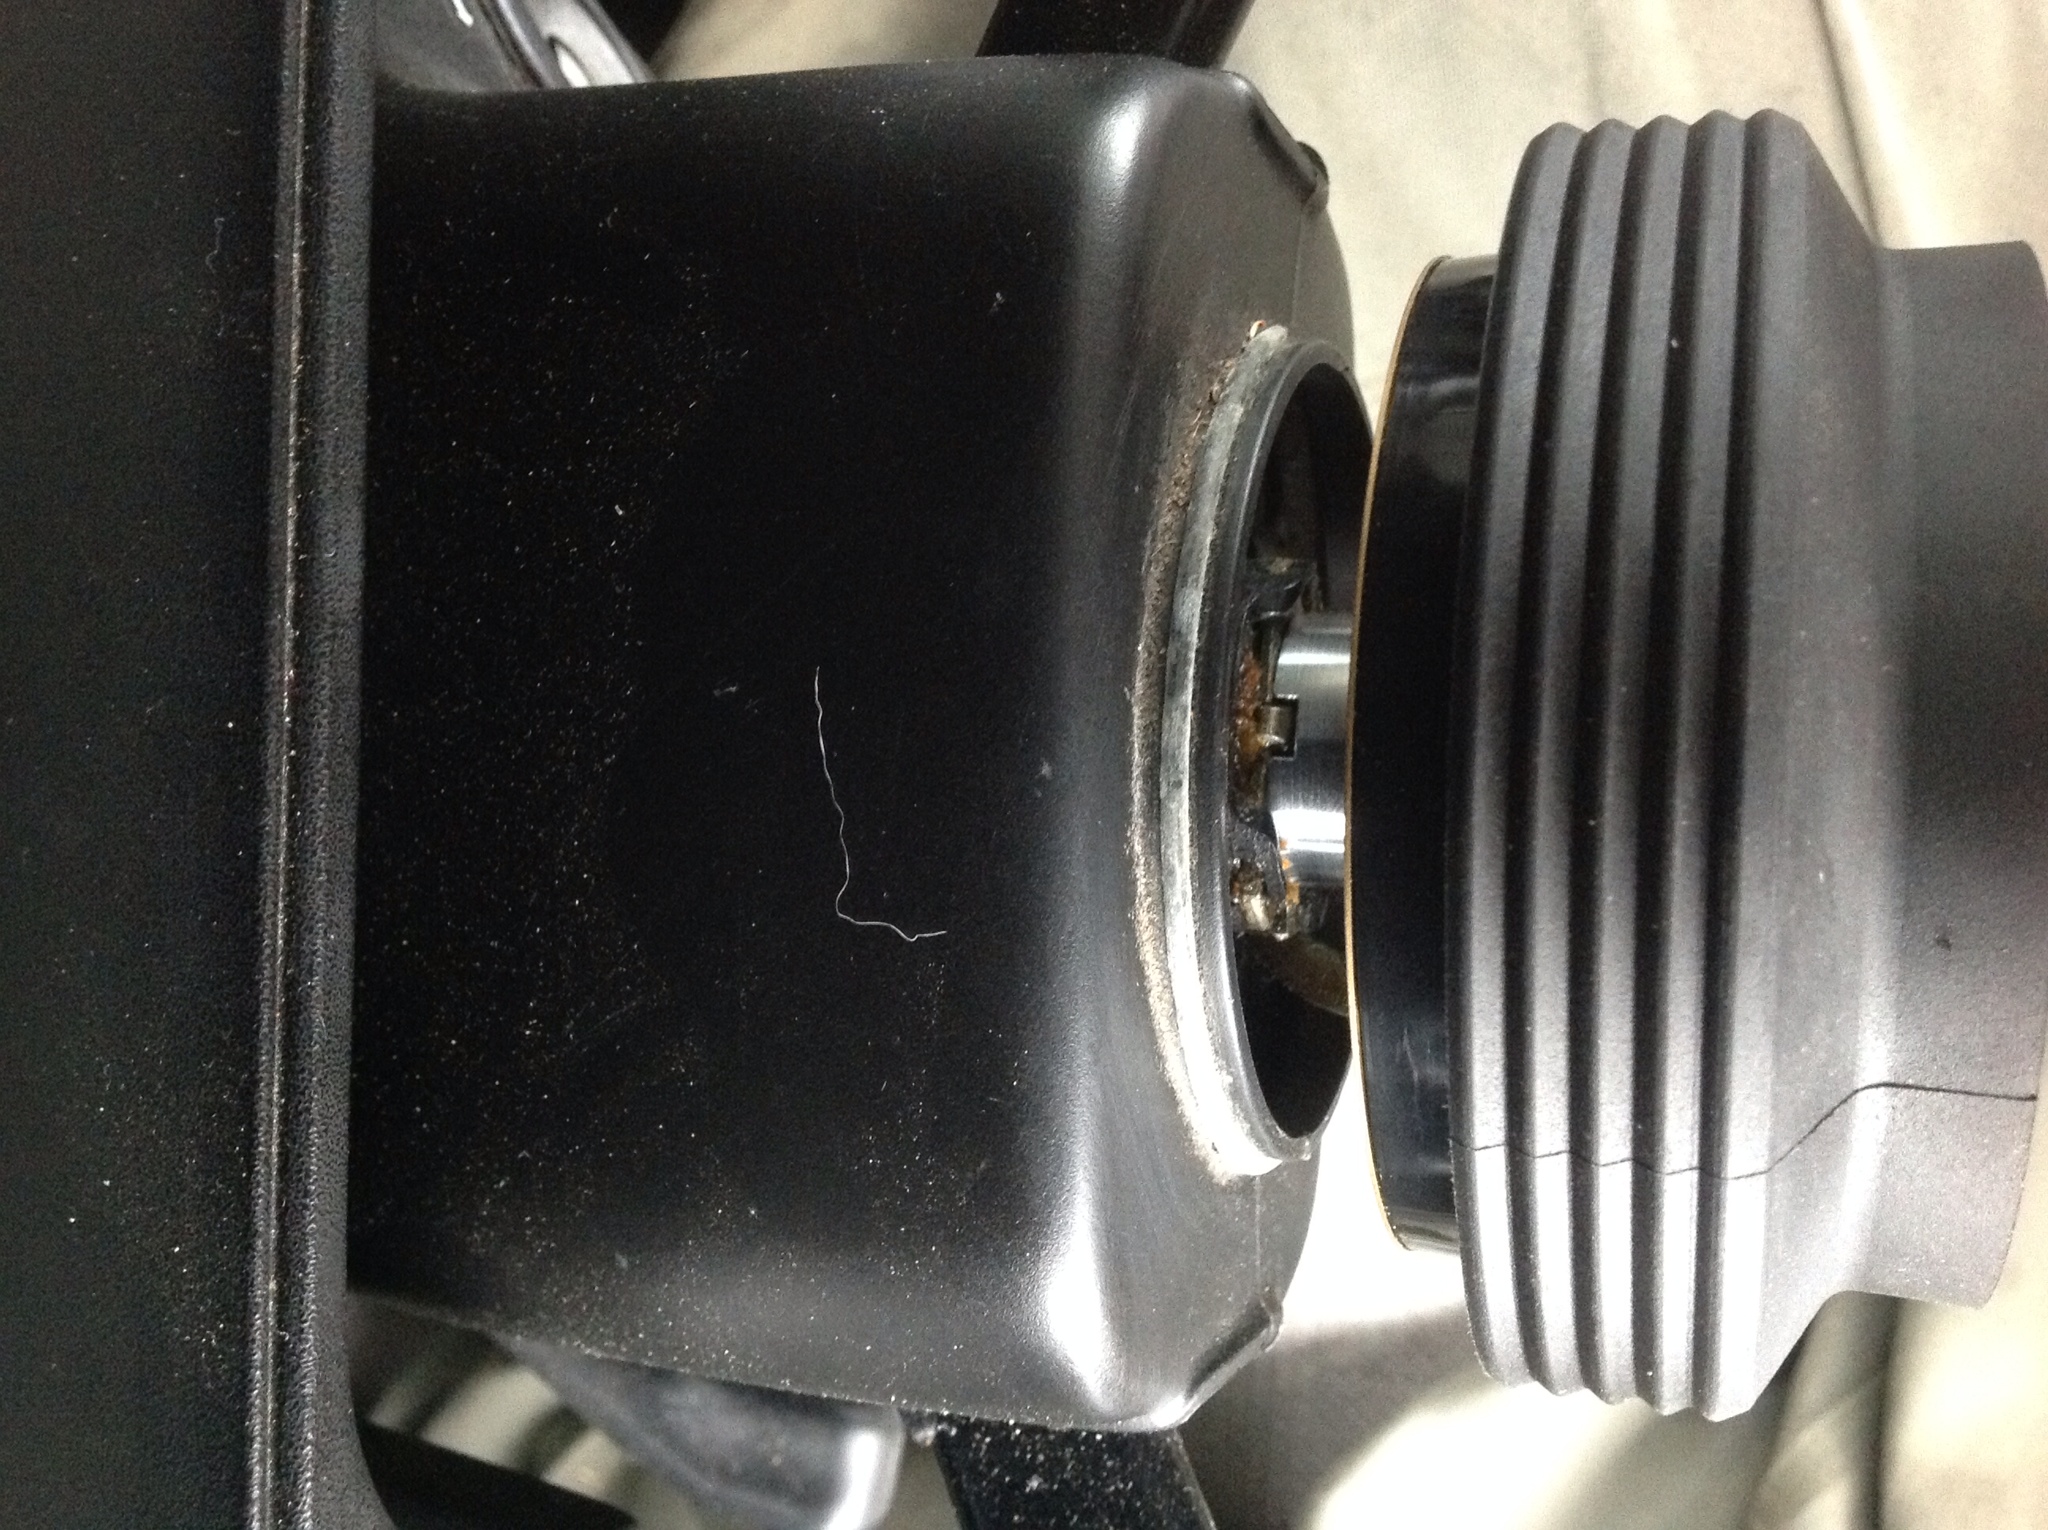
Never mind the gunk and random cat hair, that gap puts the major kibosh on your "clean" install. Fortunately there is a fix for this. Works bell sells long bellows which can then be trimmed to length. The down side, I had to order it from Japan. ¥500 part but another ¥2500 in customs and shipping fees. I asked a couple state side places that sell Works Bell and either they didn't know or they lied to me. The answer I got back was they only sell them as complete kits, Works Bell doesn't sell them separate. Well that's clearly not the case as I have one coming in.
Pics of that when it arrives.
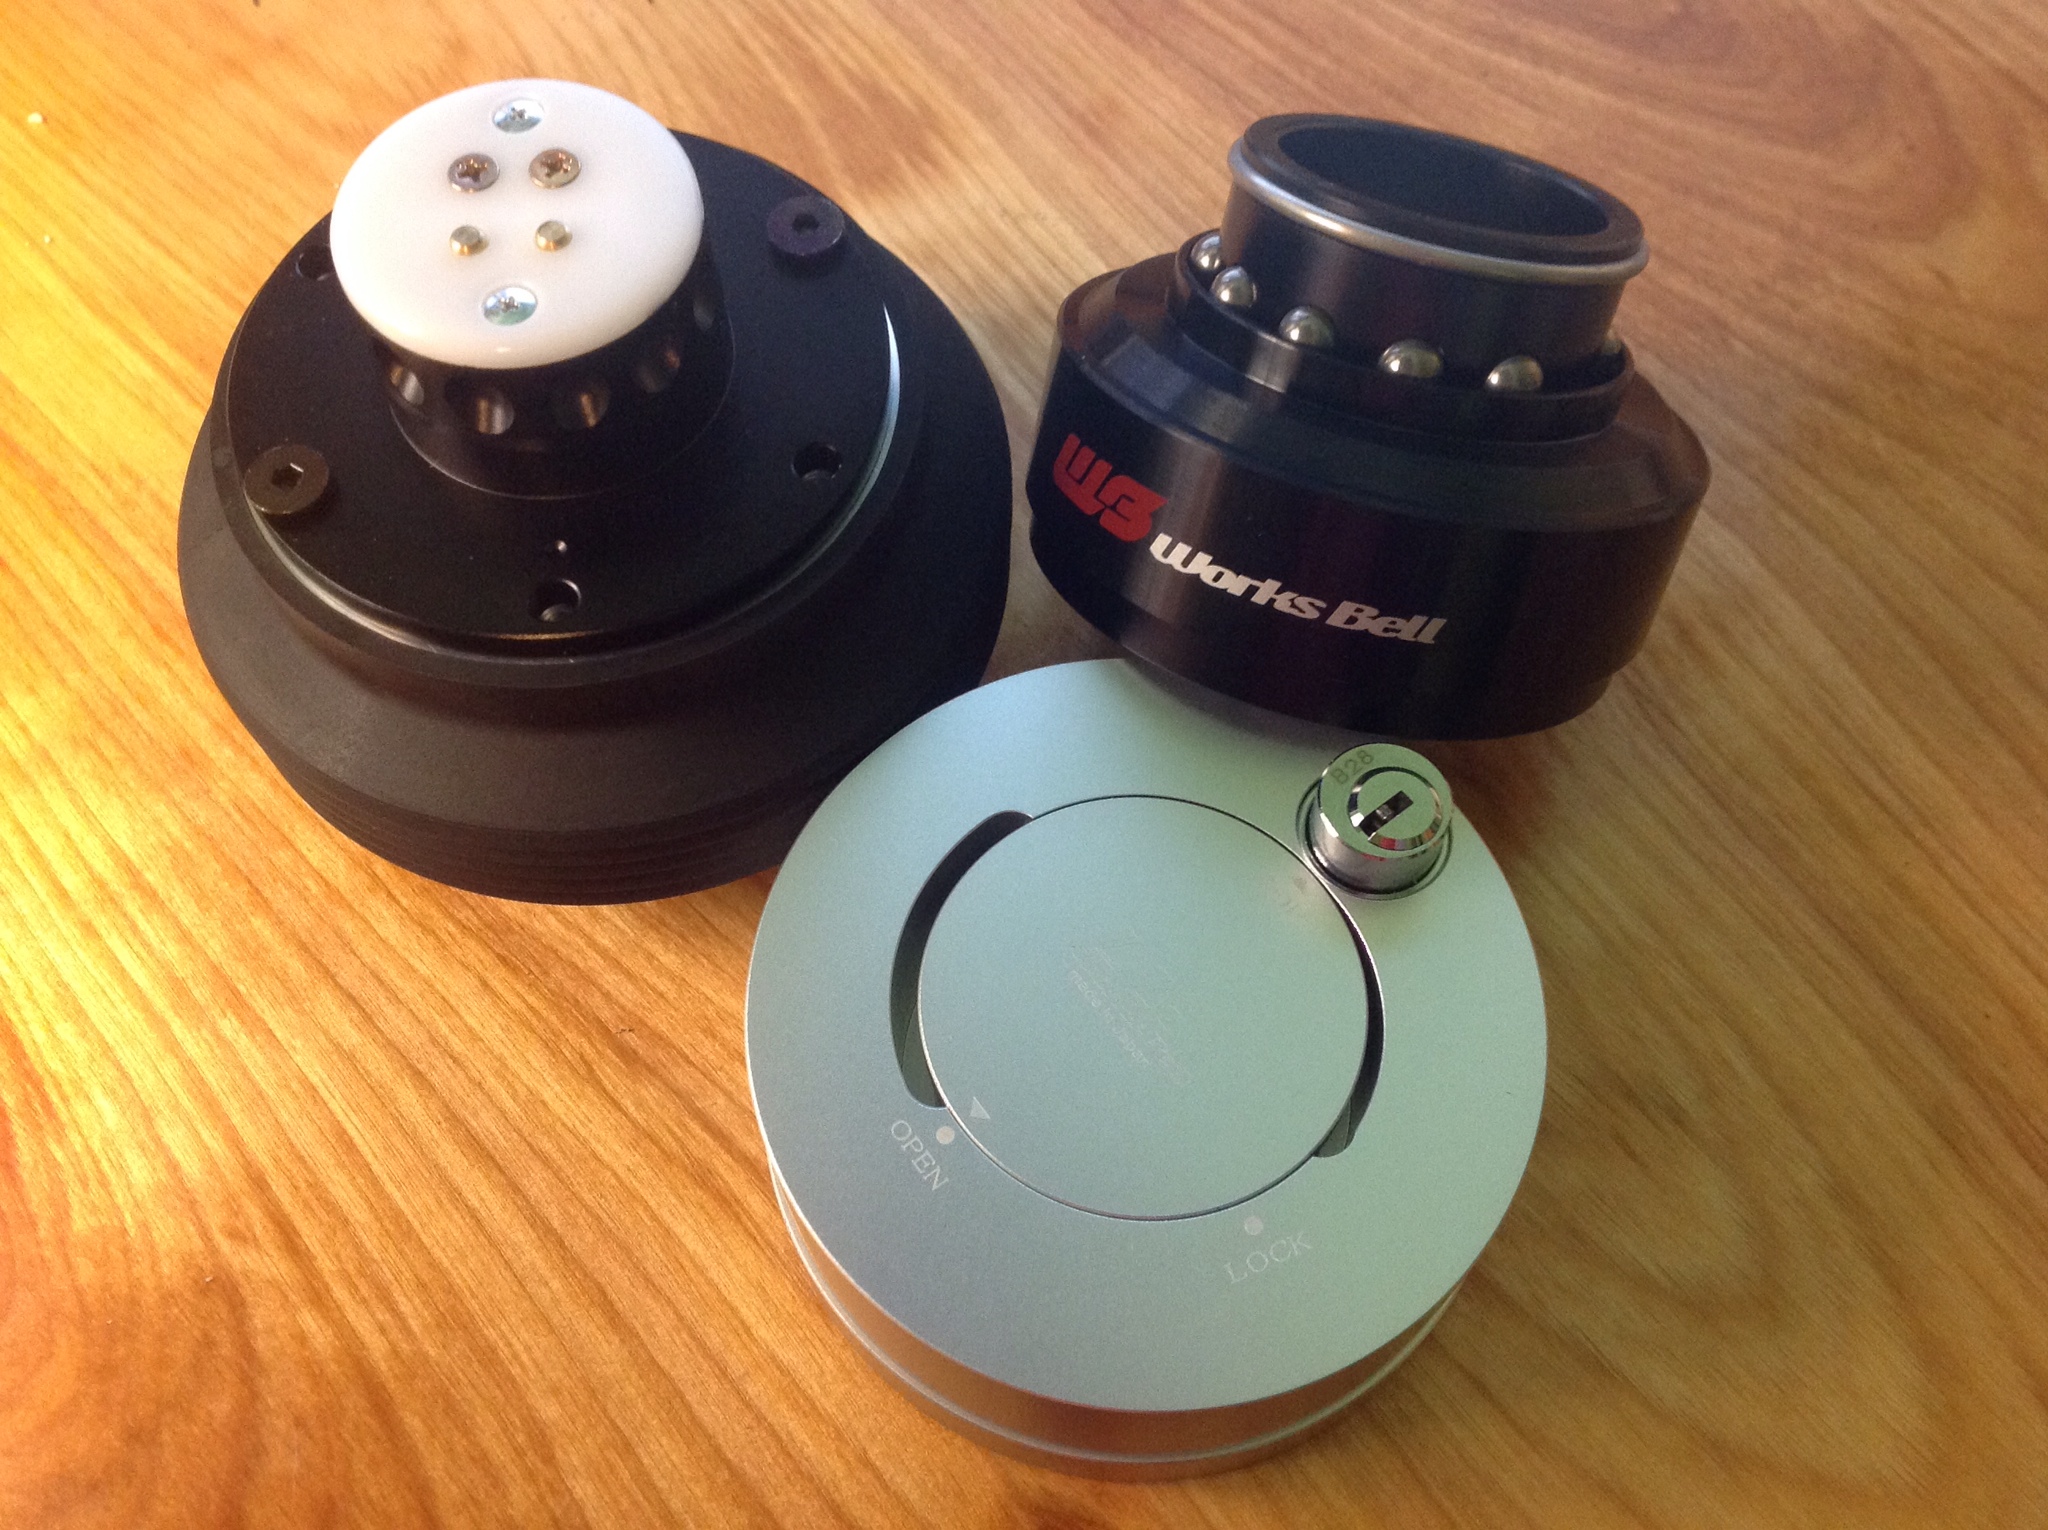
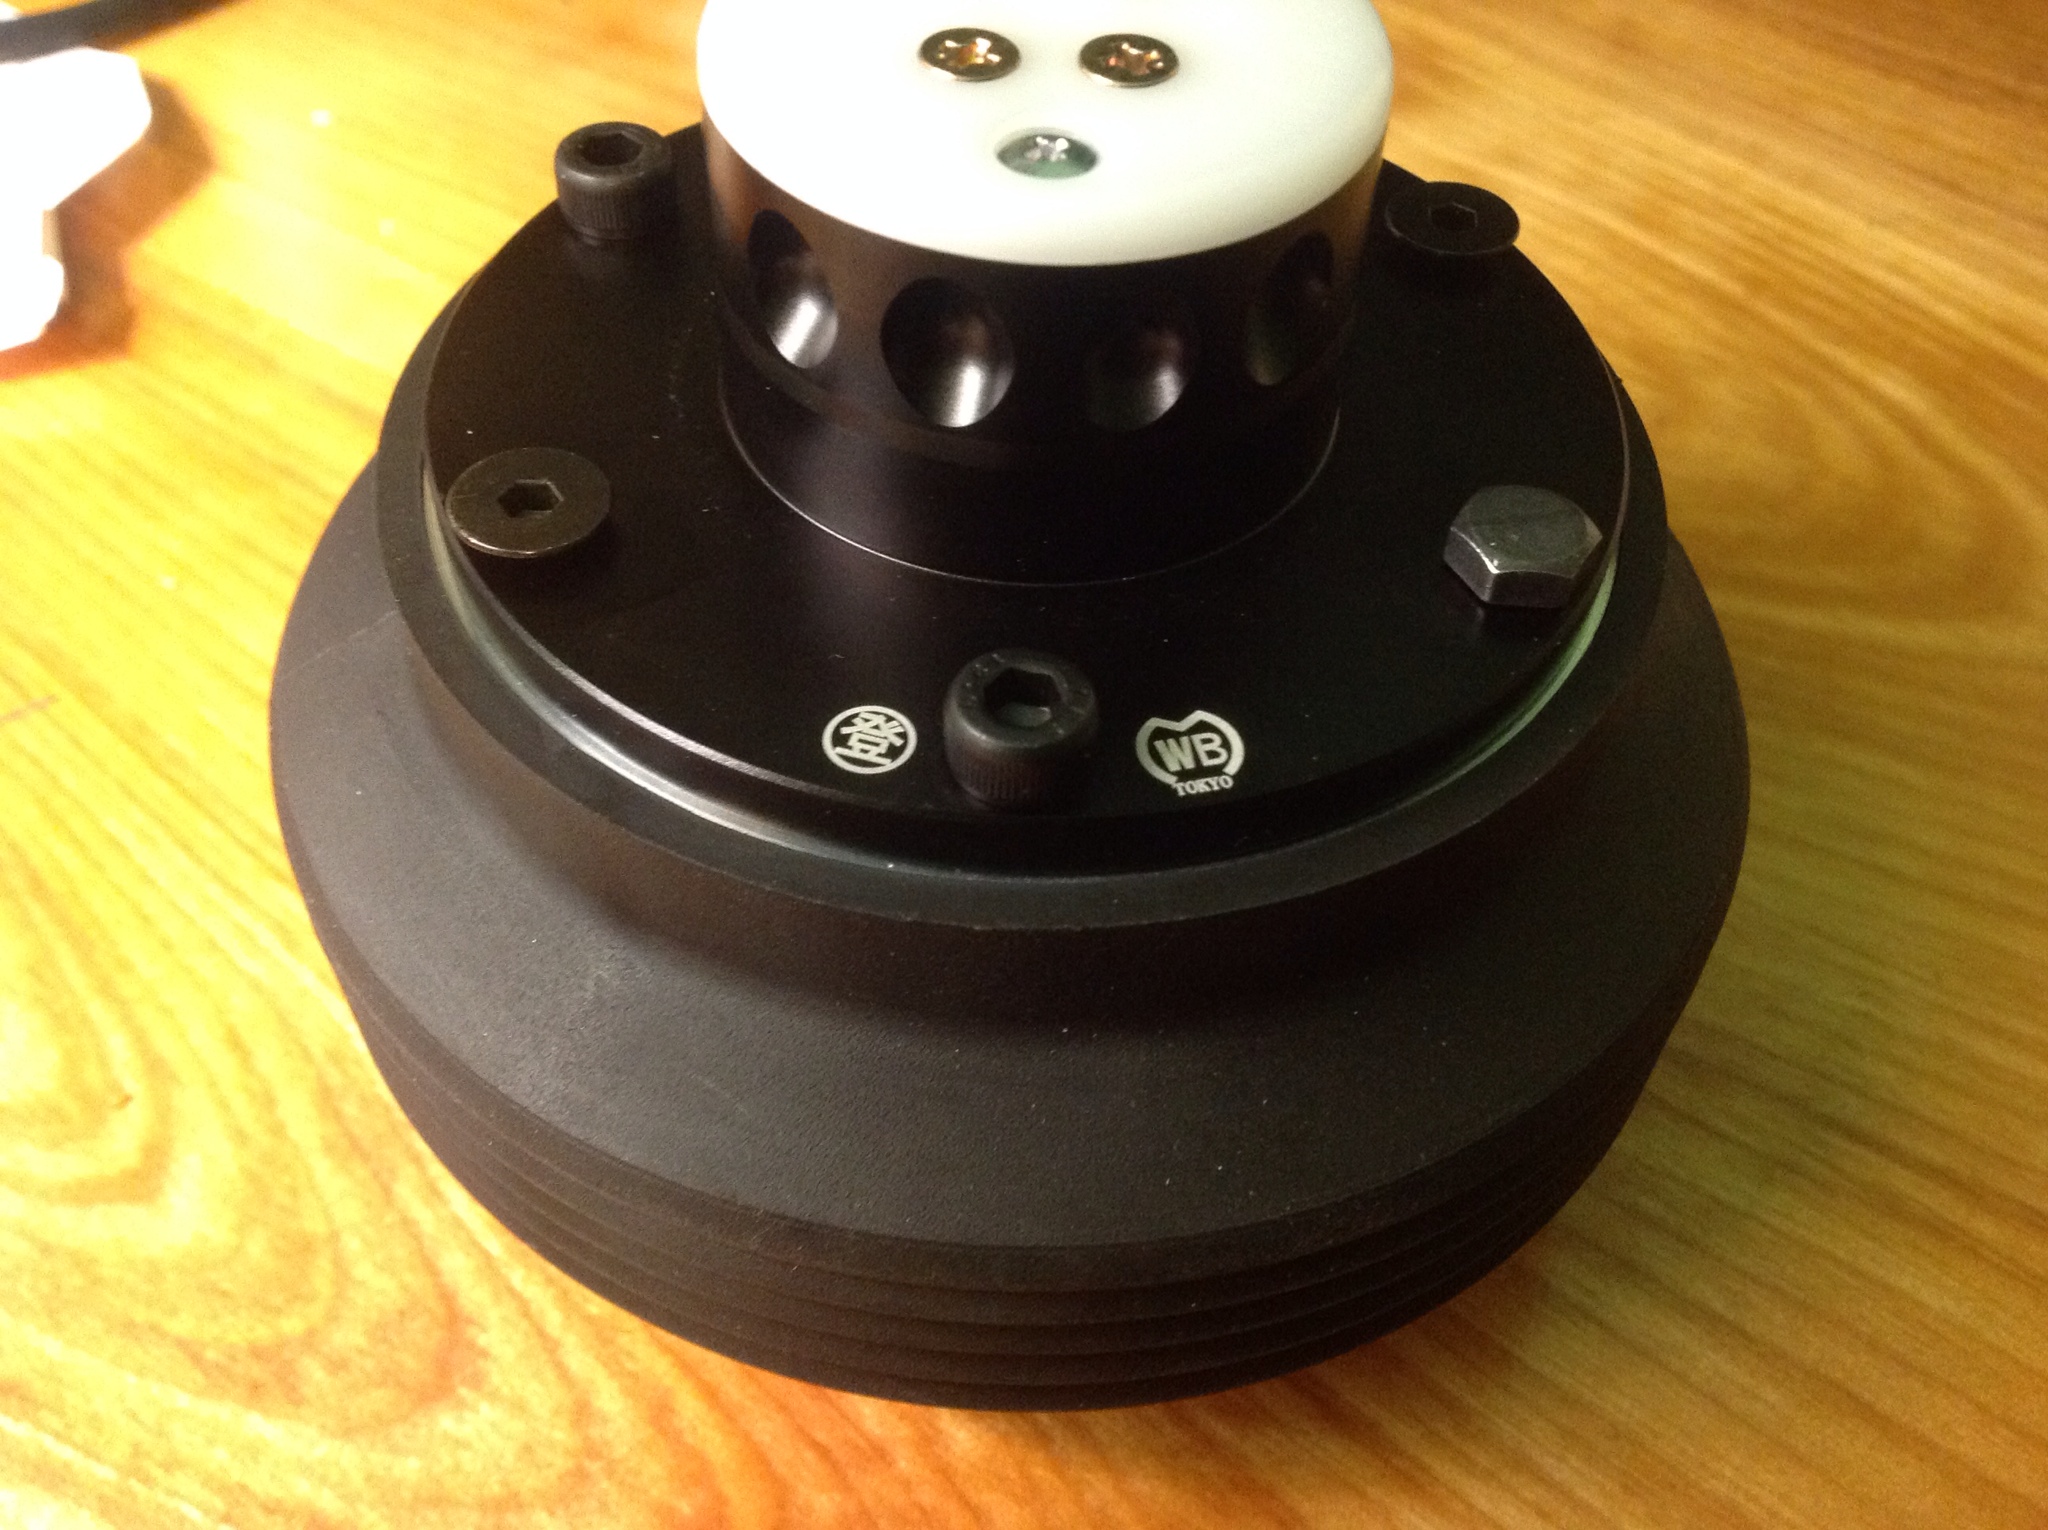
Next item is more of a personal preference. The hub itself comes with two sets of screws. Cone head hex screws or hex bolts. The hex screws would have been great had the quick release adapter had counter sunk and beveled holes for the screws to bolt in to. And I'm just not a fan of the hex bolt.
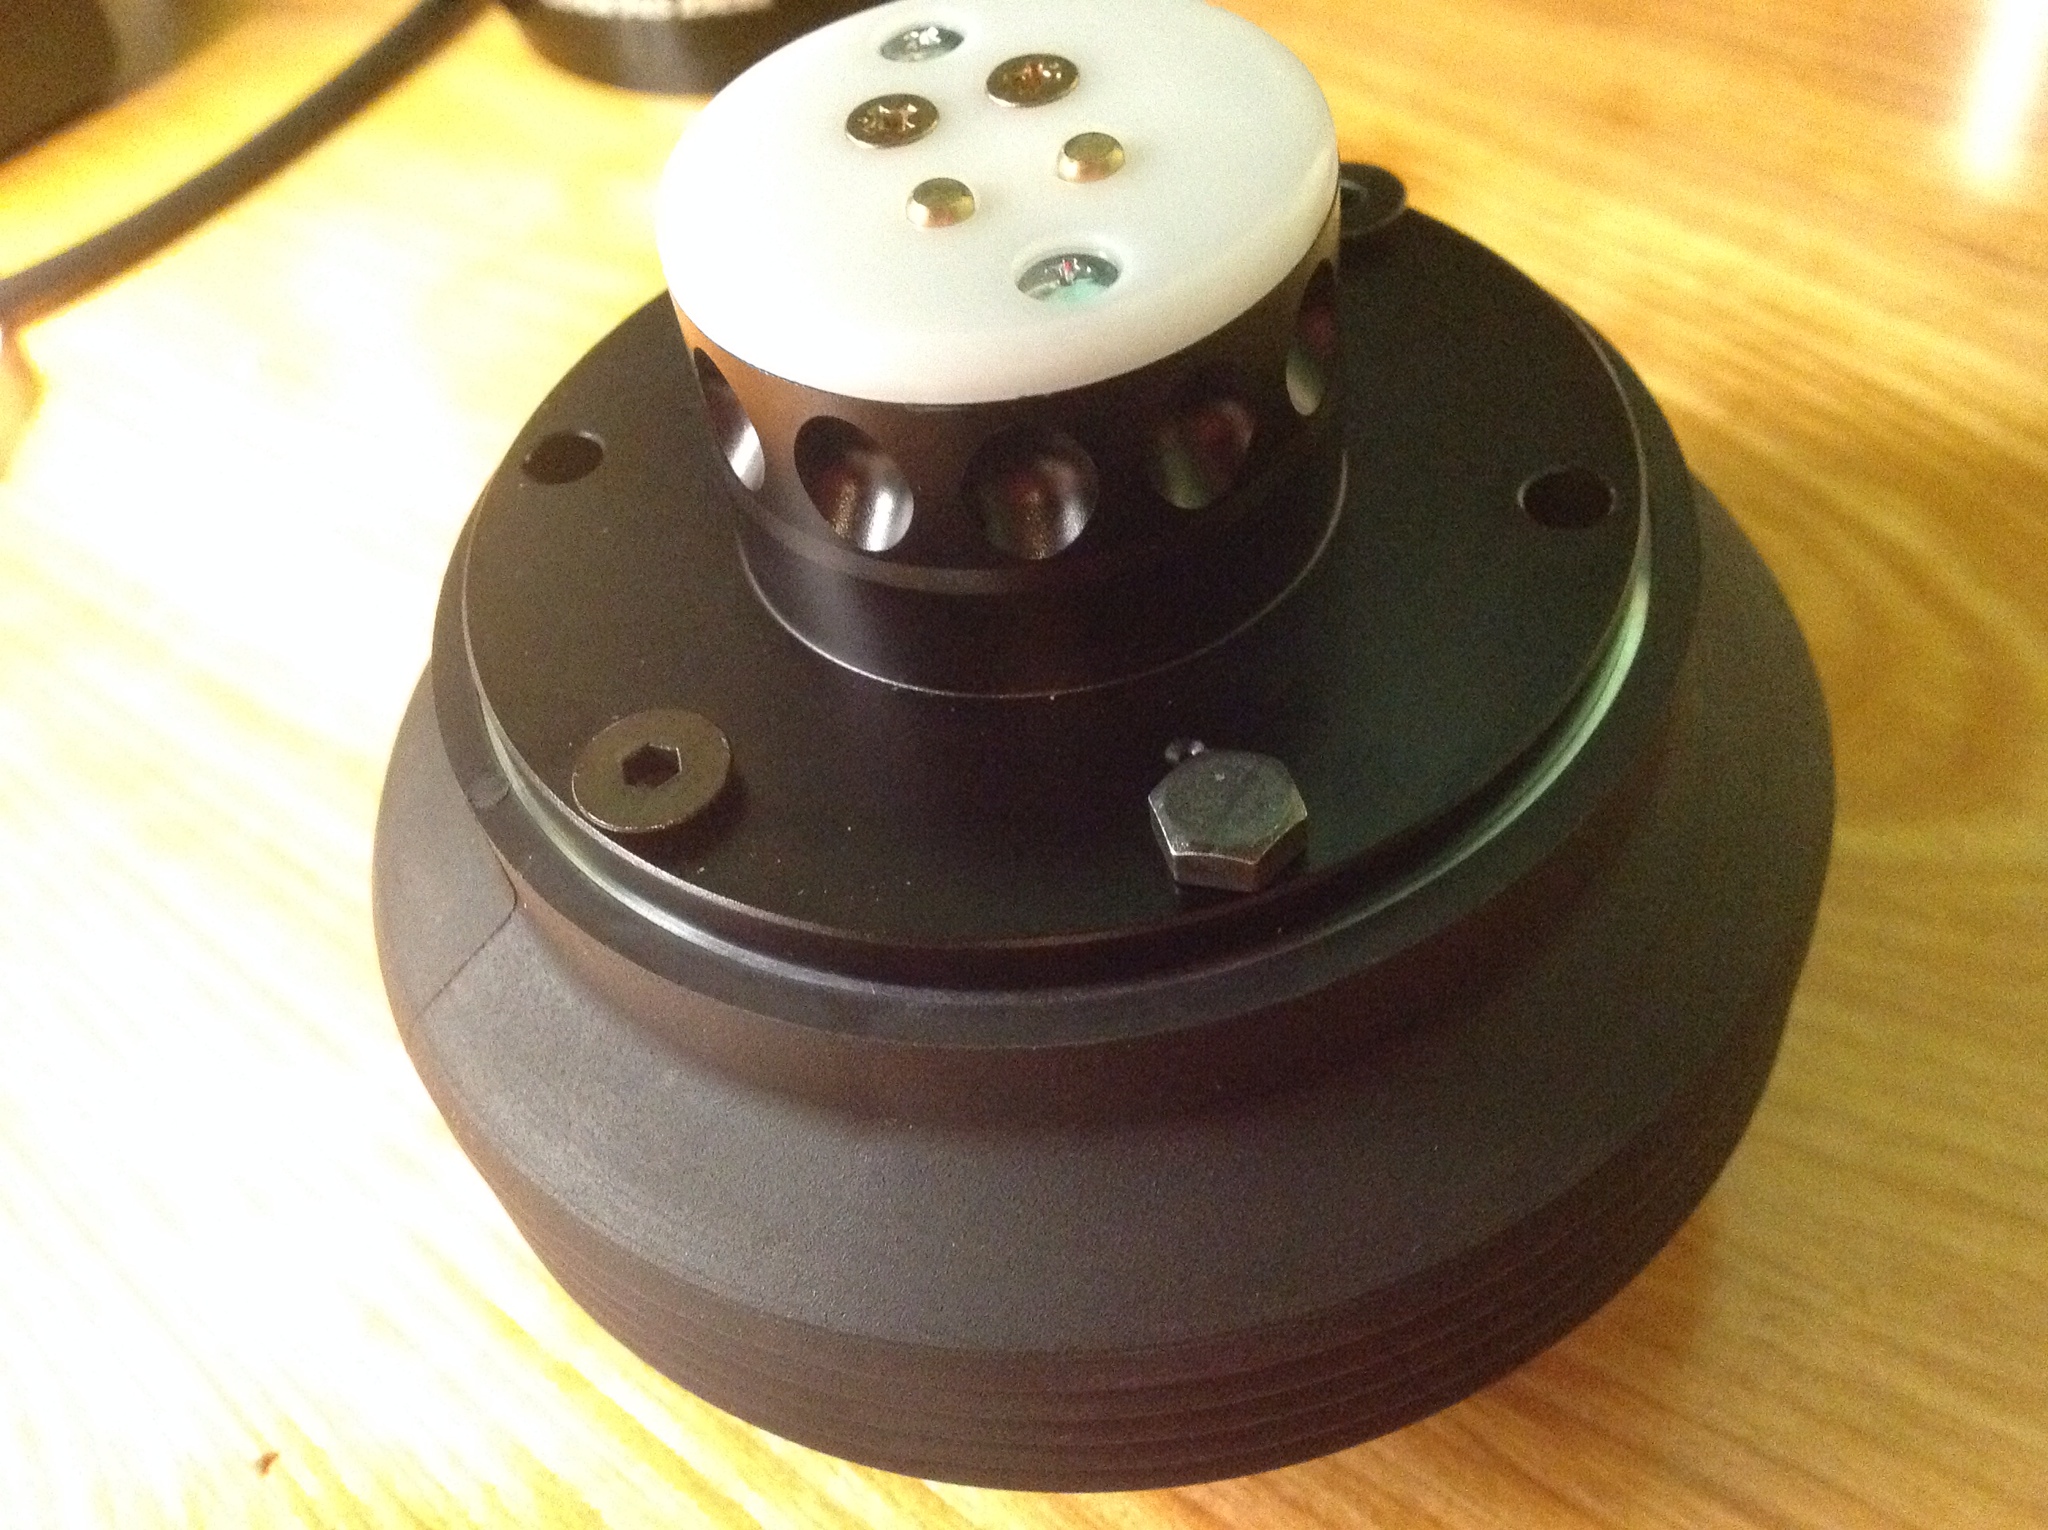
My solution here was to get some hex cap screws. I beat feet on down to the local Home Depot and they happened to have just what I needed there.
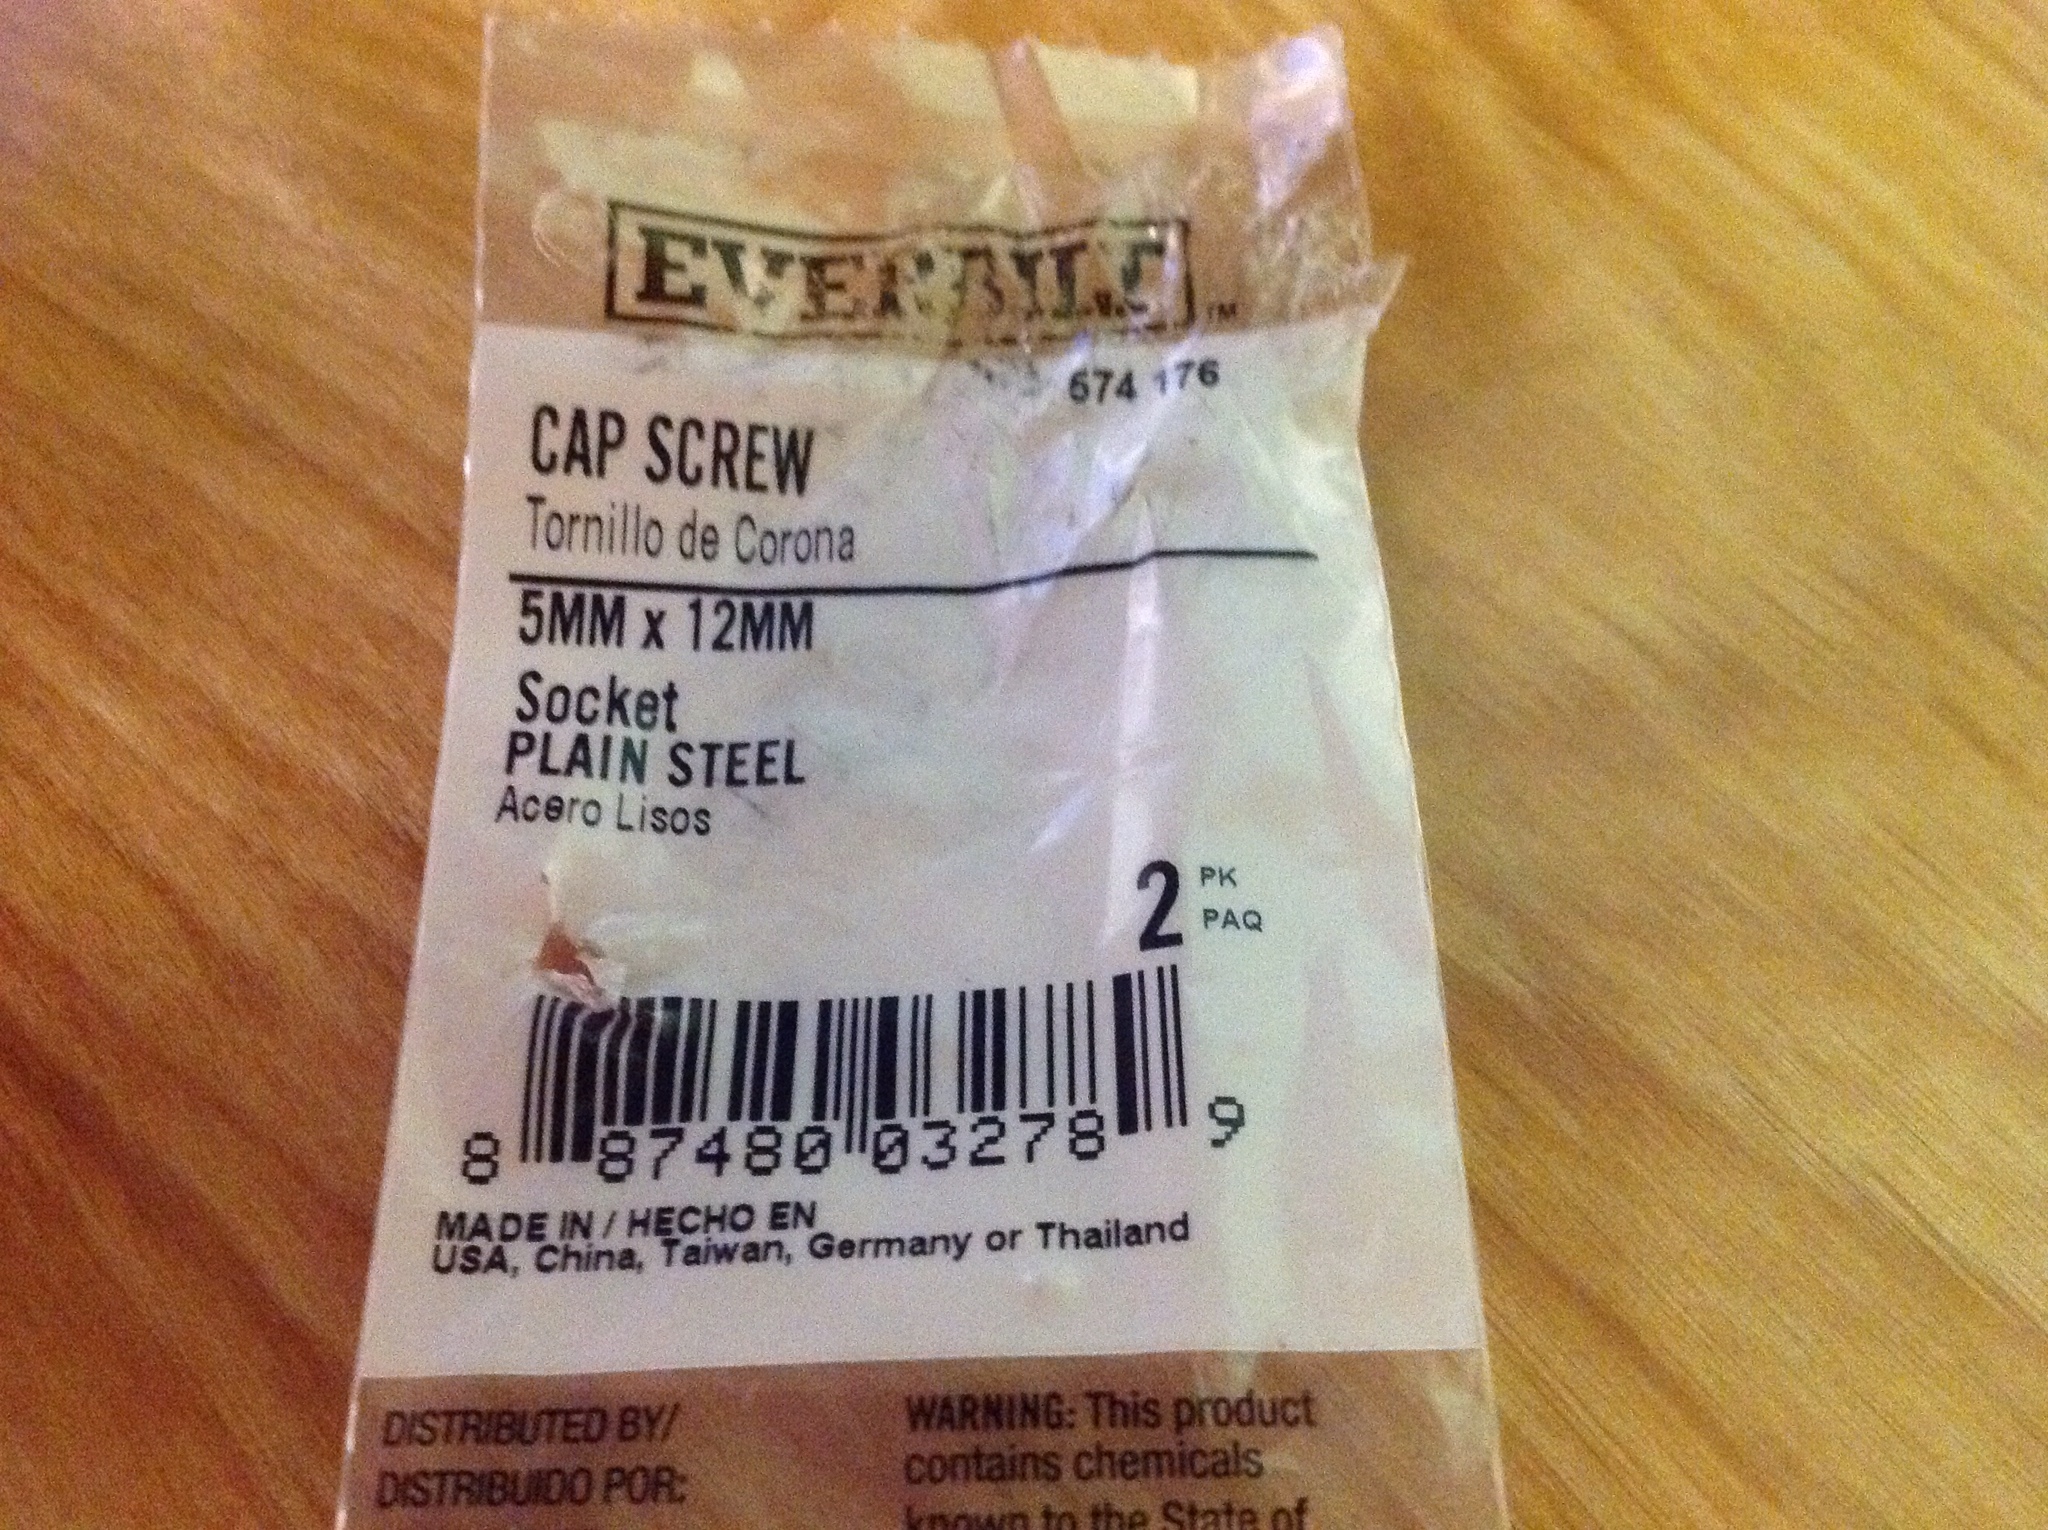
Pretty much exact same length as the original parts, and the screw head fits in the recesses of the locks perfectly. You can see how flush it is.
I personally think they look much better than the hex bolts. And well the tapered hex screws, well they aren't even right for this application.
More updates to follow as the steering wheel arrives as well as the long bellows.
Let me know if I missed anything or there are any questions.

Right off the bat, a couple things to note. They sell a vehicle specific hub for the 88-91 civic but it's a long hub. Which means if you are planning on using the disconnect as well, you're going to be eating your steering wheel. I picked up the 210s hub adapter which is for the 92-95 civics.
They stated the turn signals might not work, but they do still for me. All of the triggering apparatus appears to be further down the steering shaft. One problem you'll run in to right away though is the gap.

Never mind the gunk and random cat hair, that gap puts the major kibosh on your "clean" install. Fortunately there is a fix for this. Works bell sells long bellows which can then be trimmed to length. The down side, I had to order it from Japan. ¥500 part but another ¥2500 in customs and shipping fees. I asked a couple state side places that sell Works Bell and either they didn't know or they lied to me. The answer I got back was they only sell them as complete kits, Works Bell doesn't sell them separate. Well that's clearly not the case as I have one coming in.
Pics of that when it arrives.
Next item is more of a personal preference. The hub itself comes with two sets of screws. Cone head hex screws or hex bolts. The hex screws would have been great had the quick release adapter had counter sunk and beveled holes for the screws to bolt in to. And I'm just not a fan of the hex bolt.

My solution here was to get some hex cap screws. I beat feet on down to the local Home Depot and they happened to have just what I needed there.

Pretty much exact same length as the original parts, and the screw head fits in the recesses of the locks perfectly. You can see how flush it is.

I personally think they look much better than the hex bolts. And well the tapered hex screws, well they aren't even right for this application.

More updates to follow as the steering wheel arrives as well as the long bellows.
Let me know if I missed anything or there are any questions.
Comments
Steering wheel arrives tomorrow. Expect an install writeup in a day or two.
It's a Personal Grinta 350mm in polyurethane. I am not a fan of leather products and avoid them as I can. Just a personal preference.
On with the install.
Start with pulling your horn fuse.
Pop the horn button out and you'll find a 19mm nut back in there.
Pop your boss on. This one here is the works bell 210s
Your implementation may vary but here is the first hiccup I ran in to. The boss is for the eg civics and as such the horn spring contact is in a different spot. See how the spring arm is contacting a plastic disc instead of the contact ring.
I bent it into shape like so.
Now you can see it is clearly contacting the horn ring.
On a side note the turn signal controls are further down the stalk so you don't even have to worry about them. That was quite nice.
Next bit of the install is connecting the steering wheel boss to the quick release hub. The ring is a grounding ring that allows quick release while retaining horn functionality. This is easy, at least with the works bell kit. Smaller wire connects to the hub ring, larger wire connects to the pass through.
Make sure you run the wires through the grounding ring. I made the mistake of connecting one of them prior and it was a tight fit to undo.
(Random note here, not as much of the steering wheel shaft comes through so the nut itself is not engaging the nylon locking part of things. You may want to go with a dab of purple or blue loctite here if you feel anything loosening up.)
A bit difficult to make out here, but you have two alignment dimples. Just make sure they are indeed lined up.
Groovy.
Here is the long boss cover vs the short one. I detailed how to get them earlier in the post. Shame on local dealers for lying about works bell not selling them outside of kits.
Unless you want the horrible gap as also mentioned previously, you are going to need the long cover and to trim it down.
Trim it long and then work your way back ring by ring. Since going too short is going to not make you too happy. If you do happen to go short by a ring, you can shove the boss down further, but you will have a bit of aluminum showing from the boss. So your choice there.
Either way much better than this.
Next is assembling the steering wheel. The works bell kit details two horn buttons, one grounds to the horn metal itself, the other is a two wire setup. The personal button as you can see is a two wire setup.
What this means is you need to do a slight modification to the wiring. The ground ring wire is a narrow terminal. So you need to remove it and install a 1/4 female connector.
It's the black wire below.
Once that is done you can plug them into the horn button. Also there is a ground ring in the quick release, that needs removed as well so the horn button fits.
Bam! All buttoned up. Disregard it being sideways, it was the picture I took and the sun is down now, I may update it later. Also I know I'm missing my gauge bezel. Doing a repair on it that'll be another quick post.
Niceness.
It does move the steering wheel about an inch closer to you, so the turn signals are a little farther to reach, I was able to do so easily though and I'm not a tall guy. If you happen to be or know a machinist I bet you could get the face of the boss turned down a bit and be golden.
A couple videos to follow as I get them edited. Trying to operate the quick release while holding the ipad was not very successful, so bear with the quality once I get em up. I'd have my girlfriend hold the iPad, but she just laughs at me when she sees this.
Quick comparison of the stock vs 350mm wheel.
Thanks guys.
Price breakdown as follows, I'm leaving the steering wheel out. It's just a polyurethane Personal/Nardi, their wheels bolt right up, no adapters needed. Since I figure people will want to supply whatever wheel they prefer, it makes it sort of an arbitrary number.
Prices are with shipping.
$180.31 Works Bell 210S EG short hub (Purchased from evasive motorsports)
$31.00 Long boss cover (Purchased from Works Bell Japan. $5 part $25 customs and shipping. If you have a decent works bell retailer you can see if they can throw one in on their next order. It's just called a "Long Boss Cover." Evasive told me that Works Bell only sells them as complete kits, so I either got an idiot or a liar when I contacted them. That causes them to not have my business any longer.
$320.00 Rapfix II quick release kit, black. (Got this from eBay from seller Tuneshop. Last check at this date he was selling them for $331.20, free shipping. I best offered $300 he countered $320 so I said good enough. Coincidentally his prices are the same as what Evasive is offering, but different shipping address, not sure what's up there. Either way, no shipping cost, so that's fine by me.
$130.00 Rapfix II lock in silver. (Also from the same seller on eBay, free shipping. Originally asking $142.
So grand total, minus the steering wheel was $661.31 (please don't tell my girlfriend.)
My opinion from here on out will likely be biased regarding quick release hubs. If you're going just standard hub and a different wheel, awesome. Rock whatever. I do believe though that Works Bell was the original, or at least the company that perfected this tech, and everything else is a copy of what they're doing. From the best knockoffs being NRG down to the eBay crap that I would love to be in your will if you happen to put one of those on your car.
I was expecting there to be a minuscule bit of play when everything was locked together. There's not even that. Once the quick release hub is locked, it's a very very solid connection. Granted they do say they eventually wear, but only time will tell regarding that. I love it, I love being able to pop my steering wheel out and putting a lock right on the hub when I've got it parked.
If anyone around here happens to have a NRG kit I'd love to check it out, just to compare. But hey, this is legit JDM right here.
A sparco one that was massive and had me "eating" the steering wheel.
And my current NRG unit, totally understand the gripe against knock offs and steering wheels are one of the most important components on a car so you shouldn't cheap out when it comes to safety...
In saying that though my NRG unit has been superb, great fit with the short boss kit and hub lock would recommend it to anyone never had any play or issues with it, locks nice and tight every time.
I do think their batman looking 3.0 or 3.5 whatever it is, is pretty cool looking and it's nice that their hub seems to sit better than the works bell. That's probably my only irritation about this one that I had to special order the long bellows and trim it to fit.