How To: DIY Wrinkle Paint In Colors Other Than Black
This will be a rehash from my build log but as it stretches across several posts I thought I might collect it into one 'How To'.
I was given a spare valve cover and throttle body cover by bam-bam so I could dress up my engine bay. After looking around a little to see what others had done I started forming opinions about what I might like to do. I saw a valve cover painted in red wrinkle by christoffer ( http://www.civicwagon.com/showthread.php?10849-Progress-report-Nao-with-Vtak/page4&highlight=christoffer ) which really knocked my socks off. Red wagon + red wrinkle = very cool. Somewhere along in there I heard a rumor about blue wrinkle so I started googling blue wrinkle paint and figured out I couldn't afford it. But while I was googling I found build logs where people had applied black wrinkle and then color of choice over that. After some indecision I decided to try it. On to the fun!
First things first, always use your PPE: Personal Protective Equipment. For paint, etc. you'll need a real respirator mask, eye protection, and it's not a bad idea to glove up while using any stripper.
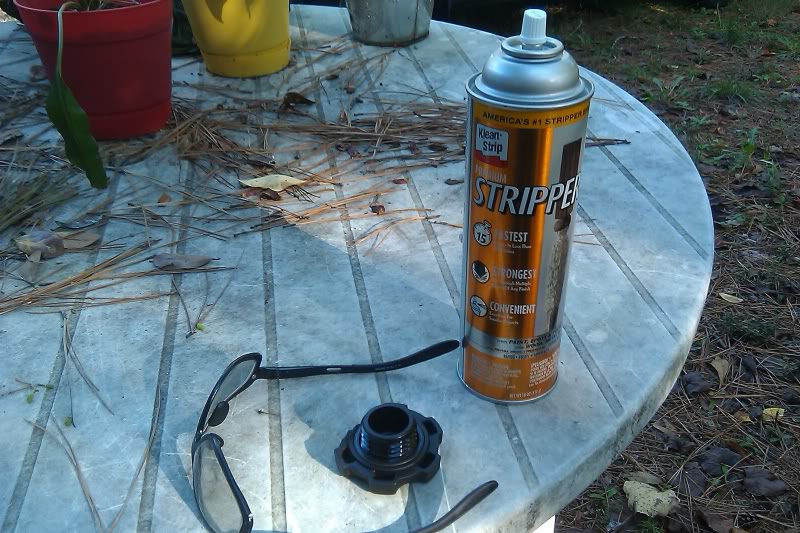
Weapon of choice for this first part is Klean Strip Stripper. I forgot to get the exact name before I threw away the can. It was about $5 at walmart. In addition you'll probably want something non-metal to scrape paint off the little nooks and crannies. For a few dollars at walmart you can get a set of three plastic scrapers / putty knives.
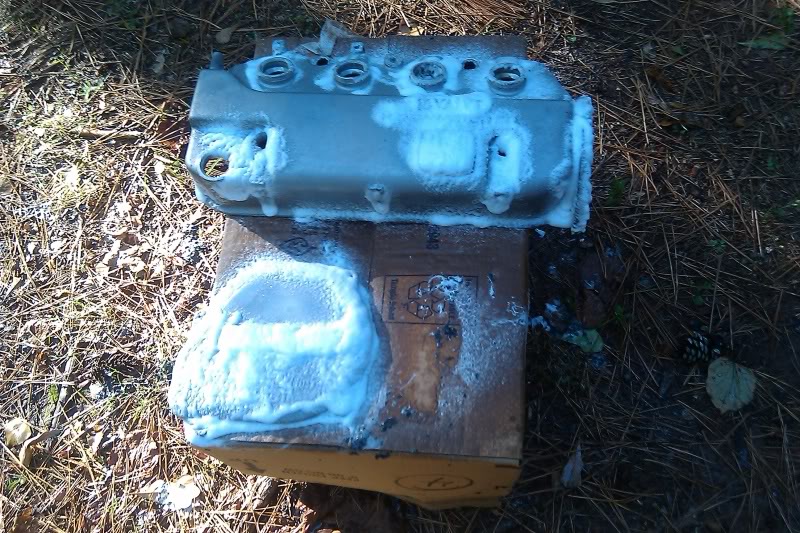
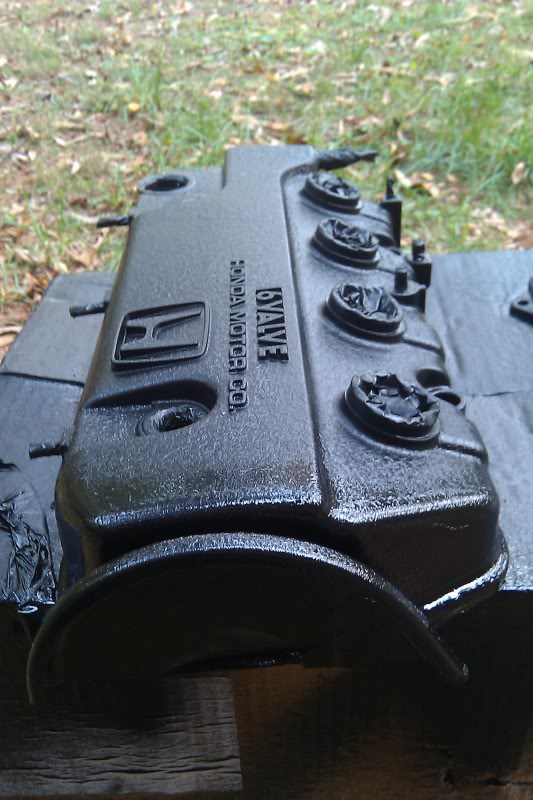
I forgot to take a before picture. Here's one at the second coating of stripper. In between, I hosed it off with the water hose which took off most of the paint easy-peasy!
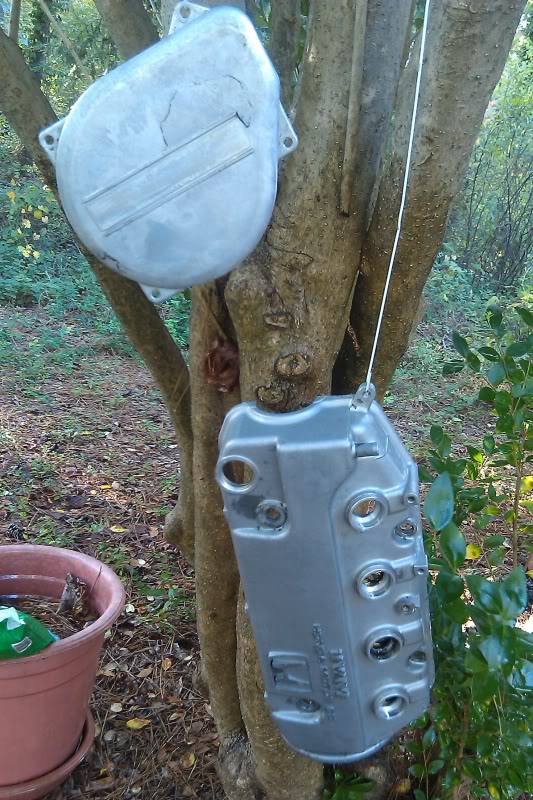
Afterward I hung the pieces to dry.
The areas showing discoloration are where the aluminum was exposed and corroded over the years. The faint line on the throttle body cover is from a different paint than the original wrinkle; it had been touched up before.
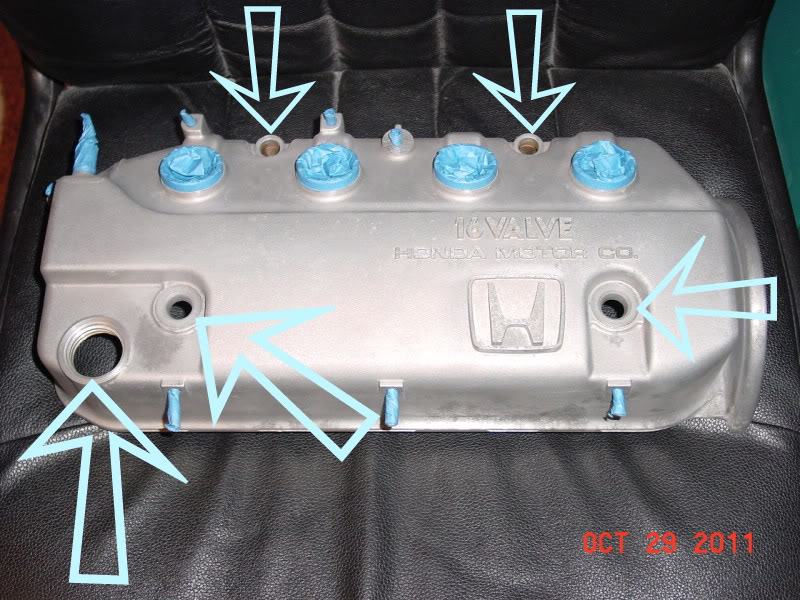
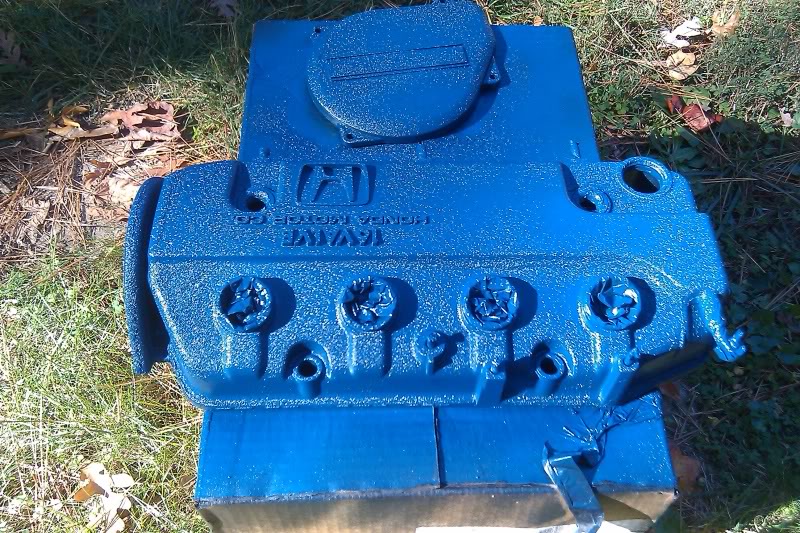
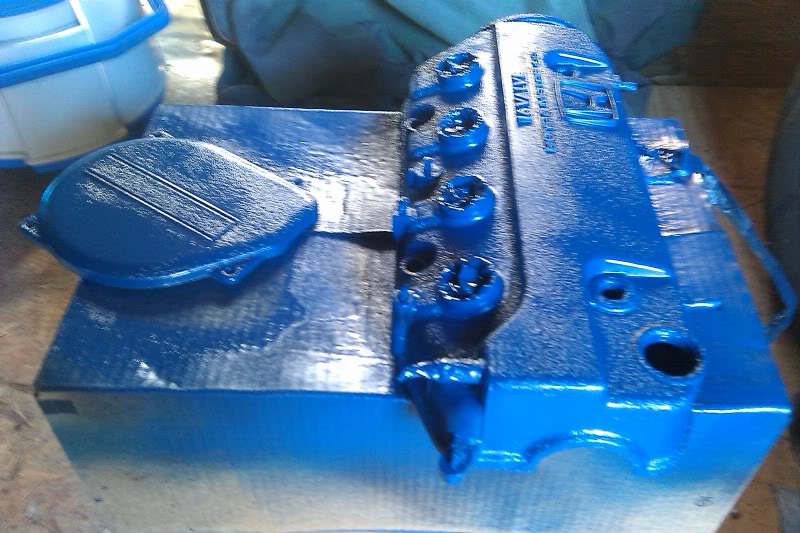
Next I gave it a good all-over sanding with red Scotch-Brite. The paint was gone but I wanted to get most of the corrosion off of the aluminum. Then it was time for masking. I masked with tape all of the areas I could get to and masked with petroleum jelly the other areas the couldn't easily be taped shown here by the arrows. After masking and degreasing it was time for wrinkle paint! For this I used VHT Wrinkle Paint from O'Reilly that was about $10. Following the instructions (which I'll only be paraphrasing here) I applied three coats, heavy. (Heavy, as in I used the whole can of wrinkle paint on these two pieces.) The directions say to put on the first coat painting in a horizontal direction, second coat in a vertical direction followed by a third coat in a diagonal direction. Again, follow the instruction on the can. Any time I've had good results from spray paint it's been because I forced myself to follow the instructions.
First coat, horizontal.
Second coat, vertical.
Third coat, diagonal.
After two hours.
And into the shed it goes to dry for a week.
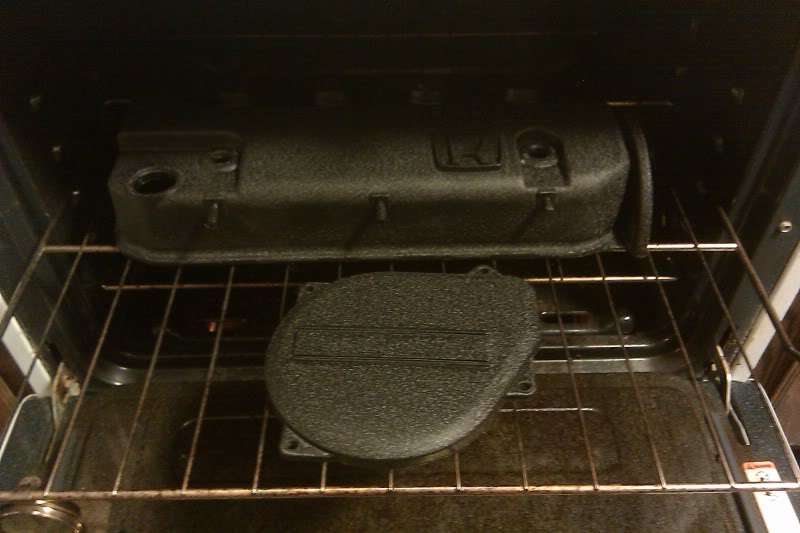
After a week I decided to go ahead and pop it into the oven for an hour @ 200 degrees to cure the paint. This is an optional step but I recommend it especially if you are planning to follow on with a color coat.
Okay, so that's wrinkle paint. As far a I can tell, black wrinkle is readily available, red wrinkle is a specialty item, and blue wrinkle has to be shipped directly from Japan. So I adapted.
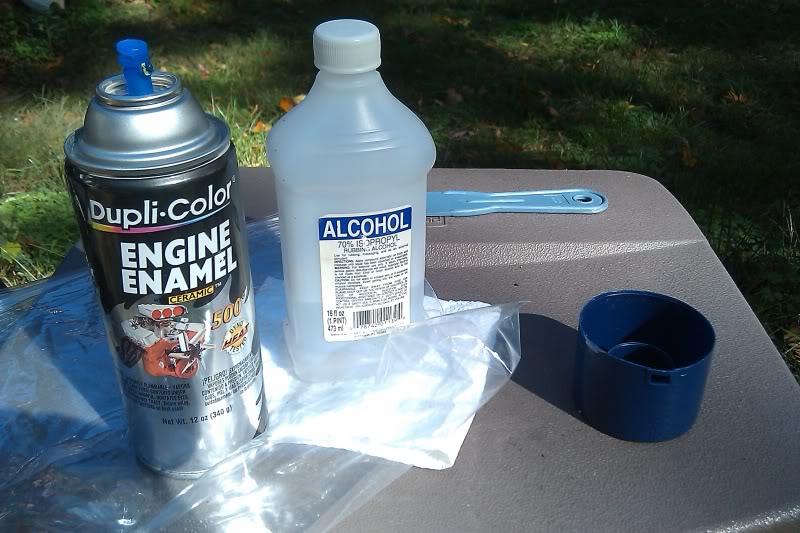
This color is called "Ford Dark Blue"... it looked about right and it was about $6 at O'Reilly. I use regular rubbing alcohol as a cheap degreaser. Before the first coat of any paint I glove up, dampen a paper towel with alcohol and give the piece a once over to remove any non-obvious oil or grease from handling and any lint that might get in the way.

First coat, light.
Second Coat, light.
Third coat, heavy, and back into the shed to dry for another week.
I started by popping them into the oven @ 200 degrees for an hour. Once they were cured (and cooled) I set about un-masking them. I learned a few things such as even 3M blue masking tape get sticky and brittle when you leave it on for two weeks and two trips through the oven for curing. Also, I think my vaseline masking dried up after the first time in the oven. So next time maybe I'll un-mask and re-mask for each coat.
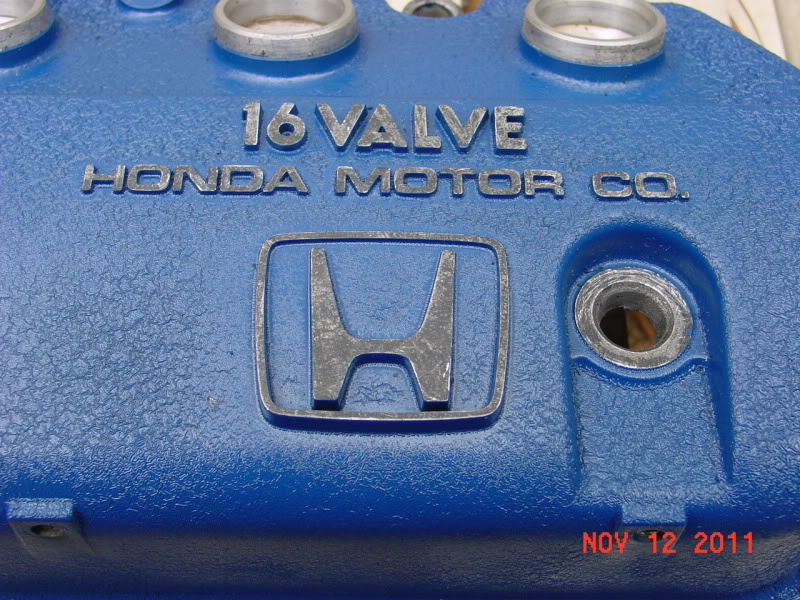
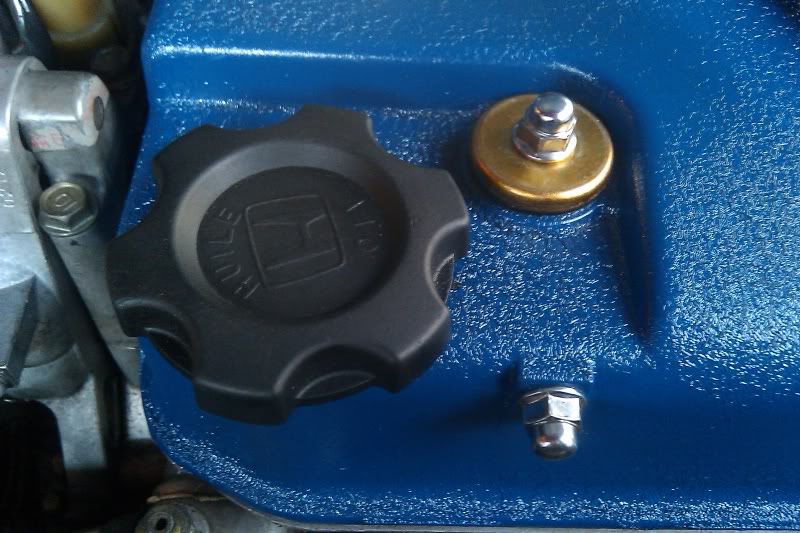
Once I removed all of the tape I got out a scraper... okay, maybe it's a putty knife, whatever, and scraped the paint off of the areas to be left 'in the white'. This should be a real hard-edged scraper like a regular steel putty knife to 'cut' the paint off instead of the plastic putty knives mentioned earlier which were only soft to avoid gouging & scraping your valve cover while removing paint. This worked pretty well and I only dinged the paint I intended to keep once. You can see it here just to the left of the H. I should be able to touch that up fairly easily.
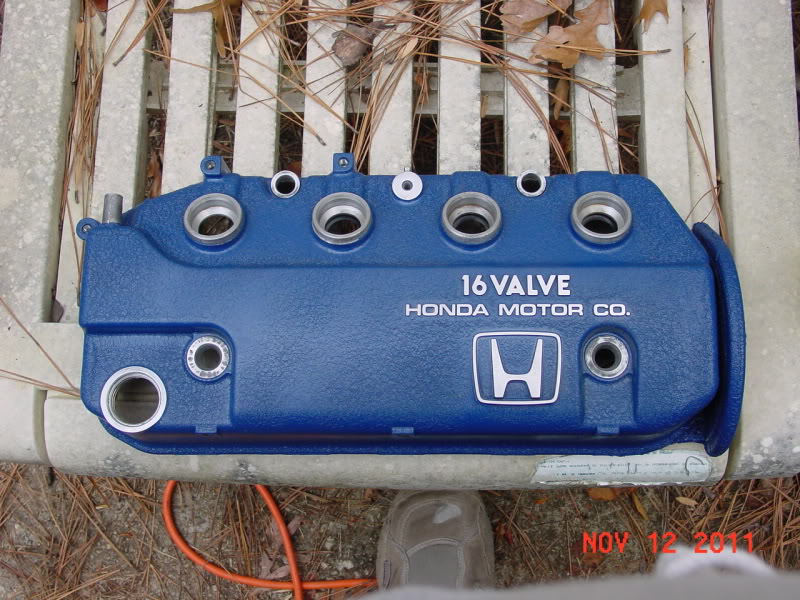
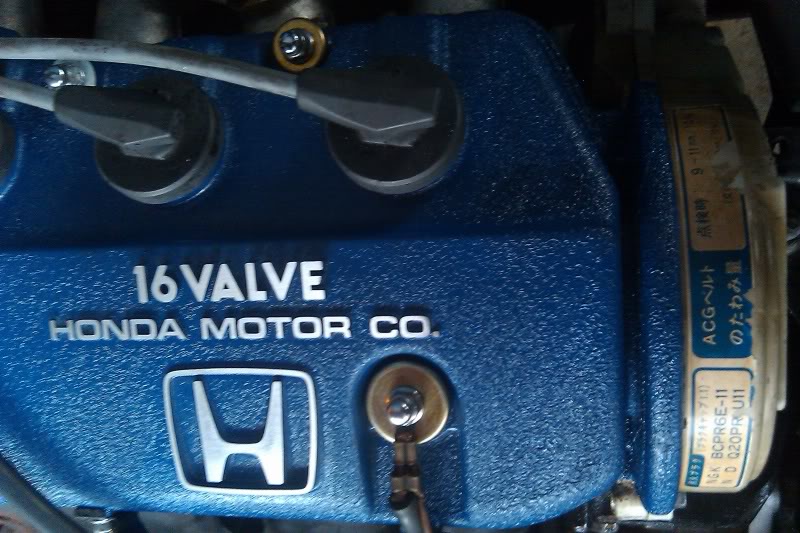
Then I got out my little Mouse orbital sander and slapped on a sheet of 220 grit paper and gave the areas to be bright a good sanding. This was gratifying in that it got the job done quite handily. The only problem might have been that since it's a orbital it left that funny snail trail pattern. You probably can't see that in this picture but it was there. While that will probably be fine for most of the spots I wanted the lettering to show that horizontal grain like stock.
So I left the sandpaper attached to the Mouse and with it switched off I used it as a sanding block and cut in a very slight horizontal grain. I'm not going to get super OCD about the recessed areas like the one to the right of the H because I can't quite get in there with my Mouse and hand sanding is not my favorite thing. As has been previously noted this is strictly polish on something not known for holding a high-gloss finish, figuratively speaking.
Here's the gouge I made with the scraper.
And here's the piece retouched. In the spirit of the package instructions I dabbed on three coats with a q-tip. Basically spray the q-tip, dab the gouge. The new paint here is a little "bright" or shiny but I'm fairly sure it'll dry down. There was one other spot that didn't get wrinkle painted OR blue painted because it's the bottom surface of the little arm doo-dad that sticks out to the rear the the vc. I still forgot to get pictures! So, I de-greased it and shot it blue. Three coats, good enough!
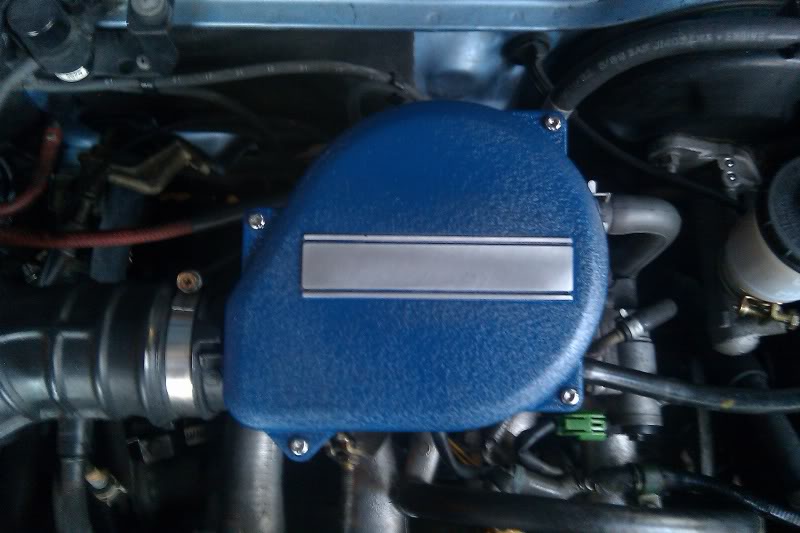
The throttle body cover got a similar treatment to remove the paint from the raised horizontal bar. This would be a great spot for a HCW.com sticker!
Heck, my blue paint even goes pretty well with my sweet JDM timing belt cover!
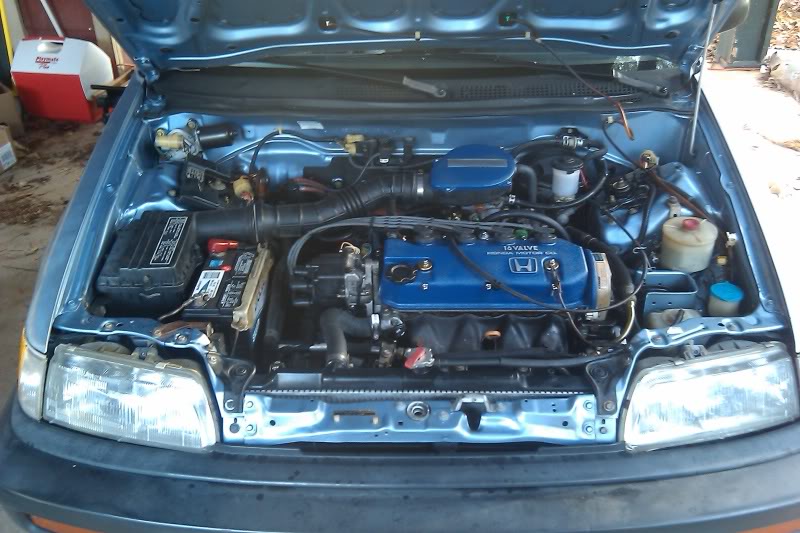
These pics show what the engine bay looks like. bam-bam really put it over the top! He added the finishing touches on the valve cover and throttle body cover with the bright hardware and fasteners. He also cut the paint off of the bar on the face of the throttle body cover which I have to admit does look more factory.
I learned a few things such as even 3M blue masking tape get sticky and brittle when you leave it on for two weeks and two trips through the oven for curing. Also, I think my petroleum jelly masking dried up after the first time in the oven. So next time maybe I'll un-mask and re-mask for each coat. The most important thing is to follow ALL of the directions on the paint cans regarding process, ambient temperature, and relative humidity. This process involved a work day followed by a week of drying time for wrinkle, a second work day followed by a second week of drying time for color, then another work day for finishing touches (and another for touch ups.) Installation was a separate process that just happened to coincide with a decent excuse to remove and replace the valve cover.
The question has come up whether another color paint would work and in my completely un-professional opinion I think it will. My only doubts would be around metallic or metal flake paints in that I have no idea what the wrinkle layer would make them look like. I do not think it would look bad just not quite the same as metallic or metal flake on a smooth surface. So pick your choice of color and go for it!
To get that authentic wrinkle paint look you'll need to choose a flat or matte paint. I used a gloss paint because it was the color I needed (close enough) and it was readily available. For my project authentic matte paint was not required.
I was given a spare valve cover and throttle body cover by bam-bam so I could dress up my engine bay. After looking around a little to see what others had done I started forming opinions about what I might like to do. I saw a valve cover painted in red wrinkle by christoffer ( http://www.civicwagon.com/showthread.php?10849-Progress-report-Nao-with-Vtak/page4&highlight=christoffer ) which really knocked my socks off. Red wagon + red wrinkle = very cool. Somewhere along in there I heard a rumor about blue wrinkle so I started googling blue wrinkle paint and figured out I couldn't afford it. But while I was googling I found build logs where people had applied black wrinkle and then color of choice over that. After some indecision I decided to try it. On to the fun!
First things first, always use your PPE: Personal Protective Equipment. For paint, etc. you'll need a real respirator mask, eye protection, and it's not a bad idea to glove up while using any stripper.
Weapon of choice for this first part is Klean Strip Stripper. I forgot to get the exact name before I threw away the can. It was about $5 at walmart. In addition you'll probably want something non-metal to scrape paint off the little nooks and crannies. For a few dollars at walmart you can get a set of three plastic scrapers / putty knives.
I forgot to take a before picture. Here's one at the second coating of stripper. In between, I hosed it off with the water hose which took off most of the paint easy-peasy!
Afterward I hung the pieces to dry.
The areas showing discoloration are where the aluminum was exposed and corroded over the years. The faint line on the throttle body cover is from a different paint than the original wrinkle; it had been touched up before.
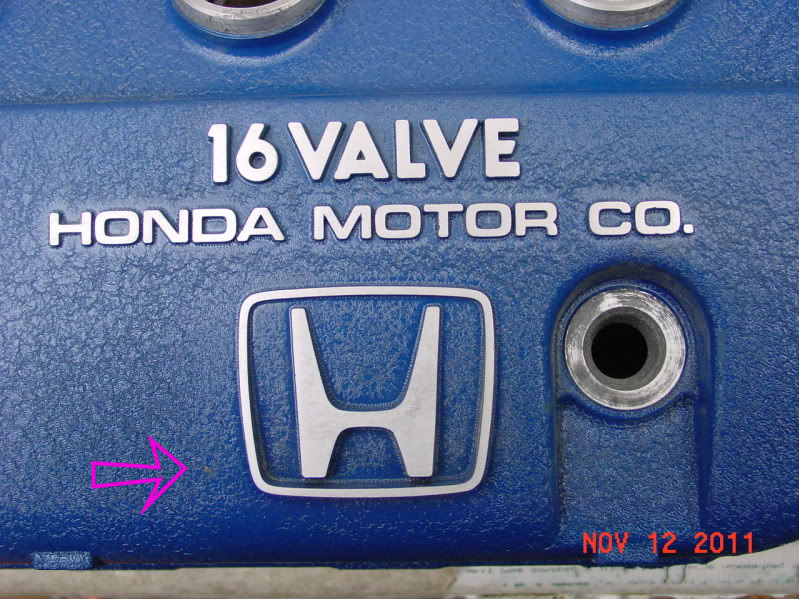
Next I gave it a good all-over sanding with red Scotch-Brite. The paint was gone but I wanted to get most of the corrosion off of the aluminum. Then it was time for masking. I masked with tape all of the areas I could get to and masked with petroleum jelly the other areas the couldn't easily be taped shown here by the arrows. After masking and degreasing it was time for wrinkle paint! For this I used VHT Wrinkle Paint from O'Reilly that was about $10. Following the instructions (which I'll only be paraphrasing here) I applied three coats, heavy. (Heavy, as in I used the whole can of wrinkle paint on these two pieces.) The directions say to put on the first coat painting in a horizontal direction, second coat in a vertical direction followed by a third coat in a diagonal direction. Again, follow the instruction on the can. Any time I've had good results from spray paint it's been because I forced myself to follow the instructions.
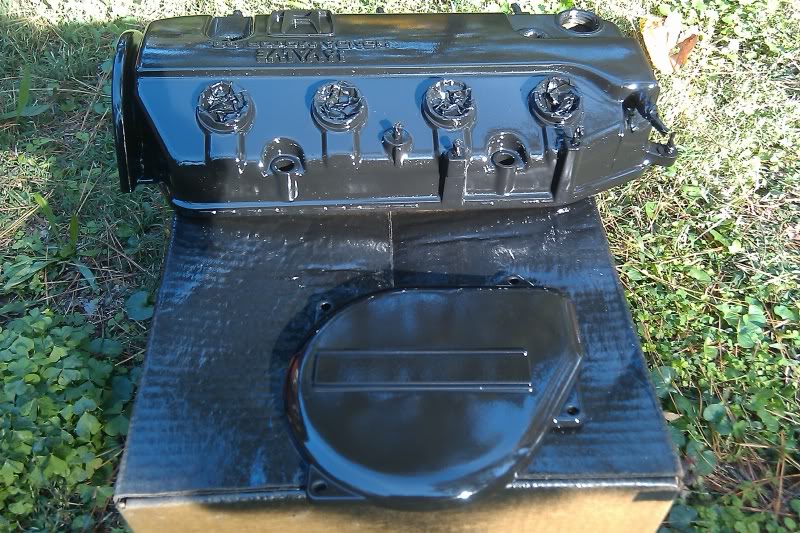
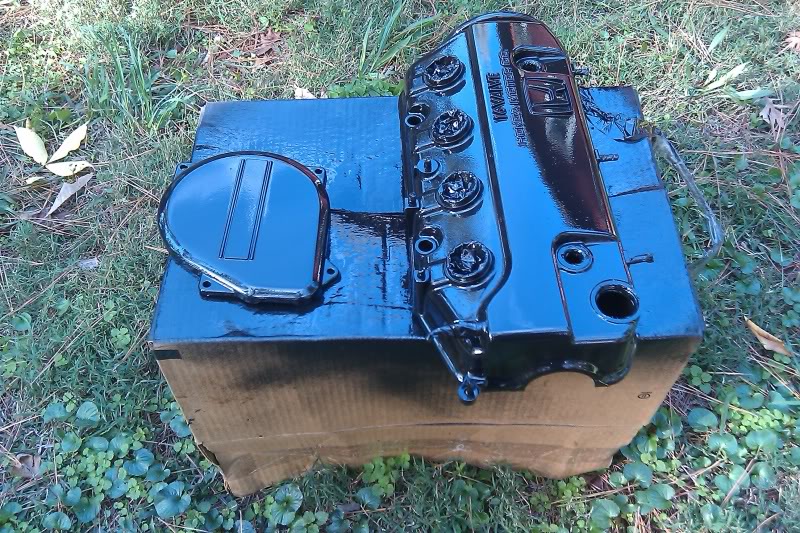
First coat, horizontal.
Second coat, vertical.
Third coat, diagonal.
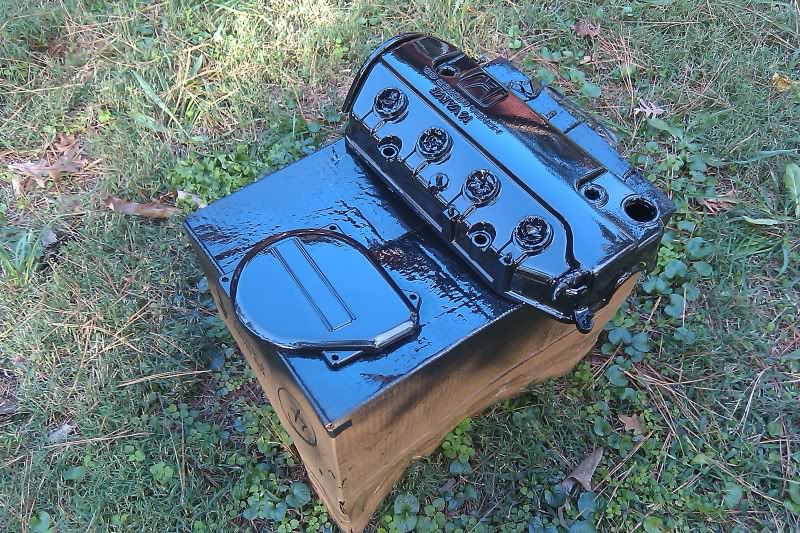
After two hours.
And into the shed it goes to dry for a week.
After a week I decided to go ahead and pop it into the oven for an hour @ 200 degrees to cure the paint. This is an optional step but I recommend it especially if you are planning to follow on with a color coat.
Okay, so that's wrinkle paint. As far a I can tell, black wrinkle is readily available, red wrinkle is a specialty item, and blue wrinkle has to be shipped directly from Japan. So I adapted.
This color is called "Ford Dark Blue"... it looked about right and it was about $6 at O'Reilly. I use regular rubbing alcohol as a cheap degreaser. Before the first coat of any paint I glove up, dampen a paper towel with alcohol and give the piece a once over to remove any non-obvious oil or grease from handling and any lint that might get in the way.
First coat, light.
Second Coat, light.
Third coat, heavy, and back into the shed to dry for another week.
I started by popping them into the oven @ 200 degrees for an hour. Once they were cured (and cooled) I set about un-masking them. I learned a few things such as even 3M blue masking tape get sticky and brittle when you leave it on for two weeks and two trips through the oven for curing. Also, I think my vaseline masking dried up after the first time in the oven. So next time maybe I'll un-mask and re-mask for each coat.
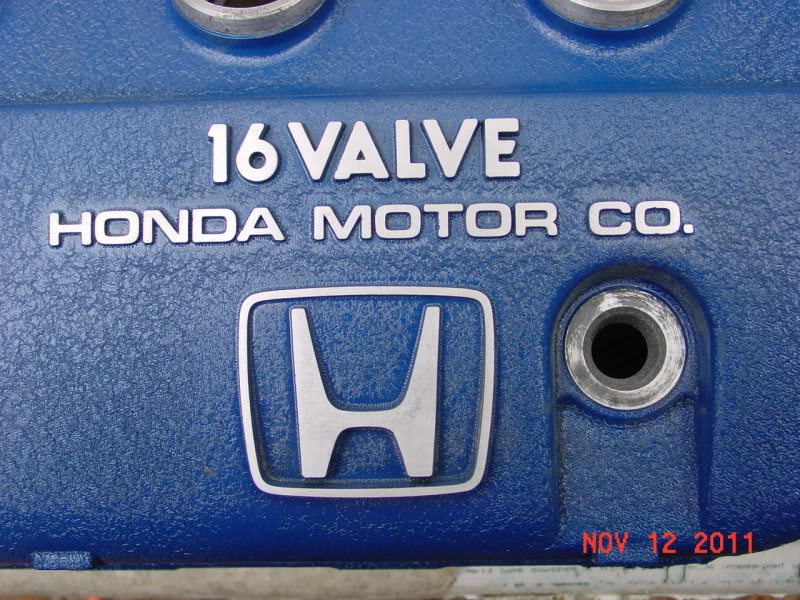
Once I removed all of the tape I got out a scraper... okay, maybe it's a putty knife, whatever, and scraped the paint off of the areas to be left 'in the white'. This should be a real hard-edged scraper like a regular steel putty knife to 'cut' the paint off instead of the plastic putty knives mentioned earlier which were only soft to avoid gouging & scraping your valve cover while removing paint. This worked pretty well and I only dinged the paint I intended to keep once. You can see it here just to the left of the H. I should be able to touch that up fairly easily.
Then I got out my little Mouse orbital sander and slapped on a sheet of 220 grit paper and gave the areas to be bright a good sanding. This was gratifying in that it got the job done quite handily. The only problem might have been that since it's a orbital it left that funny snail trail pattern. You probably can't see that in this picture but it was there. While that will probably be fine for most of the spots I wanted the lettering to show that horizontal grain like stock.
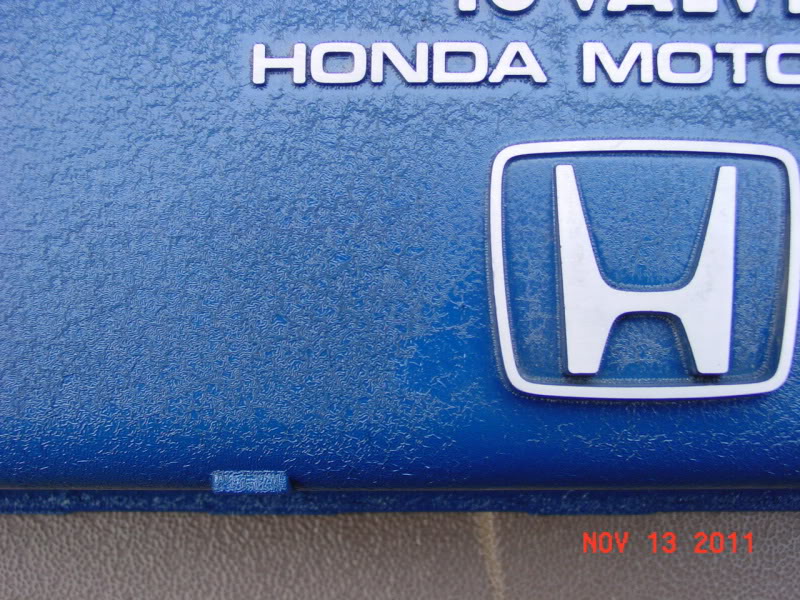
So I left the sandpaper attached to the Mouse and with it switched off I used it as a sanding block and cut in a very slight horizontal grain. I'm not going to get super OCD about the recessed areas like the one to the right of the H because I can't quite get in there with my Mouse and hand sanding is not my favorite thing. As has been previously noted this is strictly polish on something not known for holding a high-gloss finish, figuratively speaking.
Here's the gouge I made with the scraper.
And here's the piece retouched. In the spirit of the package instructions I dabbed on three coats with a q-tip. Basically spray the q-tip, dab the gouge. The new paint here is a little "bright" or shiny but I'm fairly sure it'll dry down. There was one other spot that didn't get wrinkle painted OR blue painted because it's the bottom surface of the little arm doo-dad that sticks out to the rear the the vc. I still forgot to get pictures! So, I de-greased it and shot it blue. Three coats, good enough!
The throttle body cover got a similar treatment to remove the paint from the raised horizontal bar. This would be a great spot for a HCW.com sticker!
Heck, my blue paint even goes pretty well with my sweet JDM timing belt cover!
These pics show what the engine bay looks like. bam-bam really put it over the top! He added the finishing touches on the valve cover and throttle body cover with the bright hardware and fasteners. He also cut the paint off of the bar on the face of the throttle body cover which I have to admit does look more factory.
I learned a few things such as even 3M blue masking tape get sticky and brittle when you leave it on for two weeks and two trips through the oven for curing. Also, I think my petroleum jelly masking dried up after the first time in the oven. So next time maybe I'll un-mask and re-mask for each coat. The most important thing is to follow ALL of the directions on the paint cans regarding process, ambient temperature, and relative humidity. This process involved a work day followed by a week of drying time for wrinkle, a second work day followed by a second week of drying time for color, then another work day for finishing touches (and another for touch ups.) Installation was a separate process that just happened to coincide with a decent excuse to remove and replace the valve cover.
The question has come up whether another color paint would work and in my completely un-professional opinion I think it will. My only doubts would be around metallic or metal flake paints in that I have no idea what the wrinkle layer would make them look like. I do not think it would look bad just not quite the same as metallic or metal flake on a smooth surface. So pick your choice of color and go for it!
To get that authentic wrinkle paint look you'll need to choose a flat or matte paint. I used a gloss paint because it was the color I needed (close enough) and it was readily available. For my project authentic matte paint was not required.
Comments
X2 that came out really good
Thank you both! I was gratified with the results. I've always had mixed results with spray paints until I started paying close attention to the instructions. To have this look so good makes me really happy!
I drive the car to work every day as the retread mark on the hood and the motorcycle tire scuff on the back bumper will attest. I use it for what car are supposed to be used for; driving between here and there. If age and use will cause this idea to fail it will surely happen to me and I'll certain document any touch ups I have to make.
If you don't mind I would like to post this in a few other sites...?
If you don't mind just drop in links here to the other places you post it so I can see how they like it!
http://www.d-series.org/forums/diy-foru ... ost2461972